Remote Server
Introduction
The latest version of GNS-3 (2.x) allows multiple users to work on a project and to use a remote server for simulations. Its use remains the same. This document describes how to access the simulations available on the GNS-3 server installed in the HEIA-FR cloud. The GNS-3 simulator uses profiles, selected at startup, that allow selecting different settings (servers, nodes, etc.).
Information
Access to the GNS-3 servers of the HEIA-FR is only possible via VPN.
Configuration
-
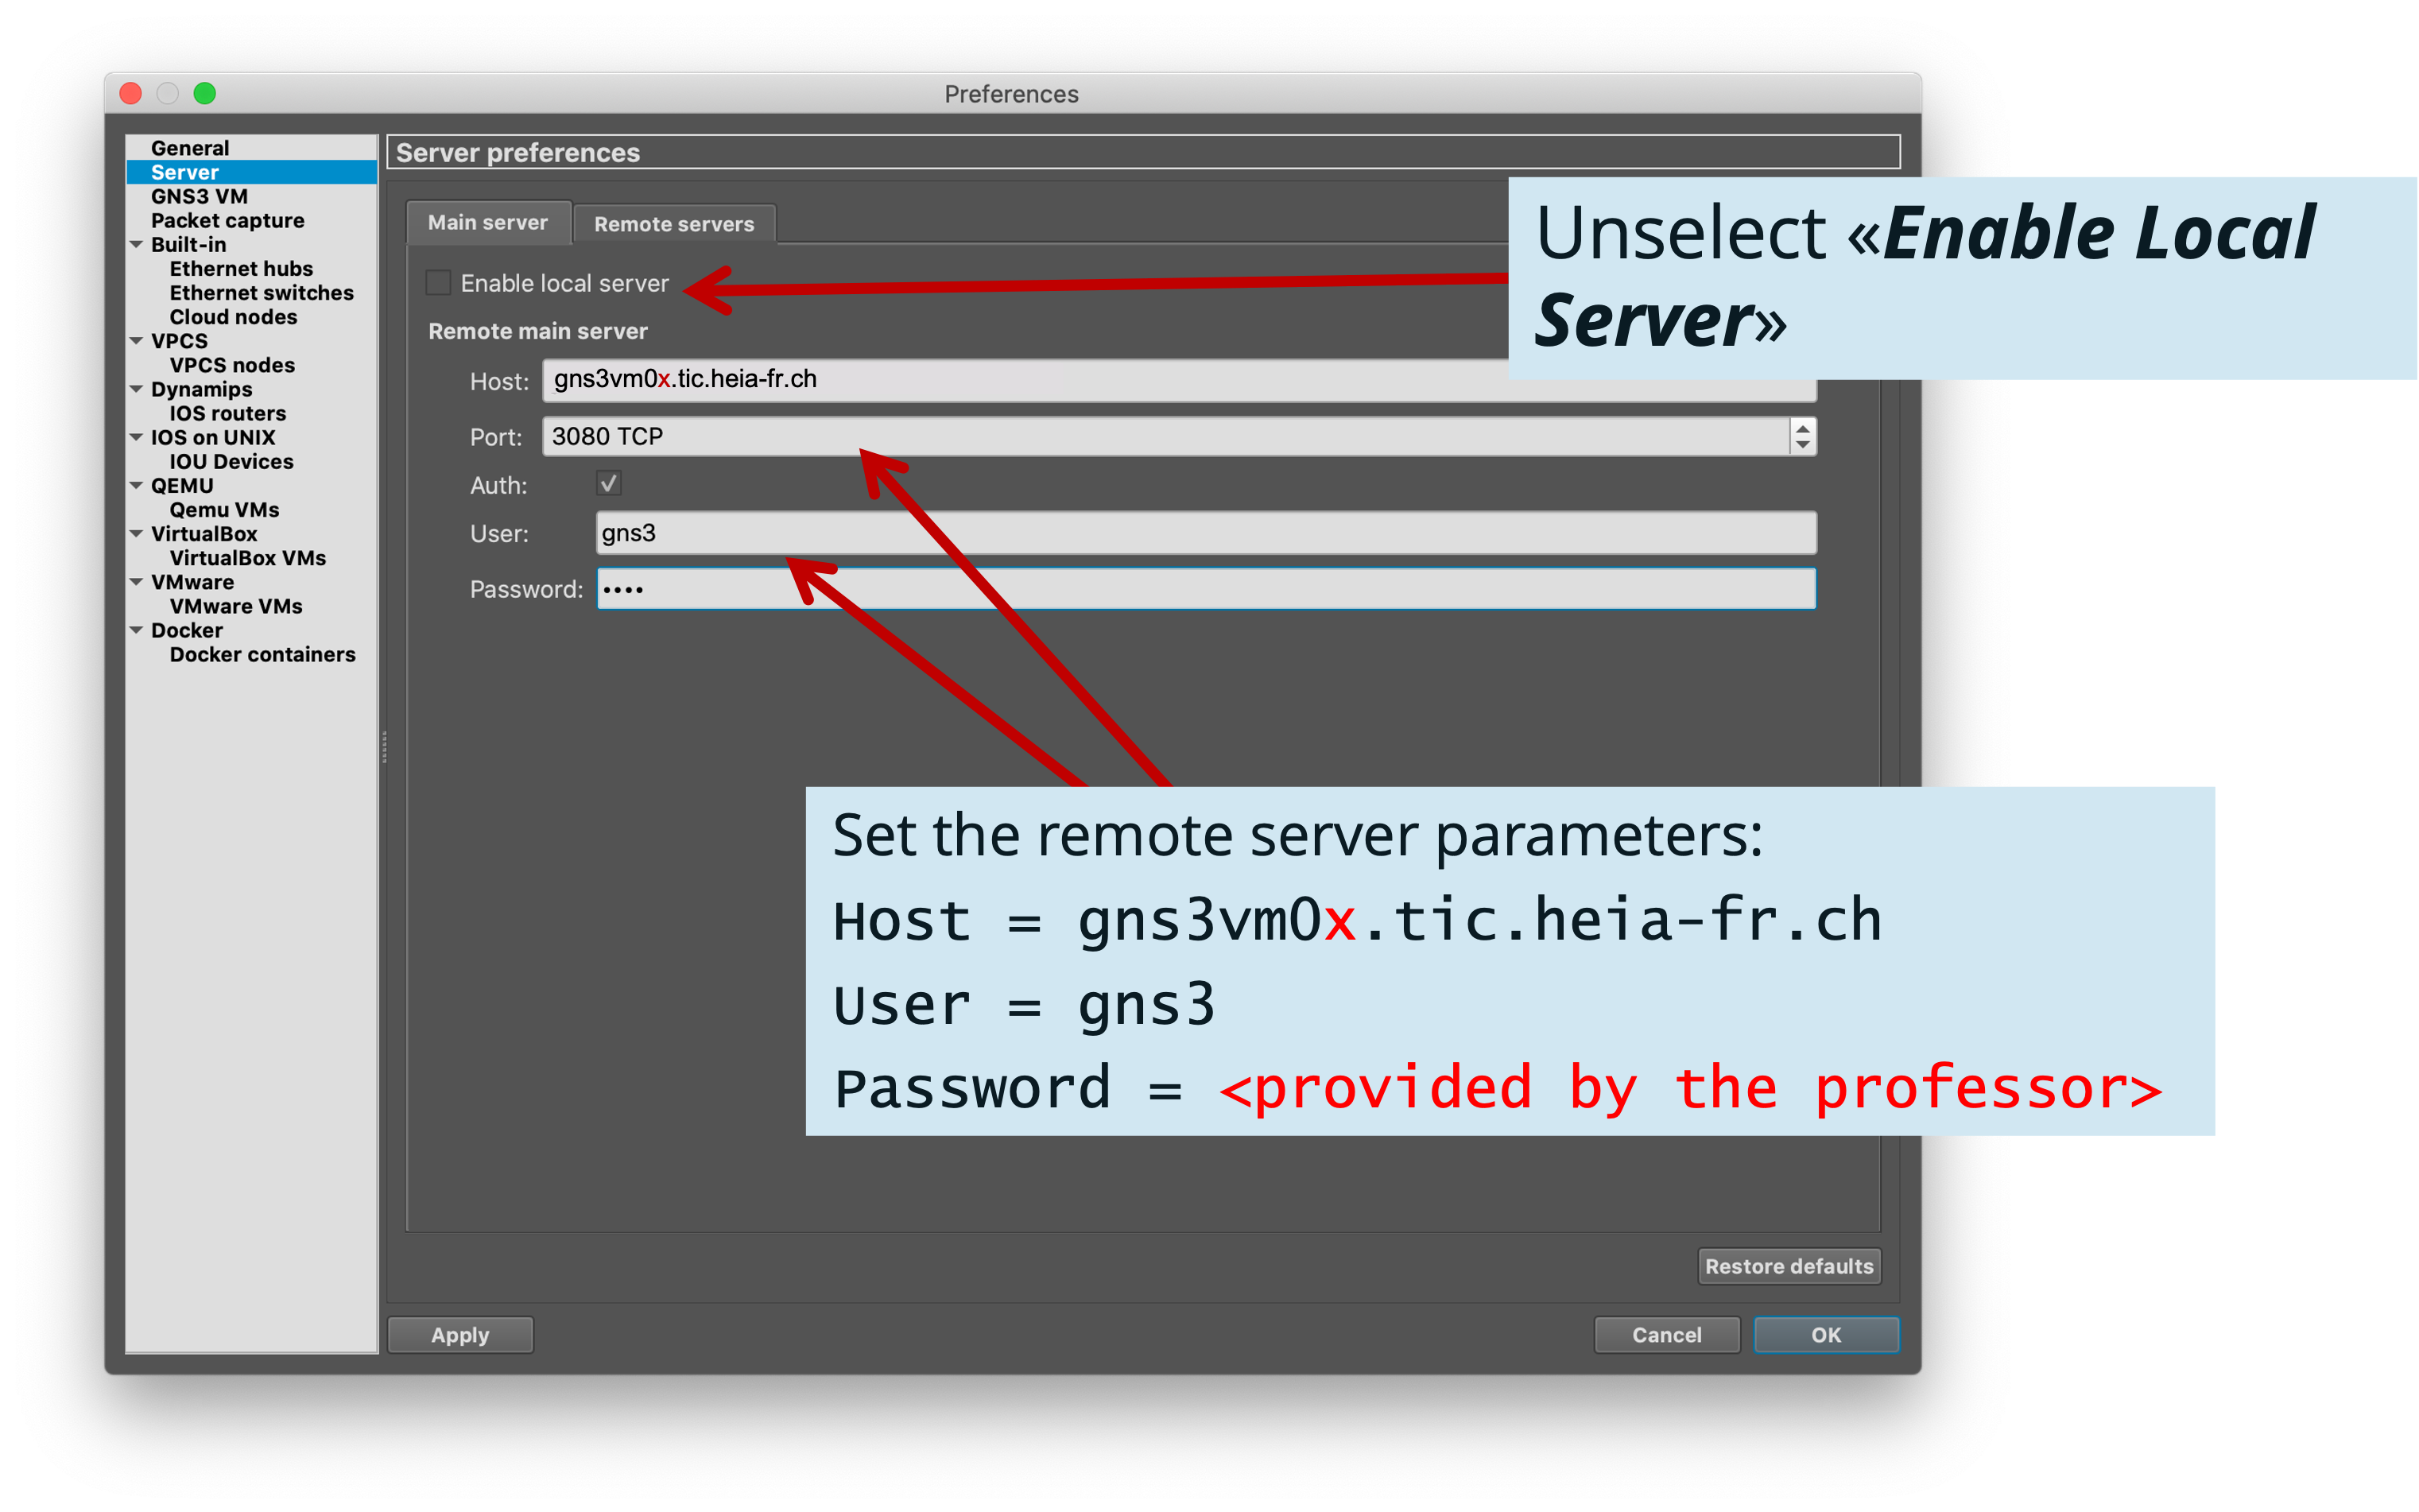
Activation of Profiles The first step is to activate the user profiles. Just start your GNS-3 and go to the preferences.
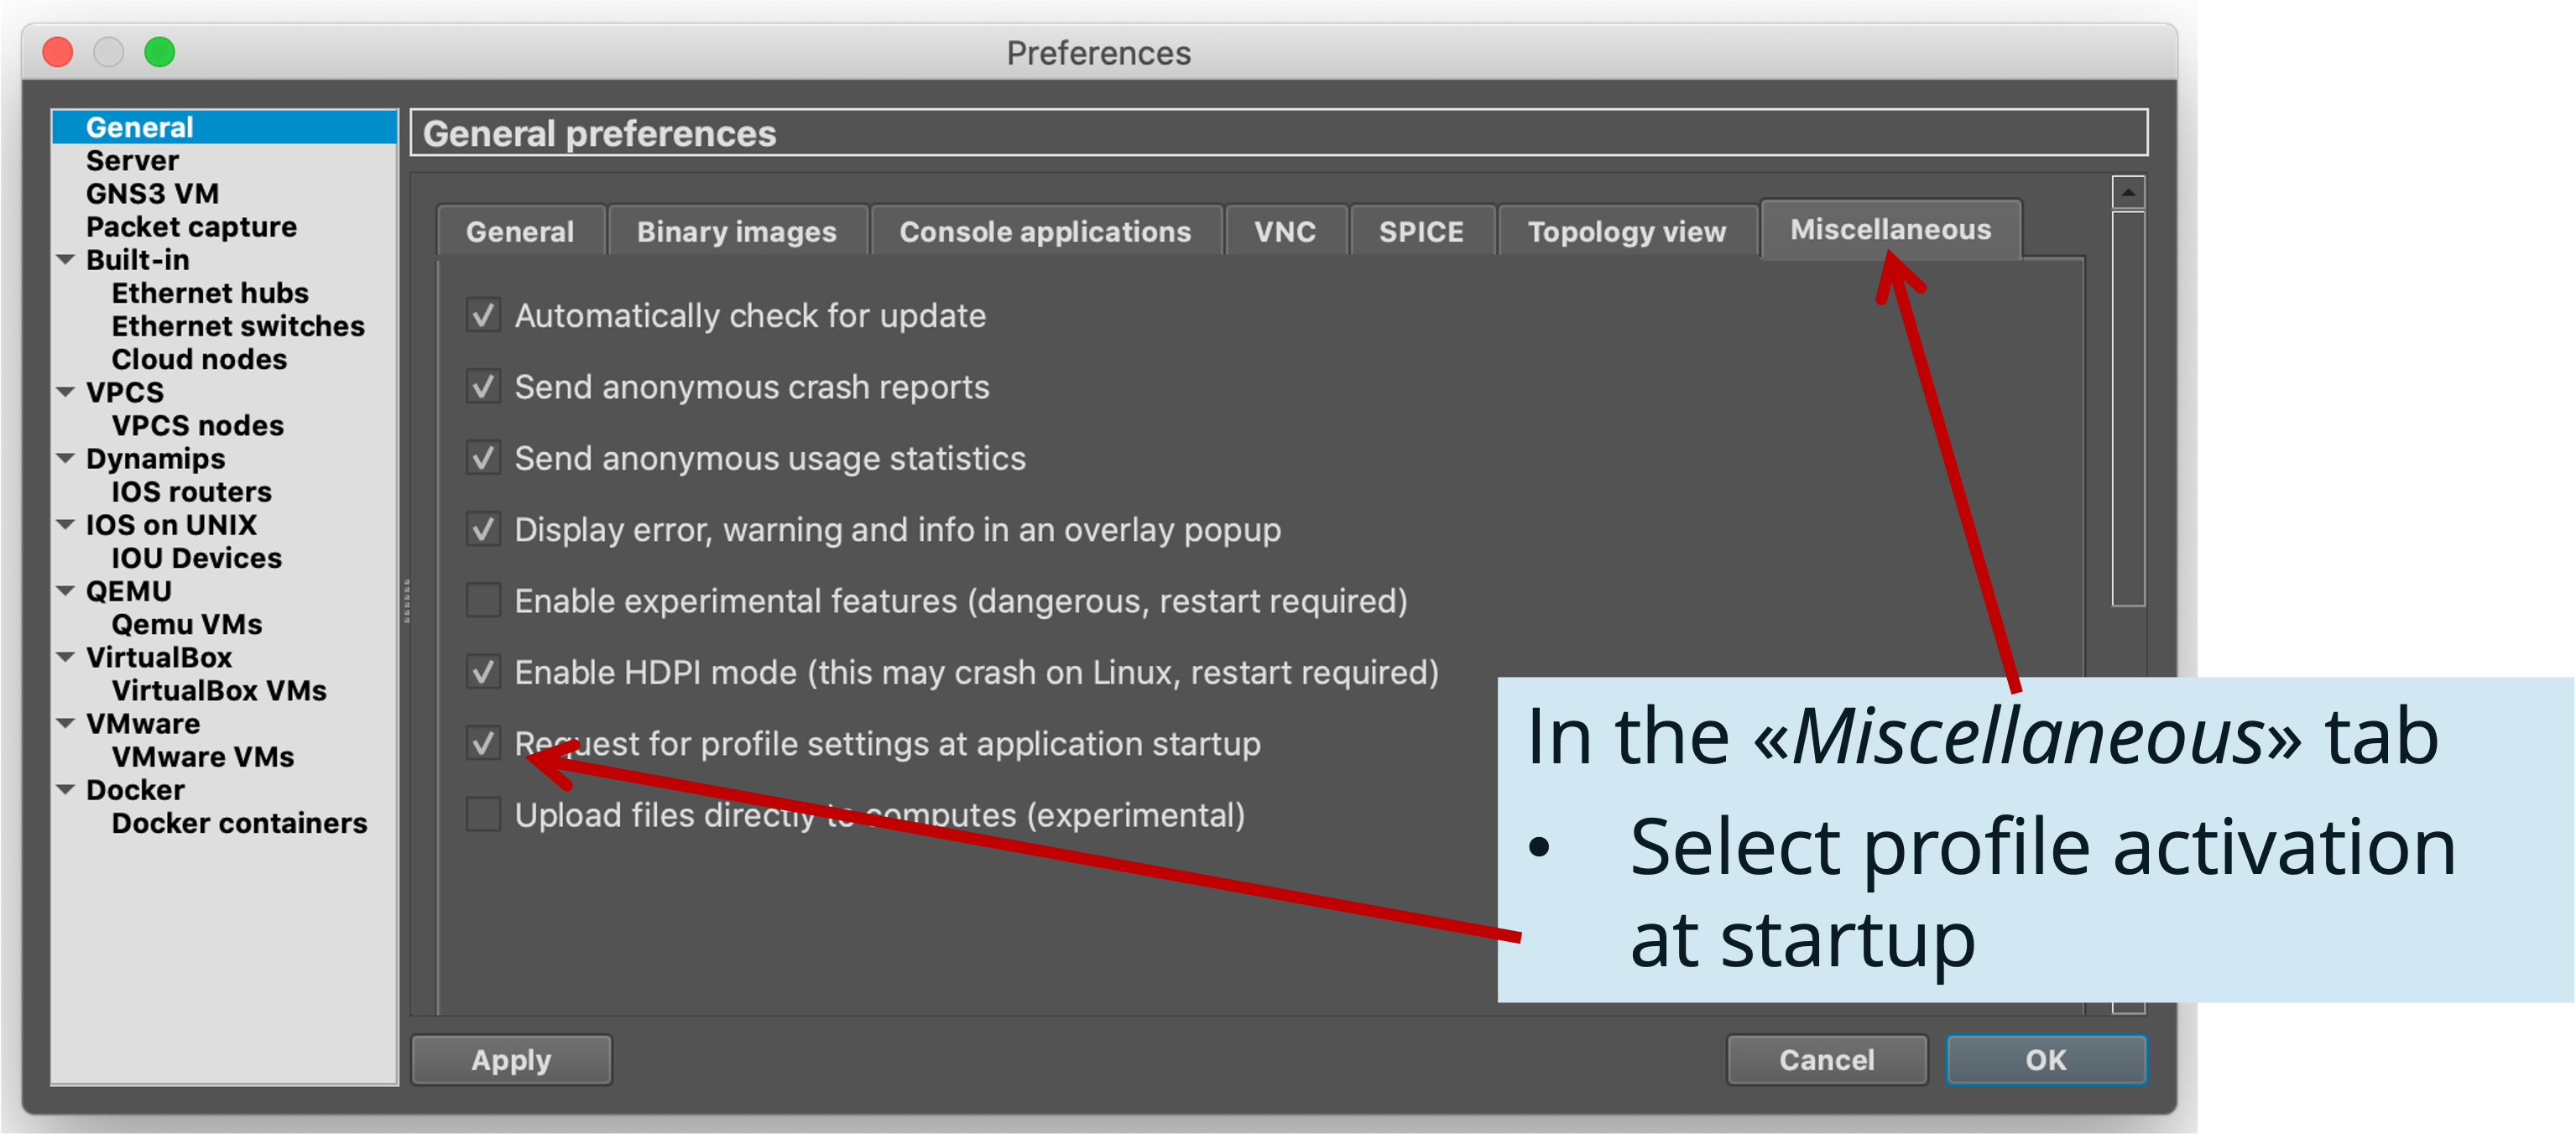
-
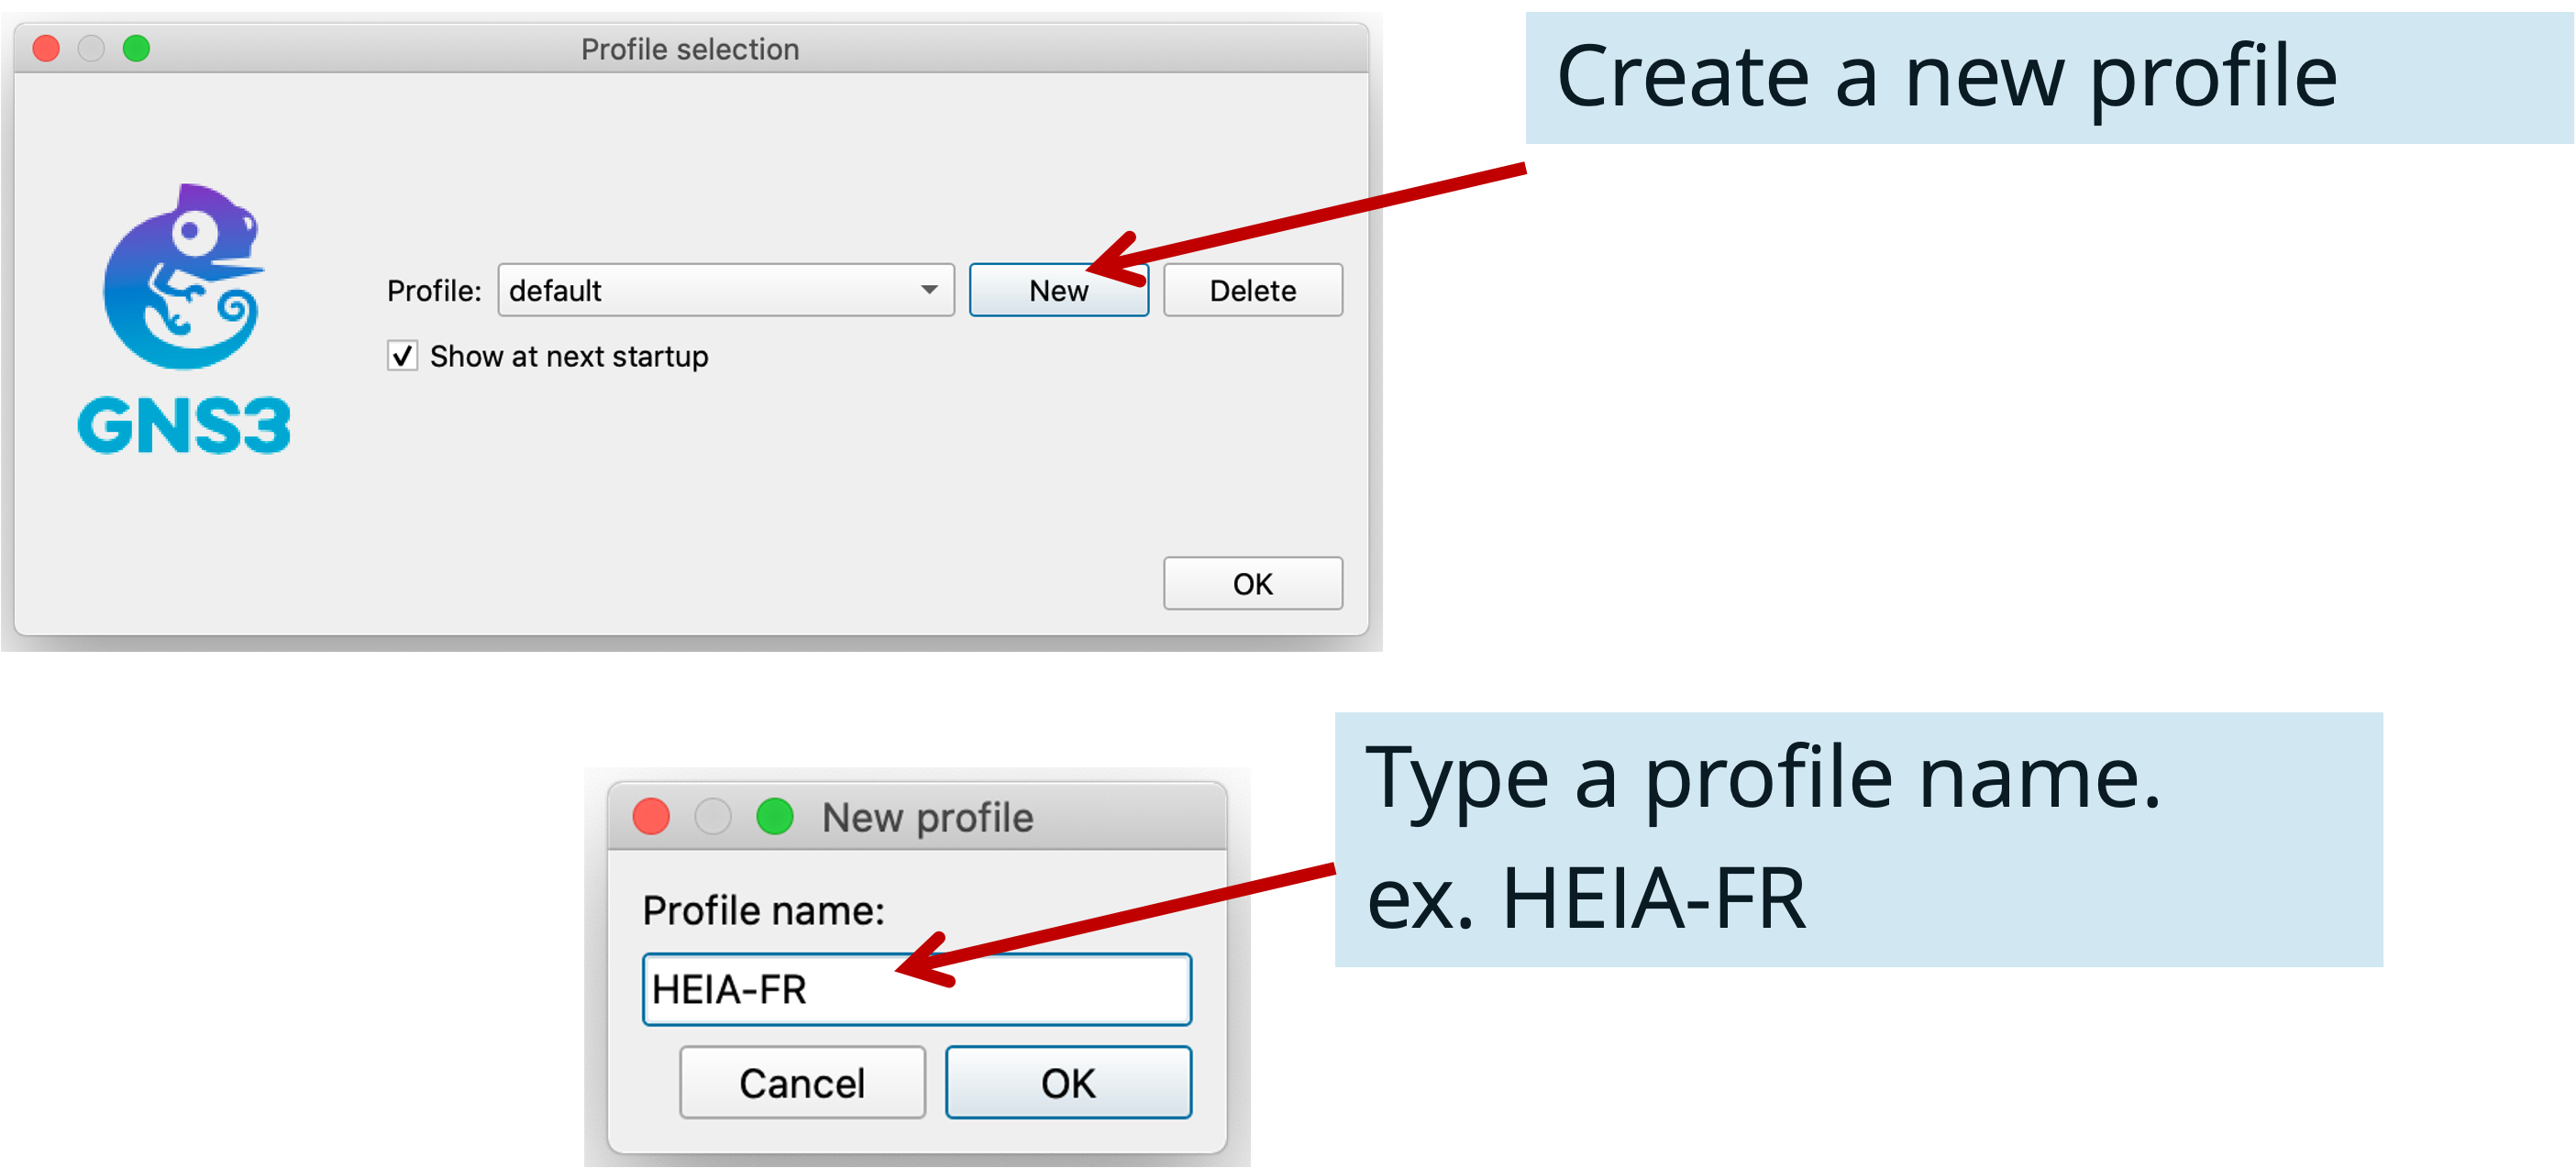
Restarting GNS-3, you should get a new window and be able to create a new profile:
Note
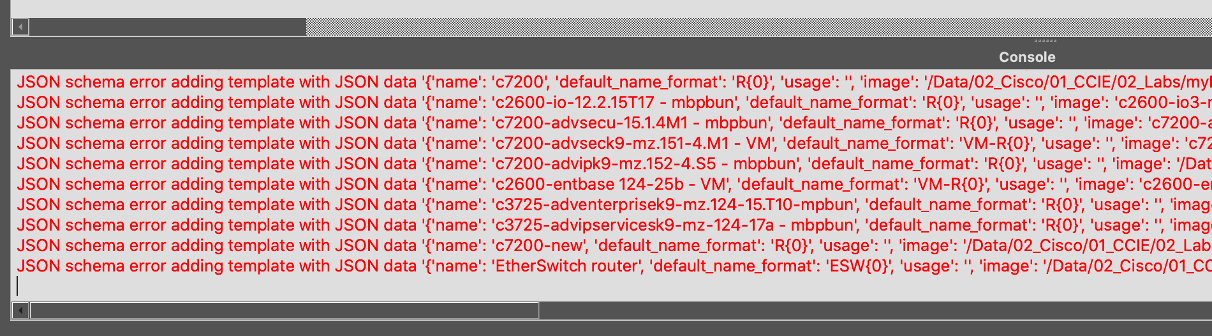
You may get a lot of error messages (see picture below), you can ignore them.
-
Go to preferences
-
Restart GNS-3, and select the correct profile
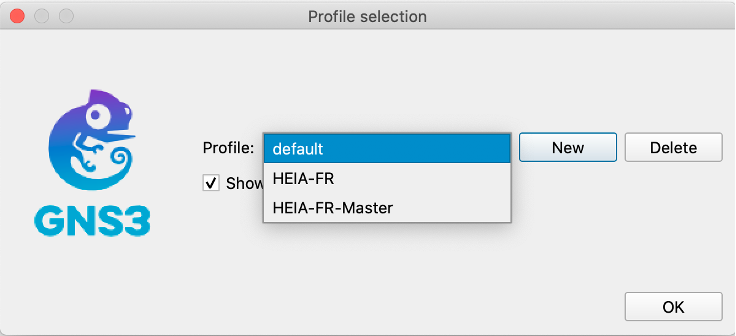
- Default profile: you can now choose to work “locally” with your machine and possibly your VM. Your previous configurations are preserved.
- HEIA-FR profile: you run your simulations on the remote server and share them with other users.
-
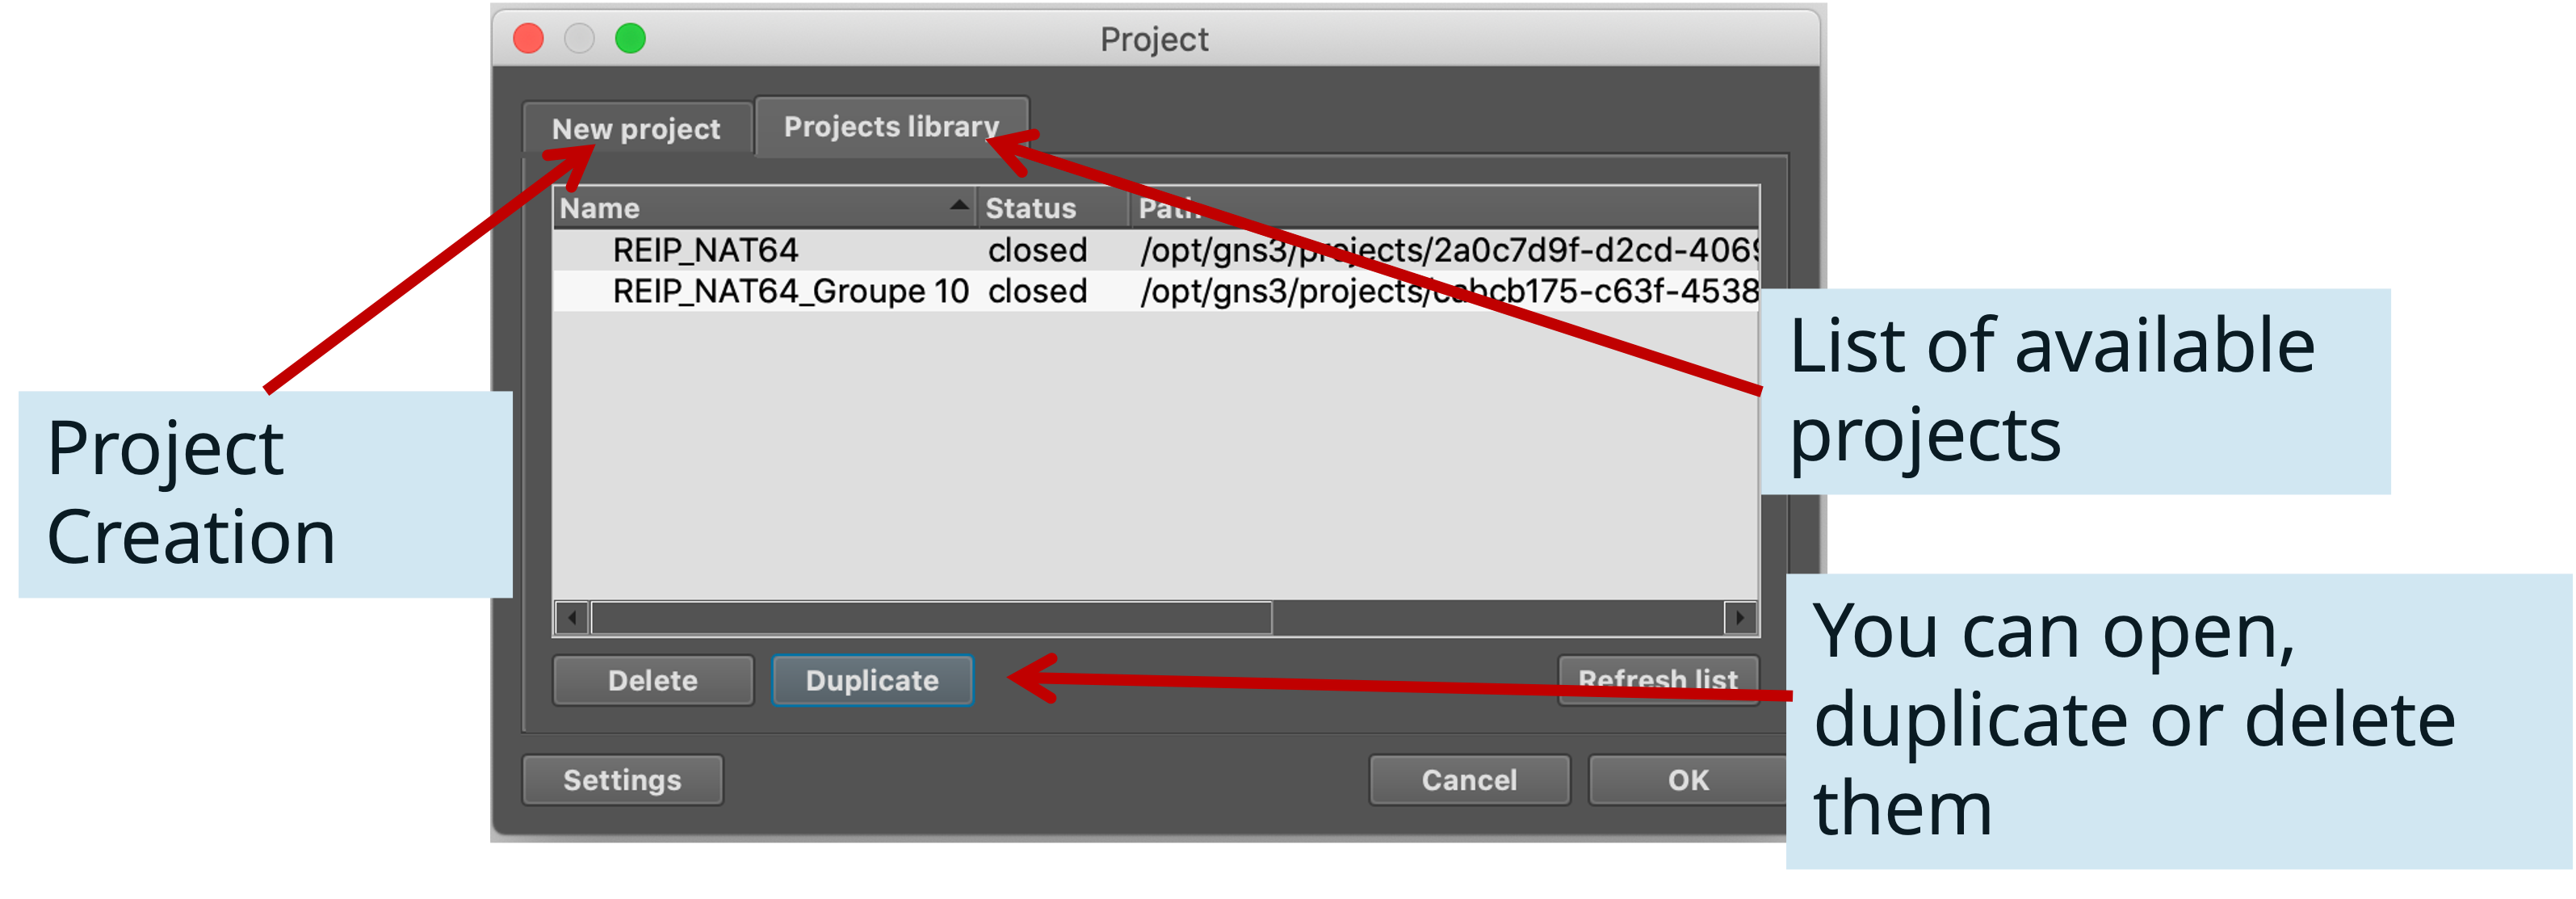
Once started, GNS-3 then offers you to create a new project or to select an existing one:
Information
Many people have access to the same projects. Today, GNS-3 does not yet offer separation between users.
Renaming Profile
On OSX, if you would like to rename a profile, use Finder and go to the following directory:
~/.config/GNS3/2.2/profiles. You can then rename the corresponding profile.Project example
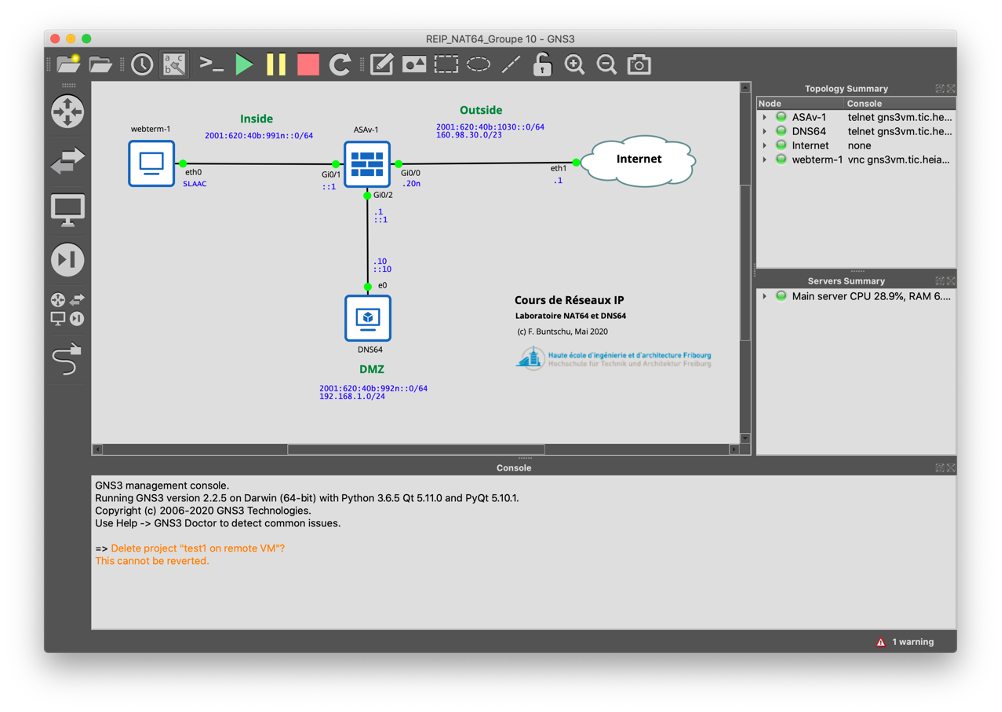
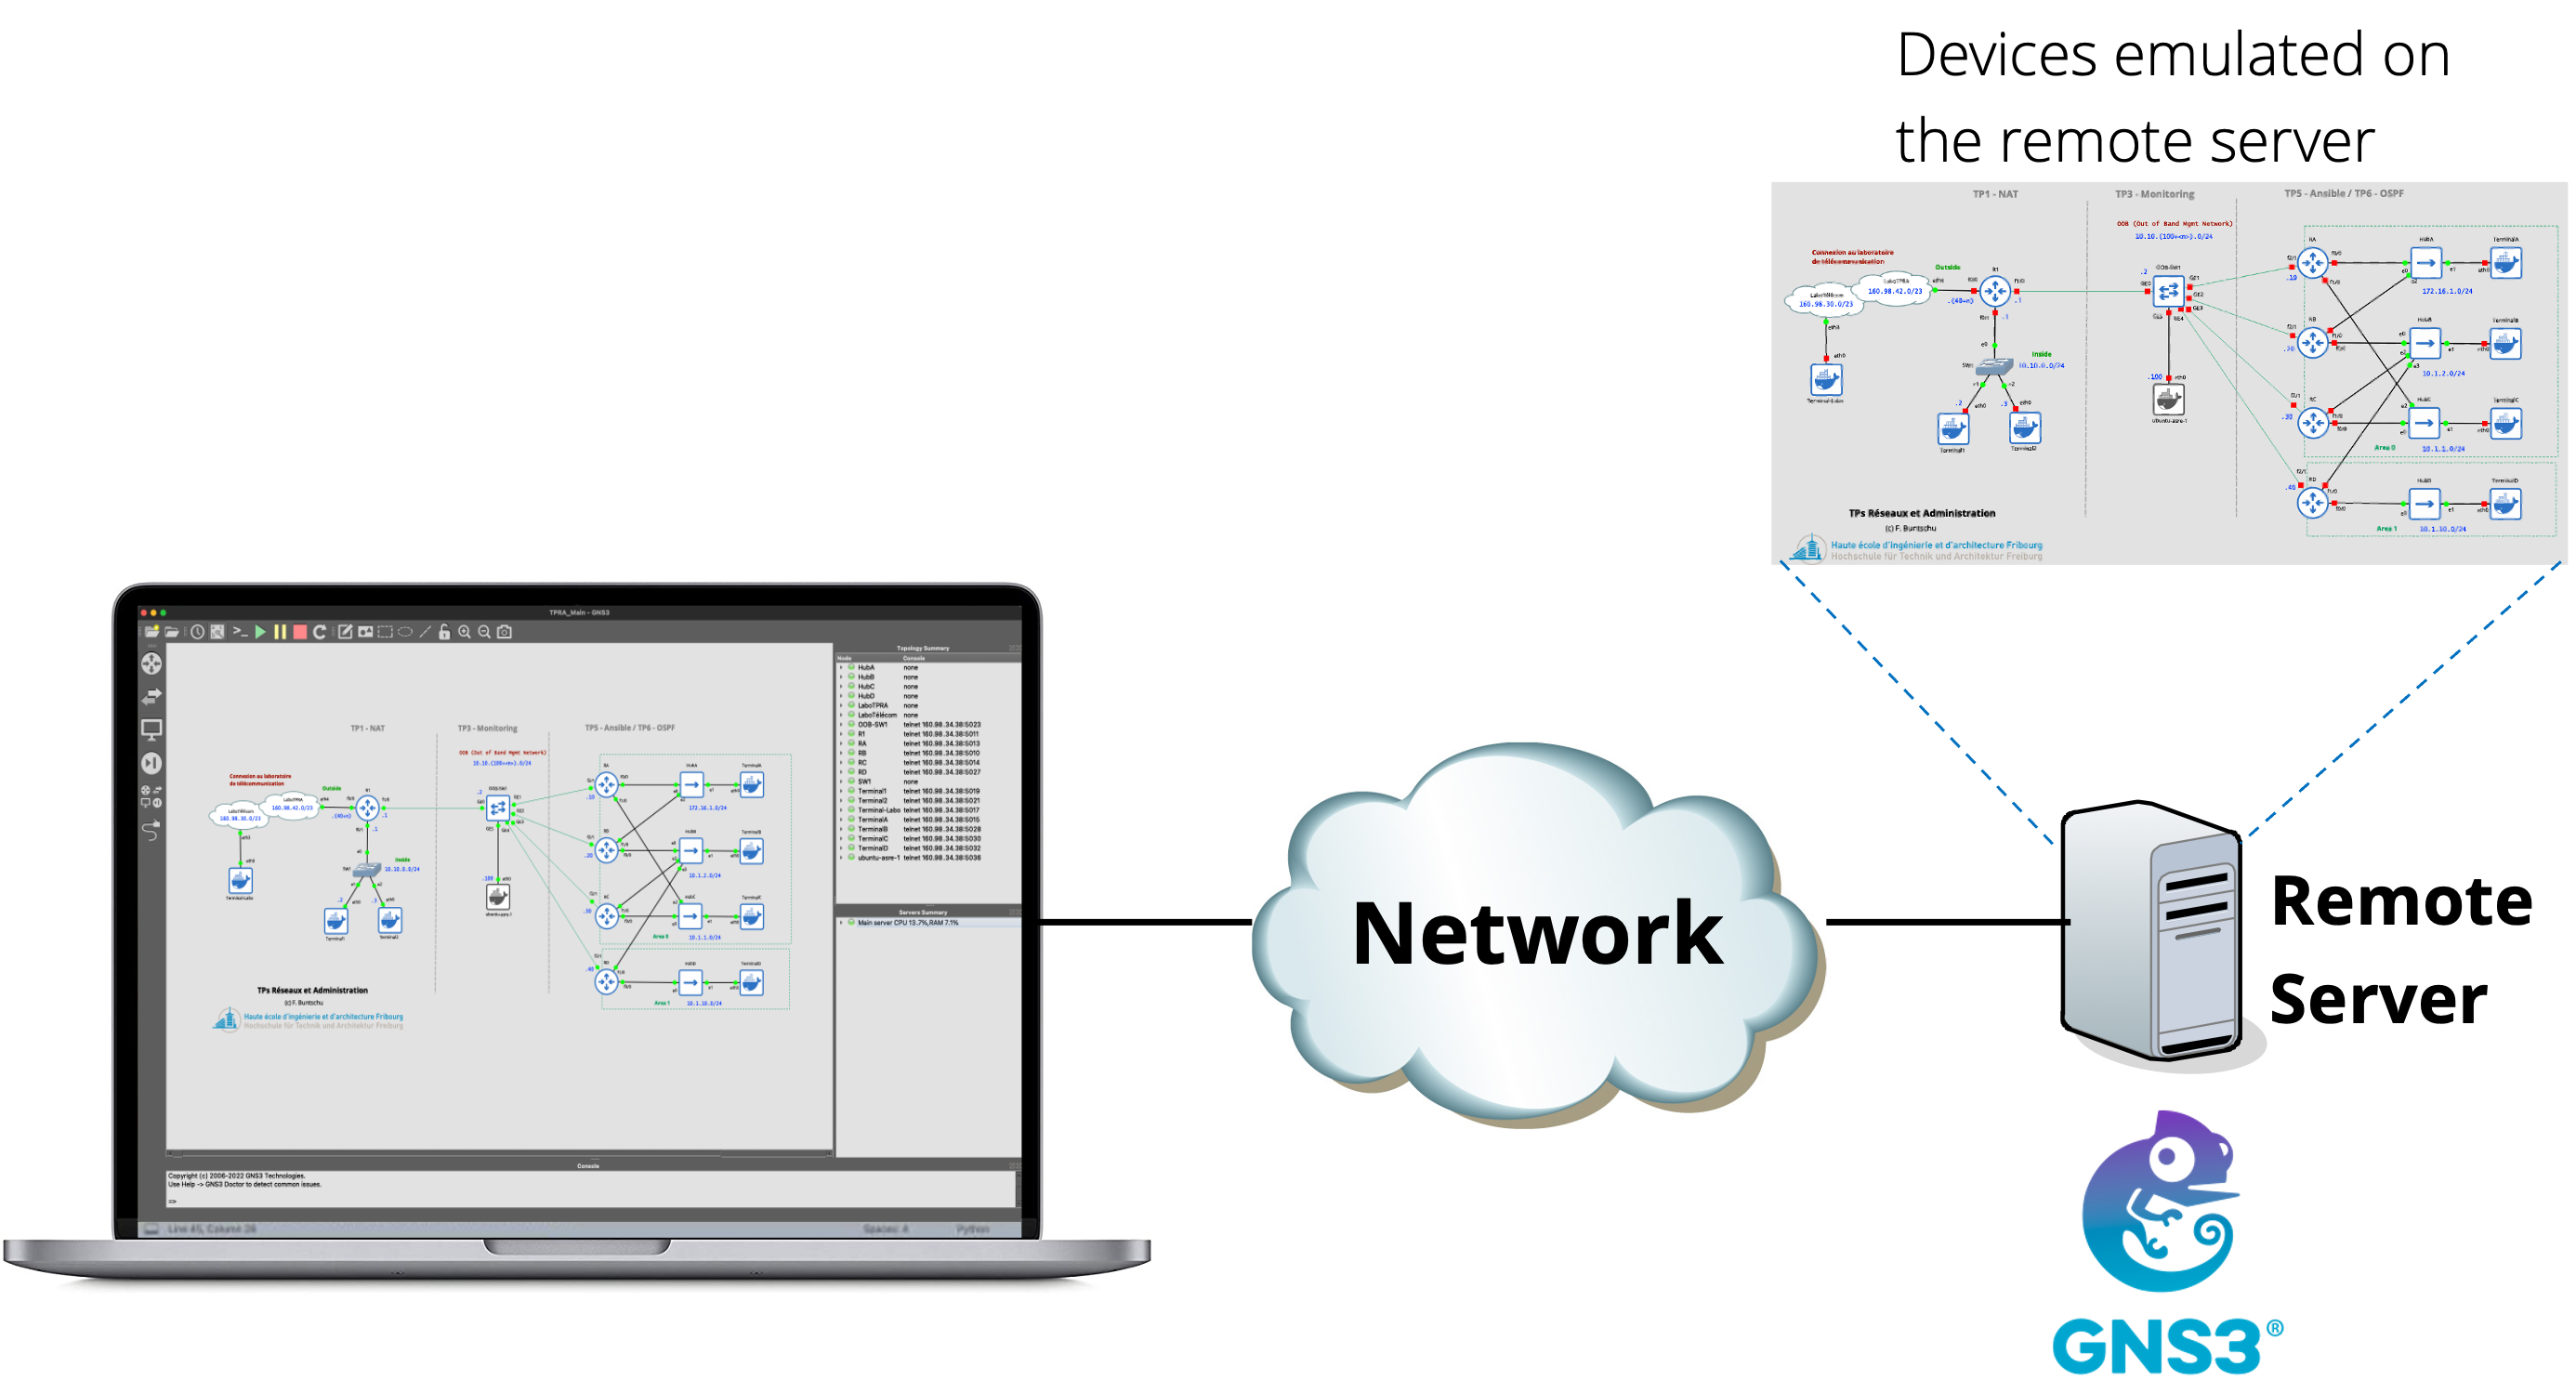
Remark: The simulated nodes are located on the remote server and have the ability to connect to the HEIA-FR telecom lab through a “Cloud” node.