Quick Start Guide
Introduction
This quick start guide describes how to install GNS-3 on your machine, add a Cisco 7200 Router, a simple and a complete L2 Switch. It will allow you to emulate different topologies
Software
GNS-3
Available on the GNS3 Website and works on Windows, OSX or Linux. The direct links to the repository:
- Latest release: https://github.com/GNS3/gns3-gui/releases
- Latest VM: https://www.gns3.com/software/download-vm
Information
If you use the GNS-3 VM, it is important to have the same version of the VM and GNS-3 for everything to work perfectly.
Cisco IOS
Available on main courses pages (require login).
Installation
Start the installation package on your machine.
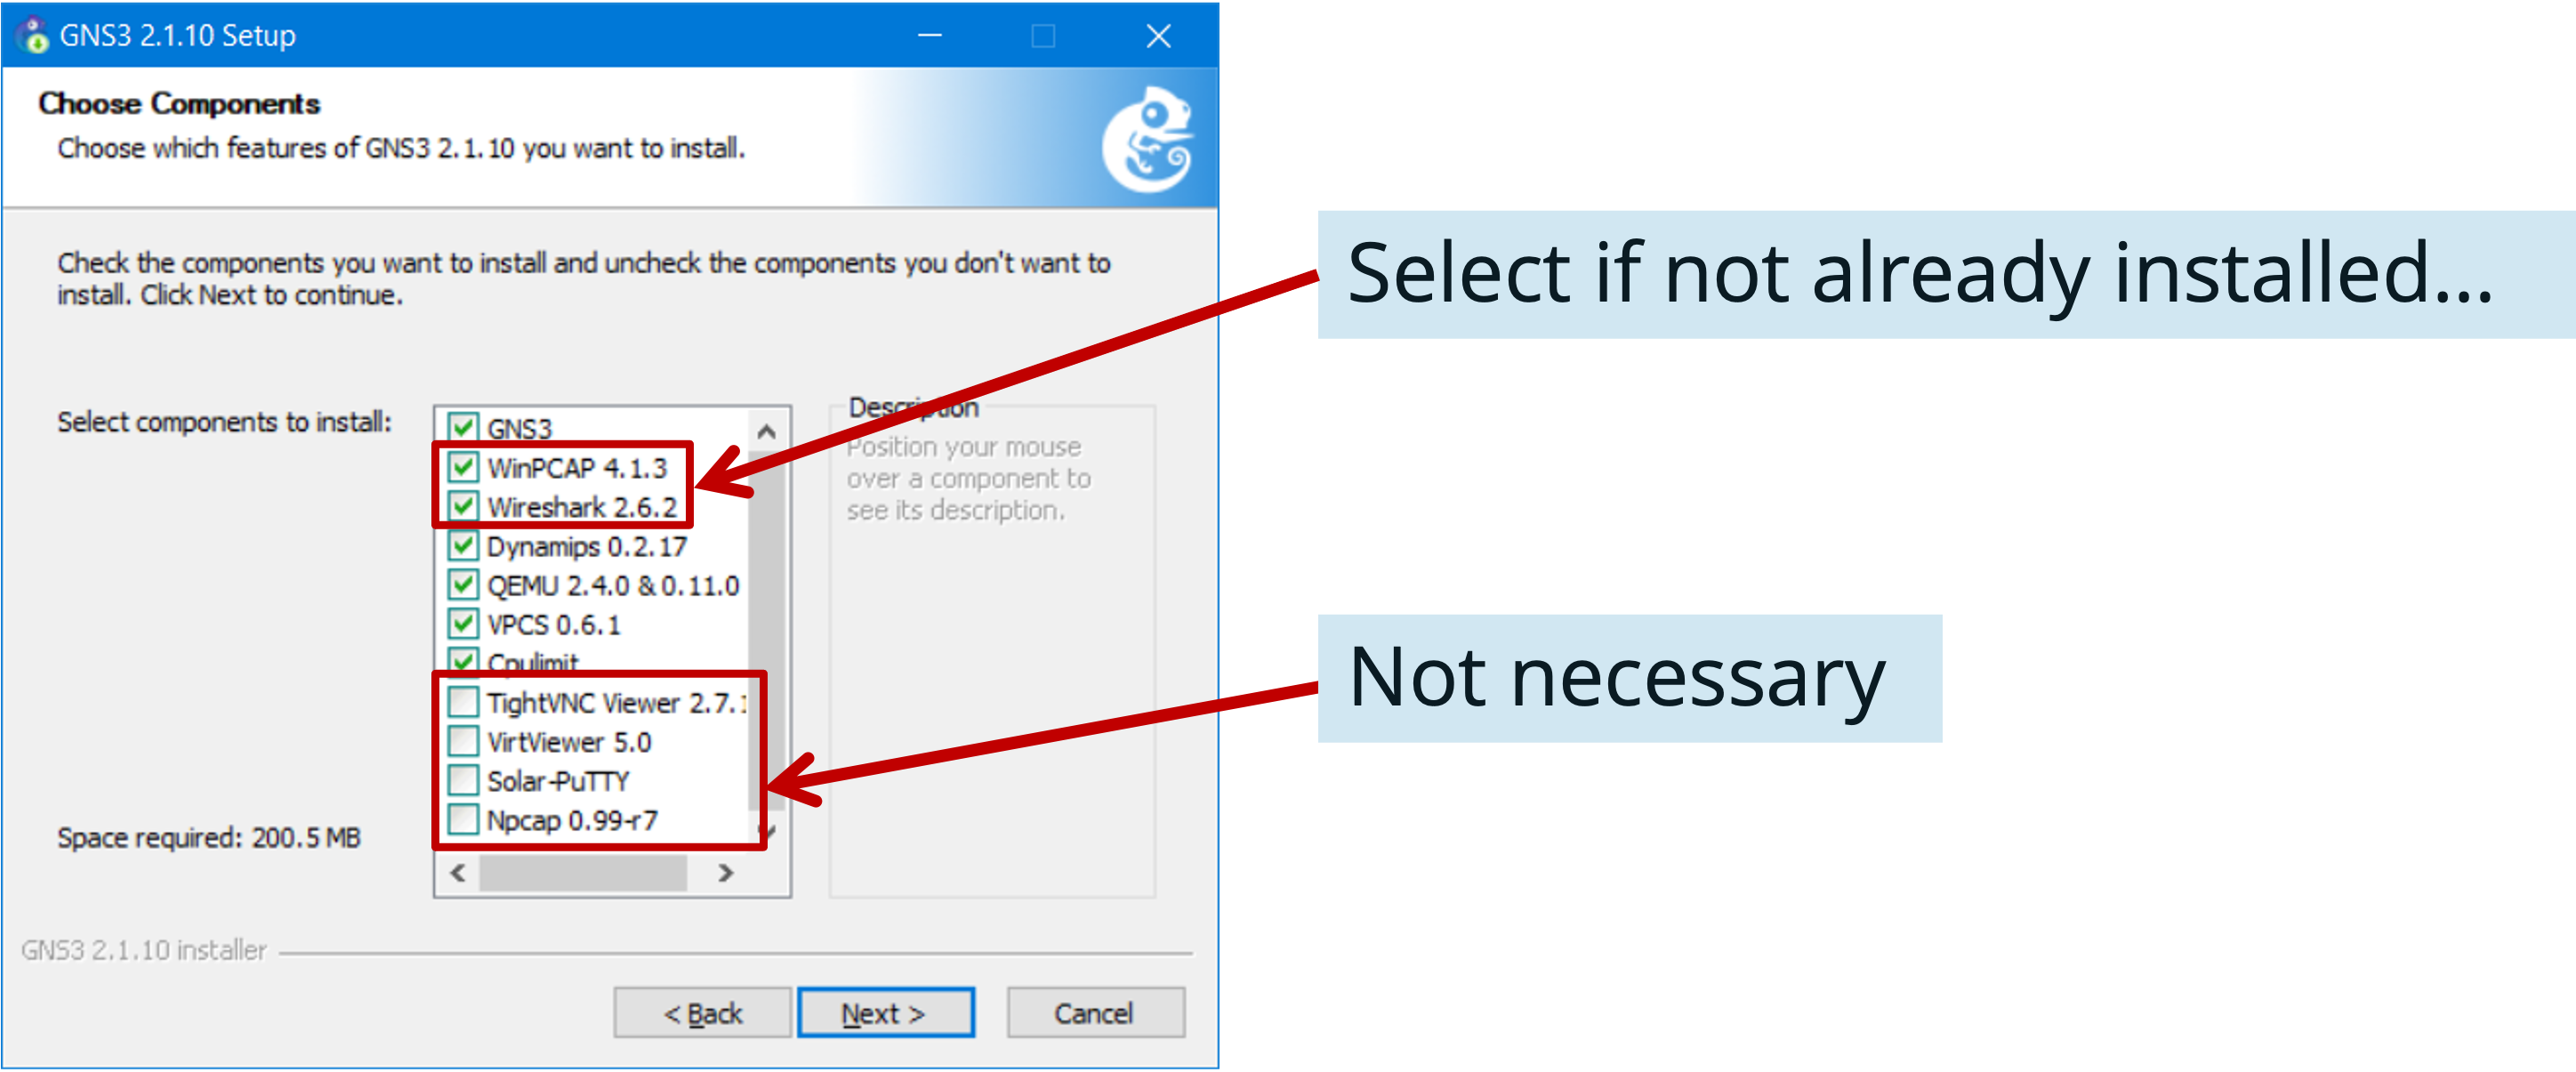
Step 1: Choose components
At least the one selected on the following figure:
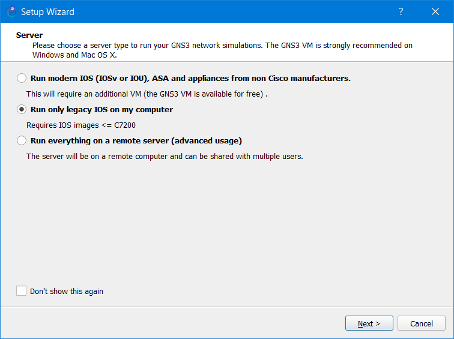
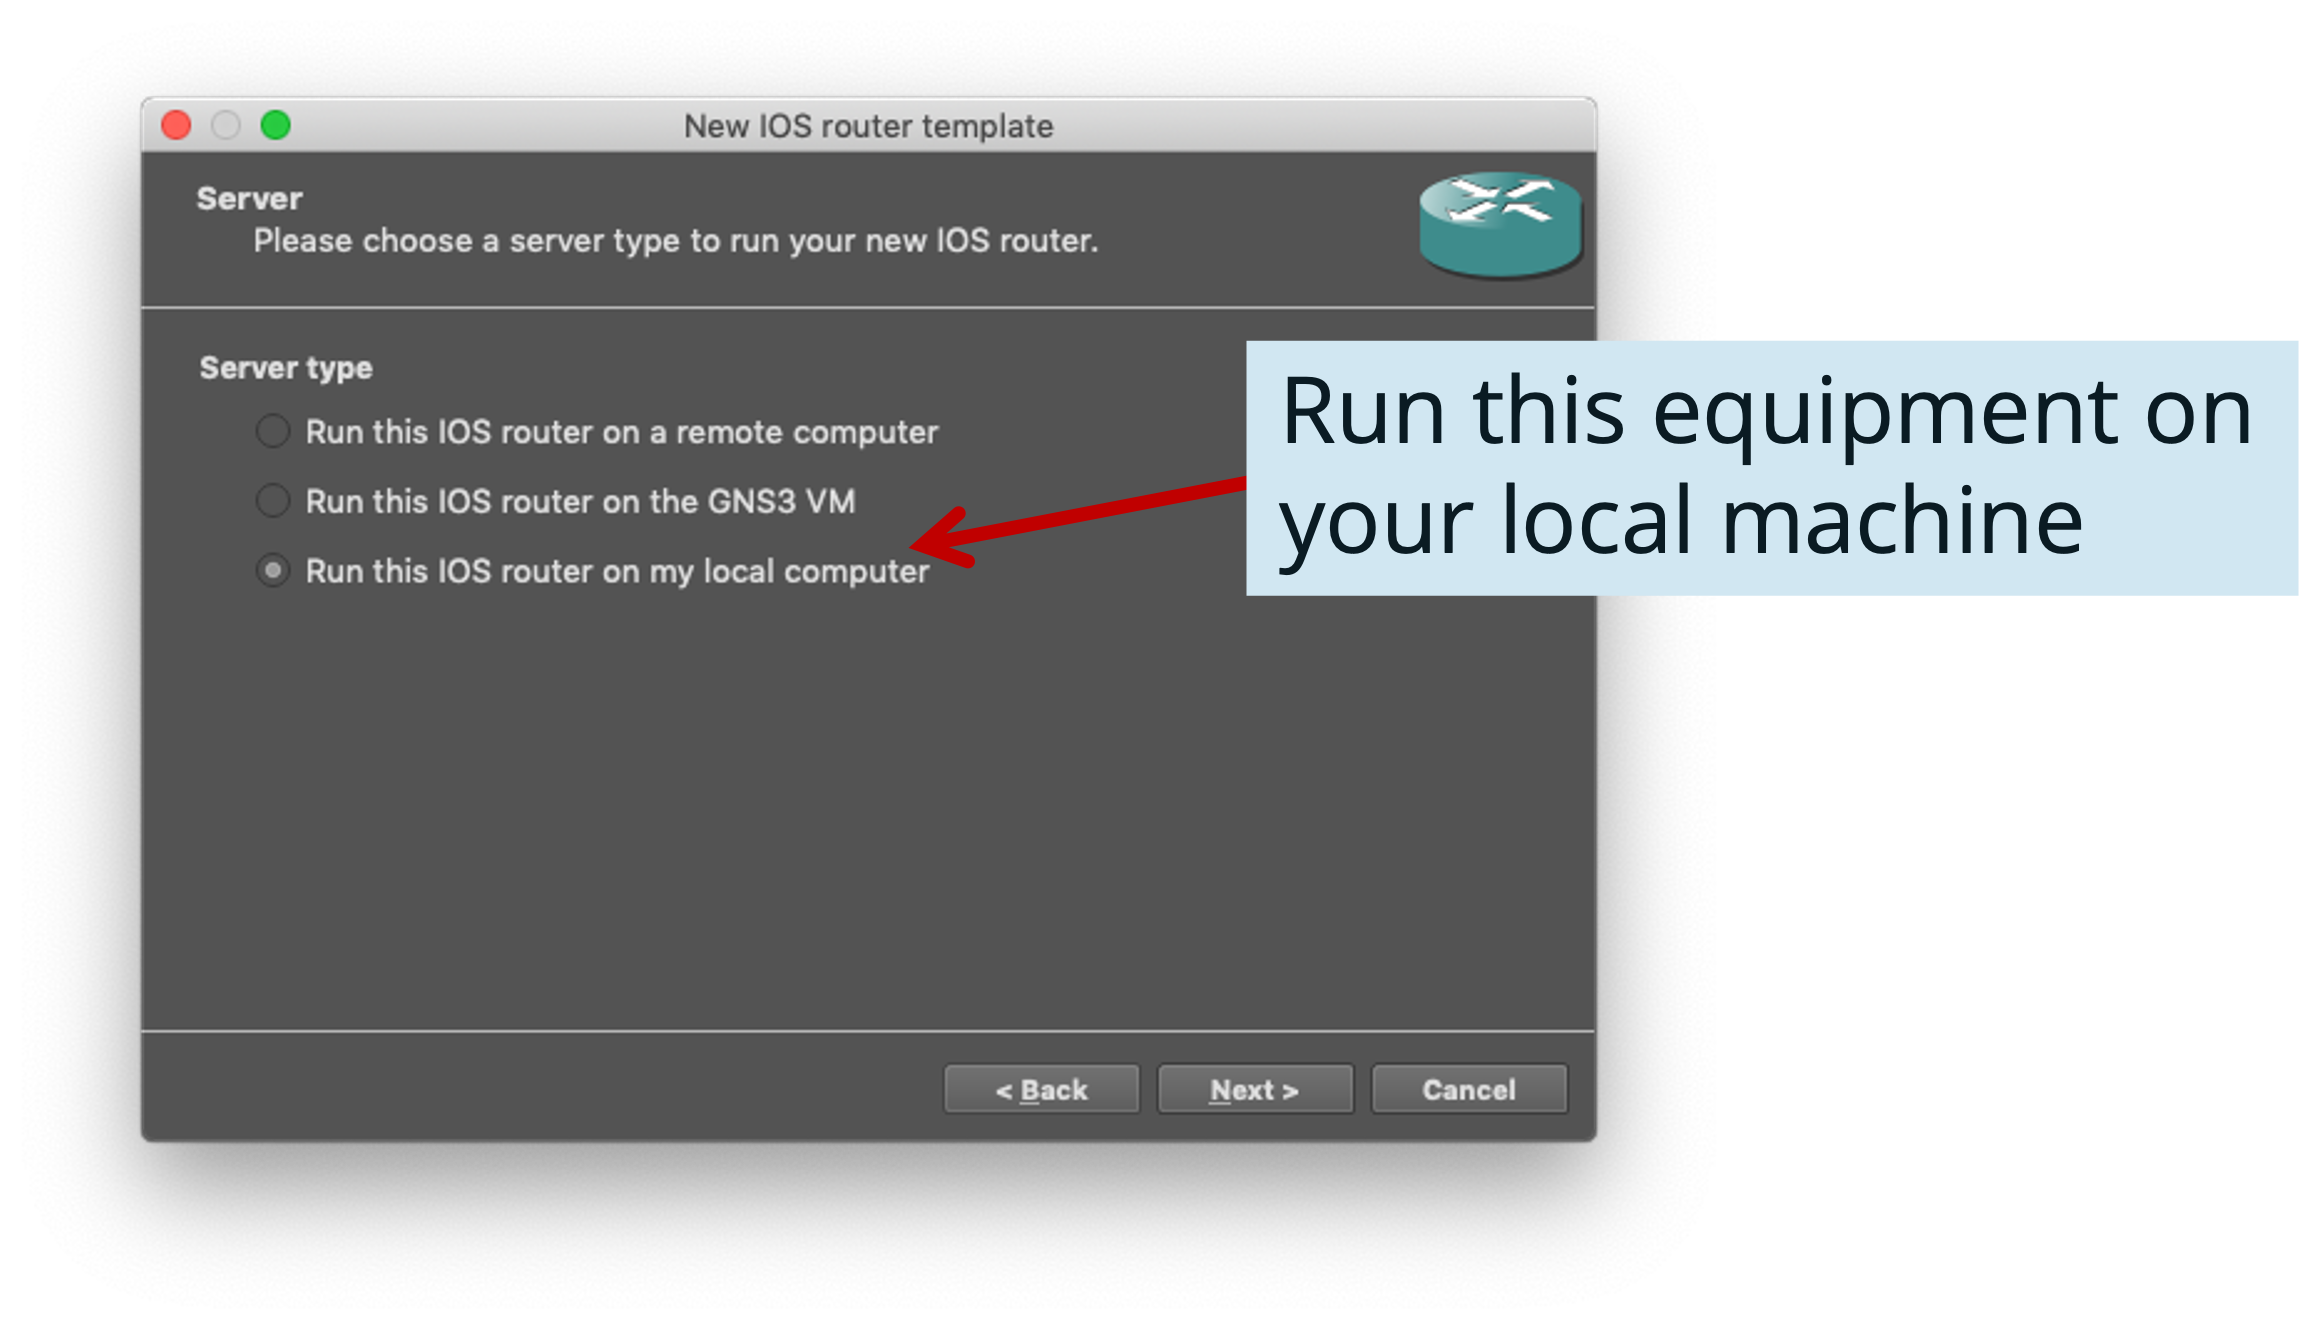
Step 2: Where to run the emulation
We will run the emulation locally on our computer.
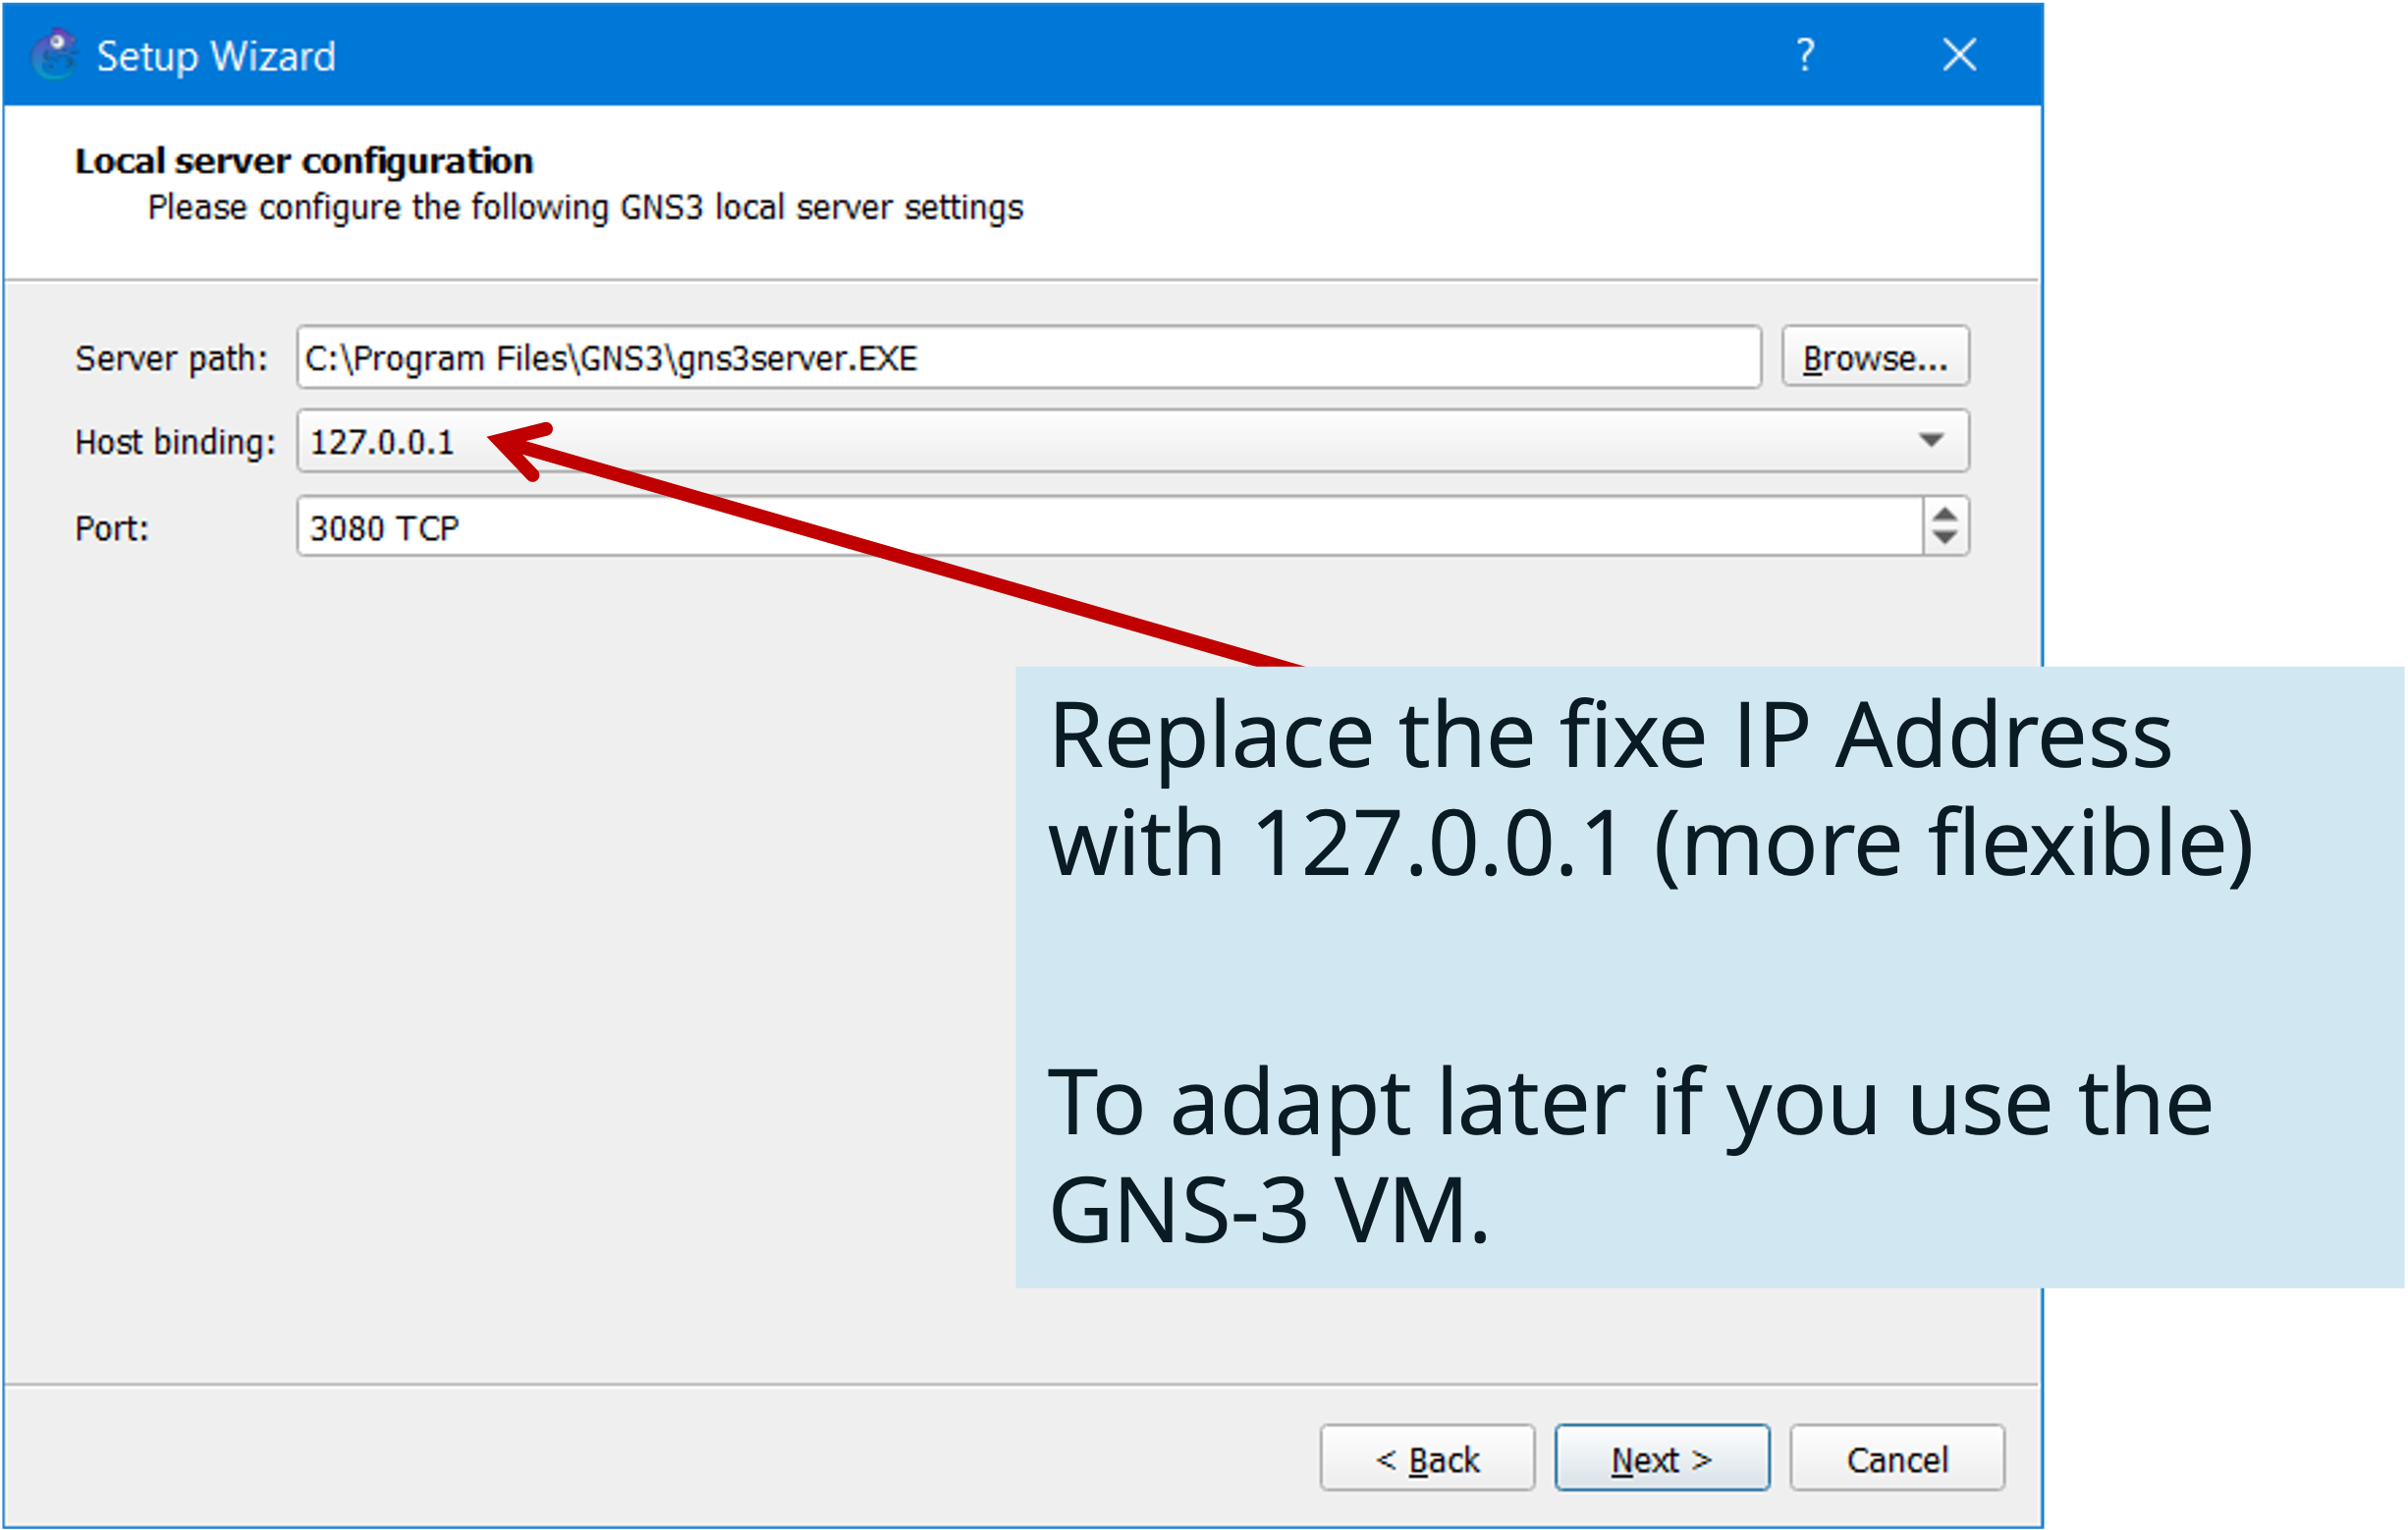
Step 3: Local Server configuration
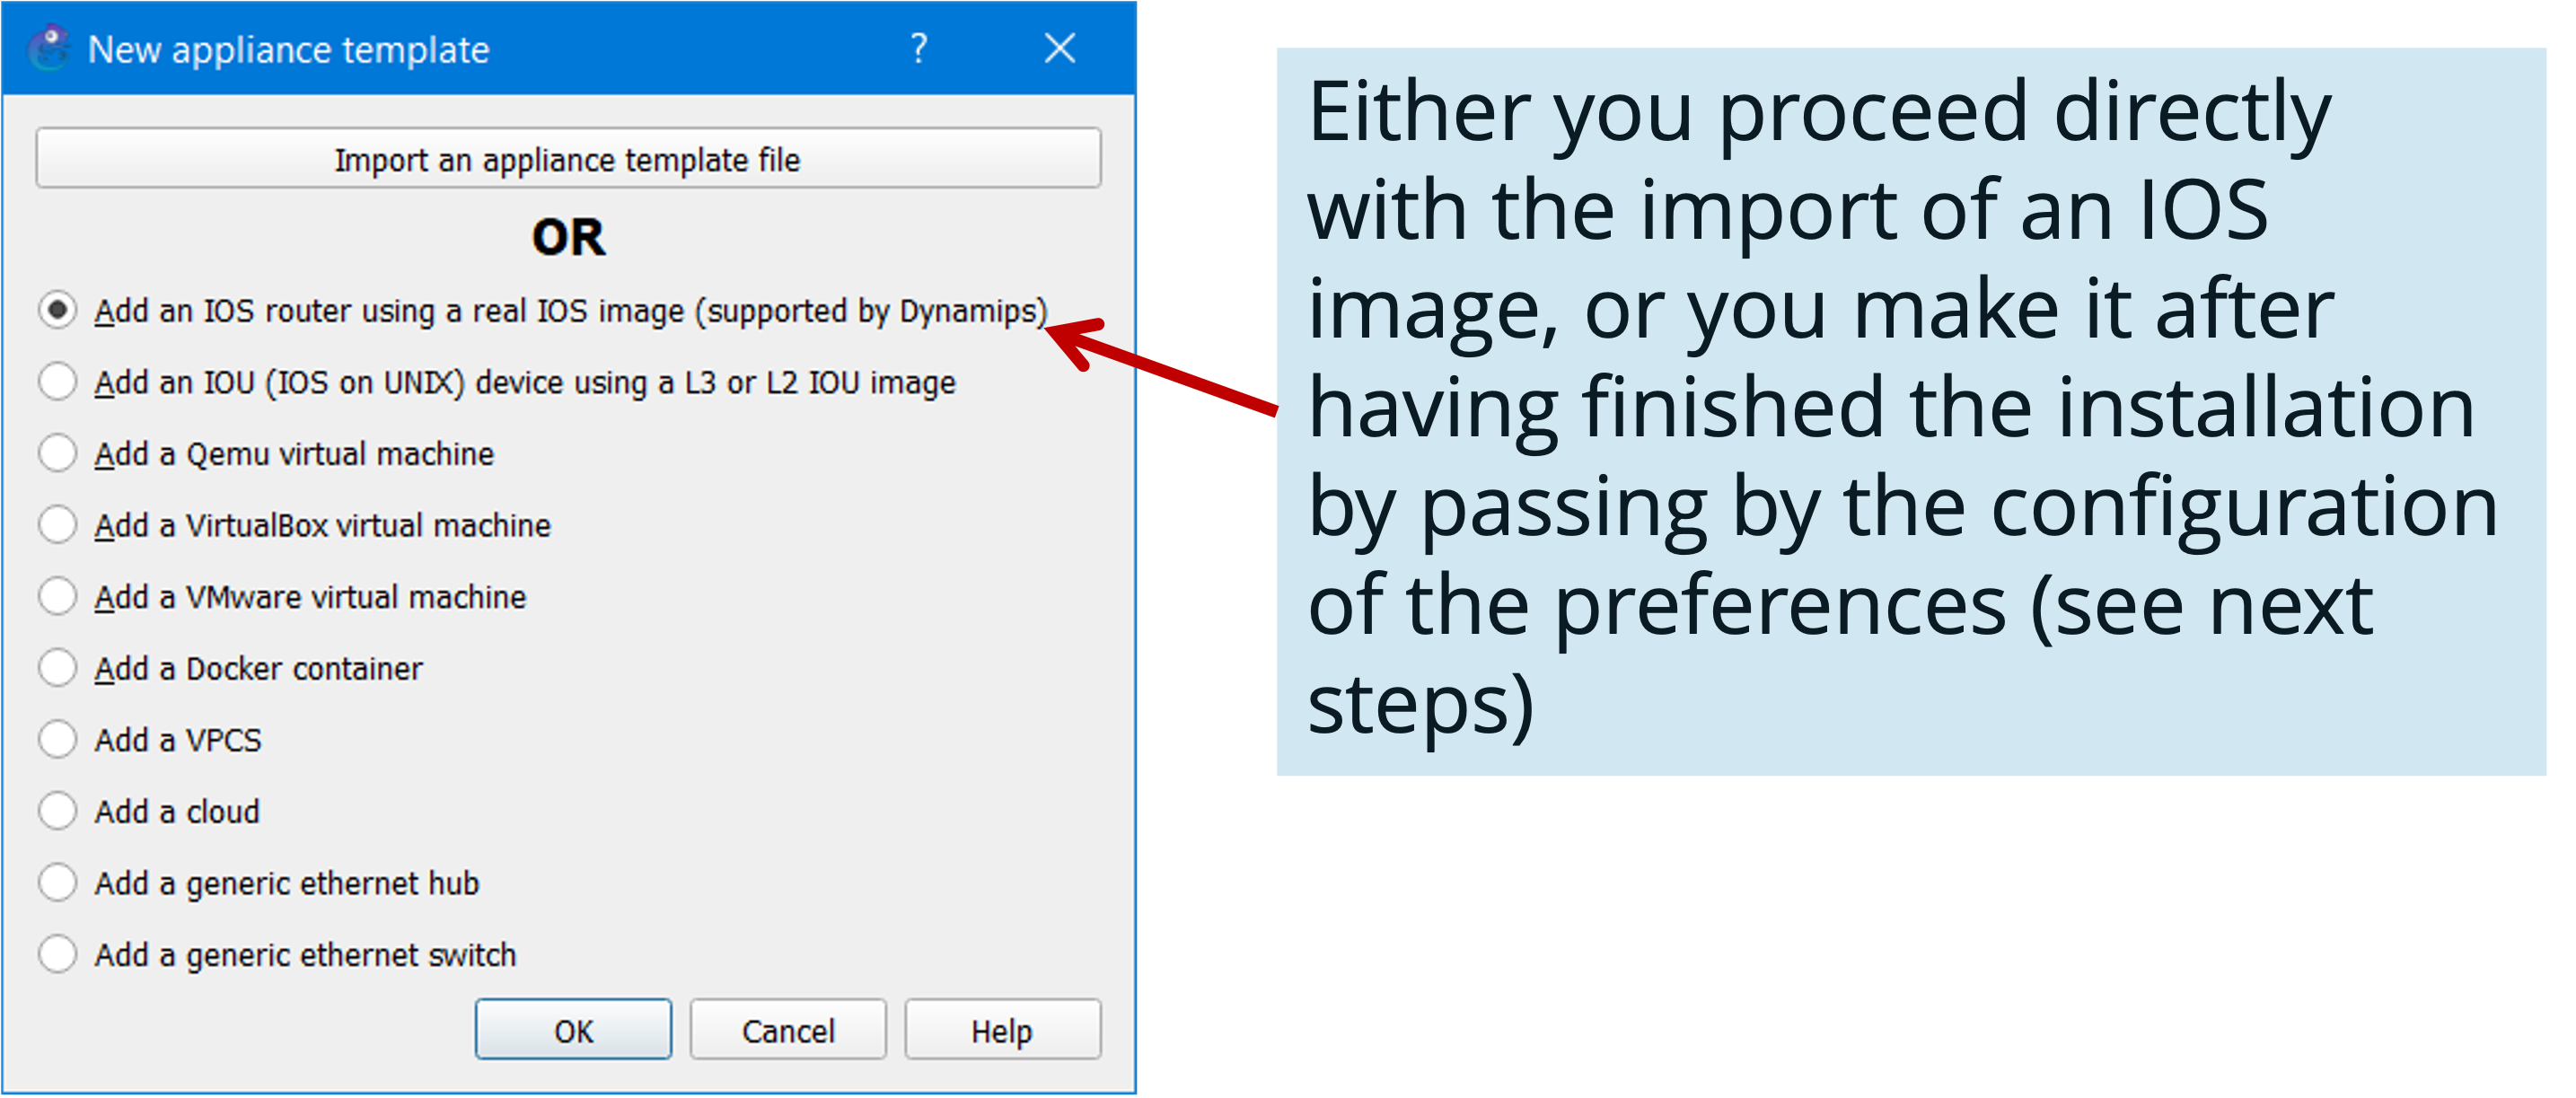
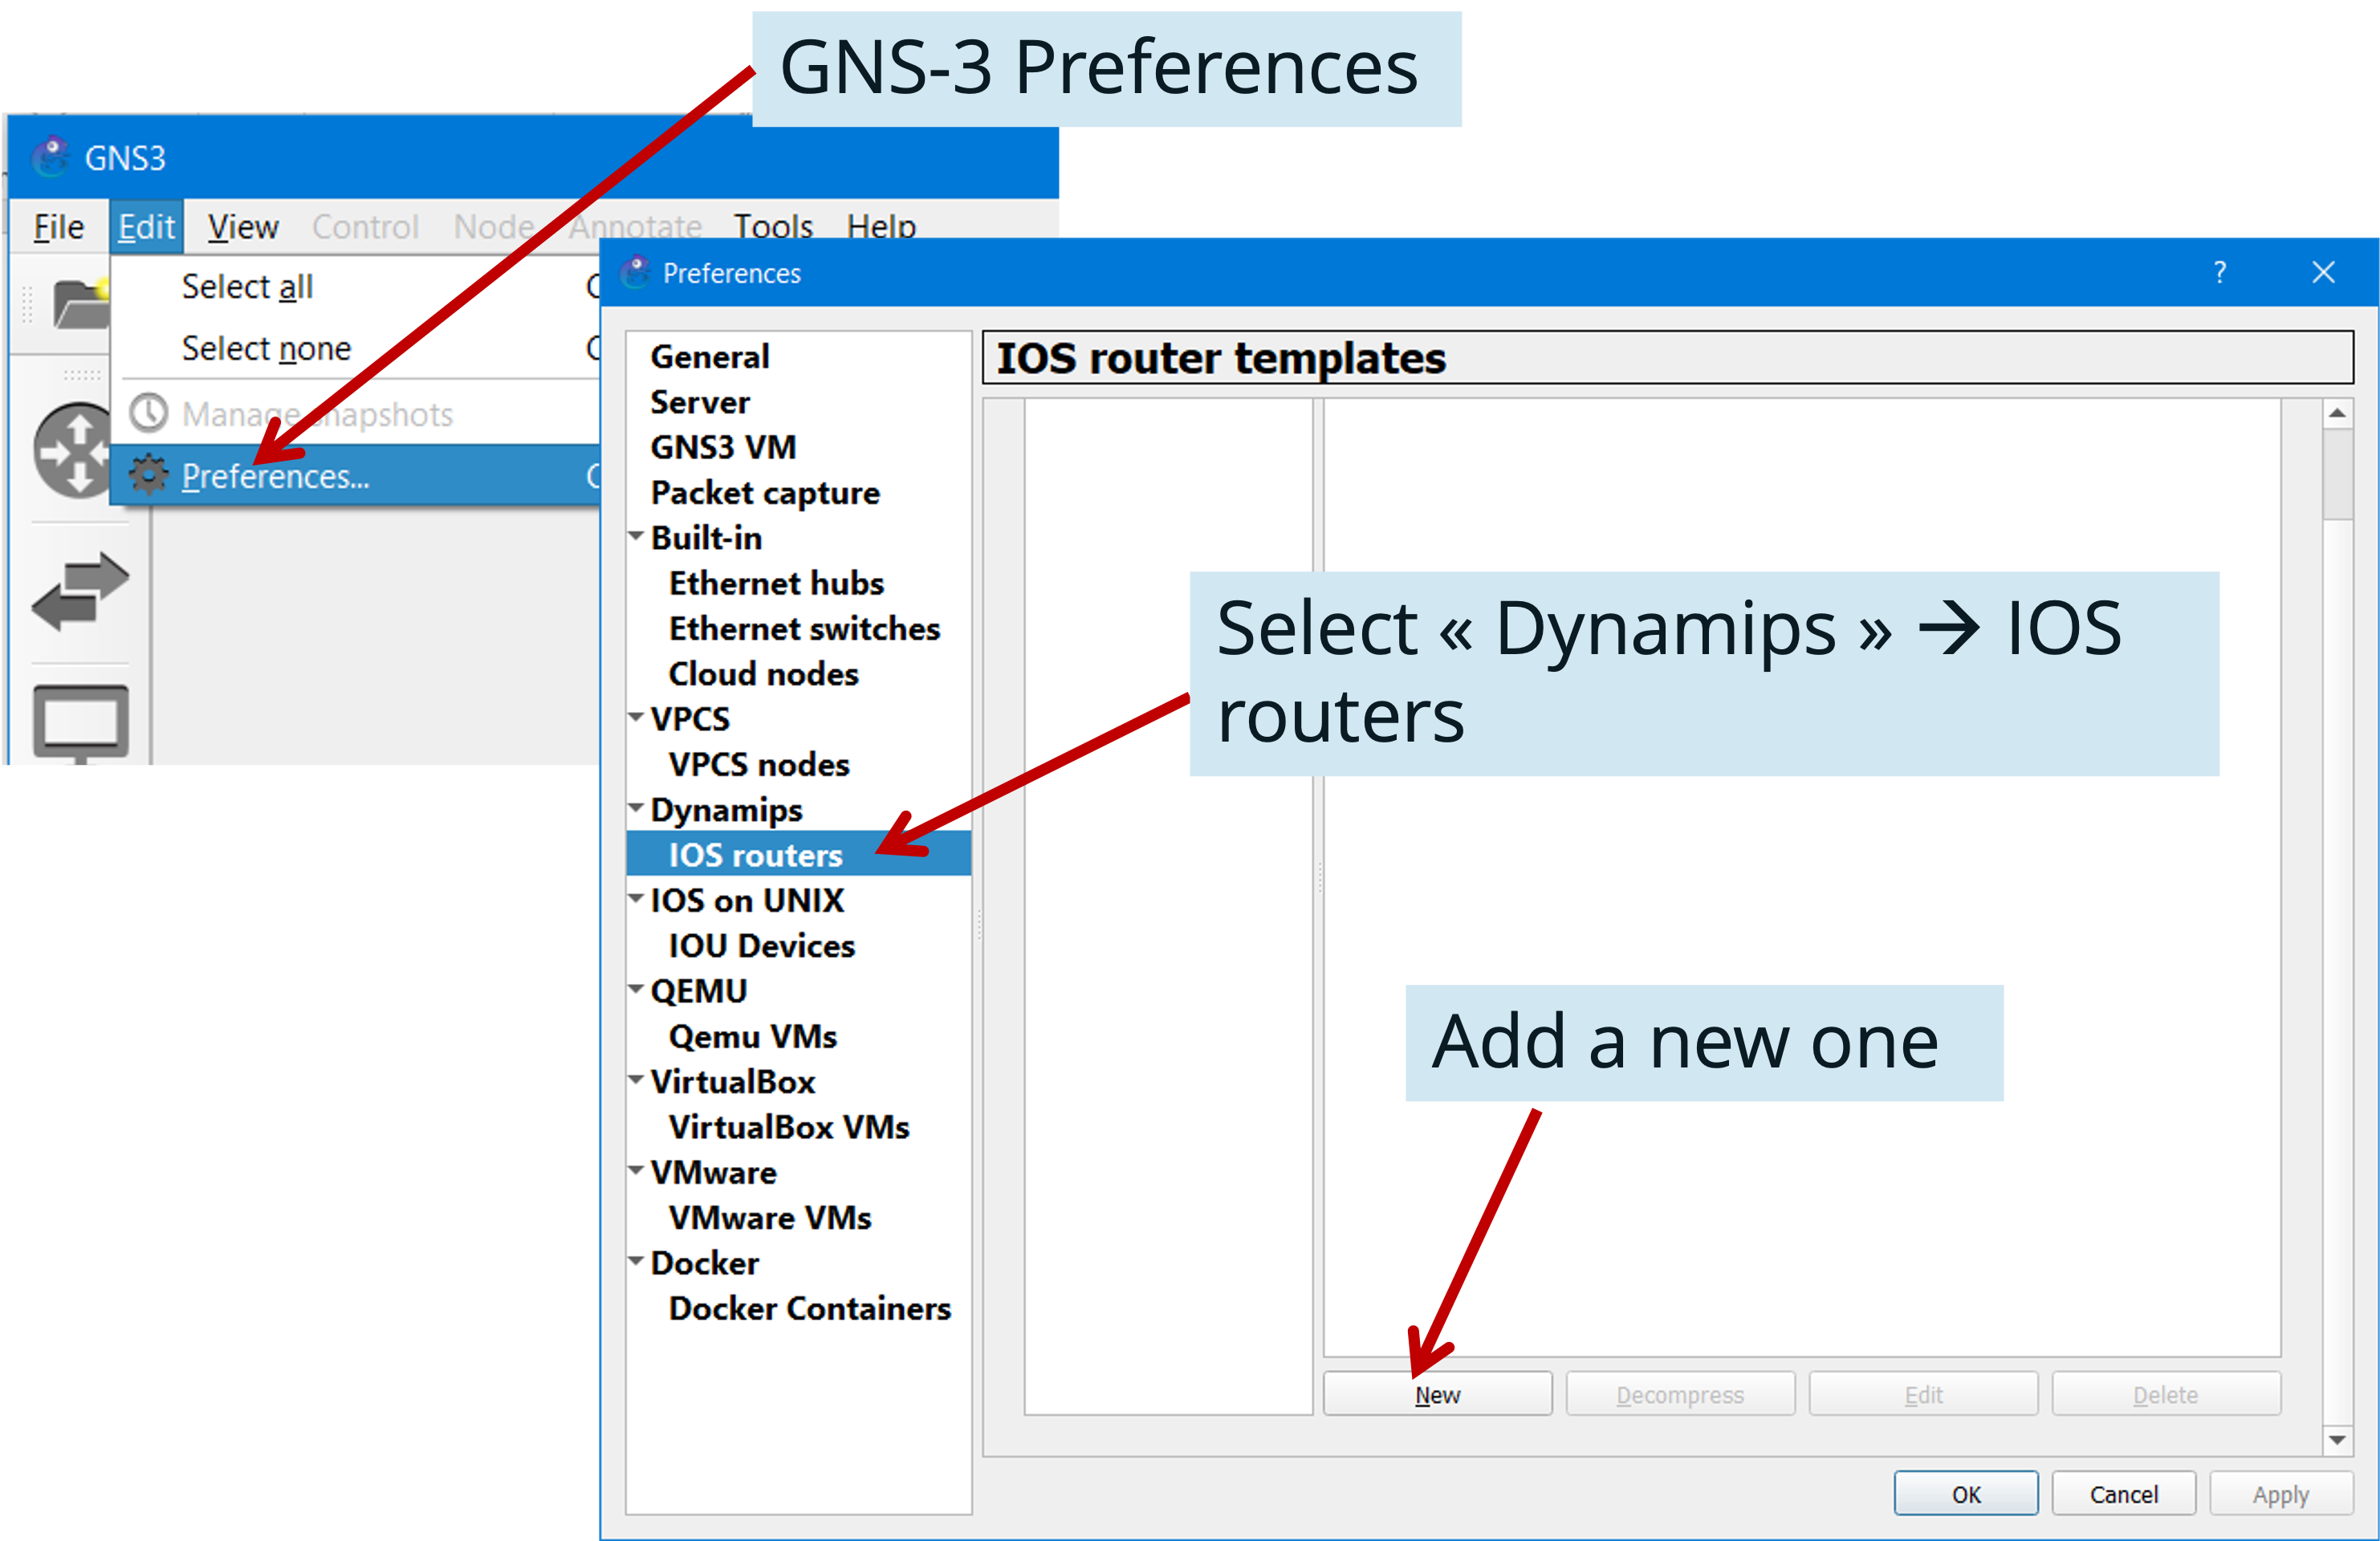
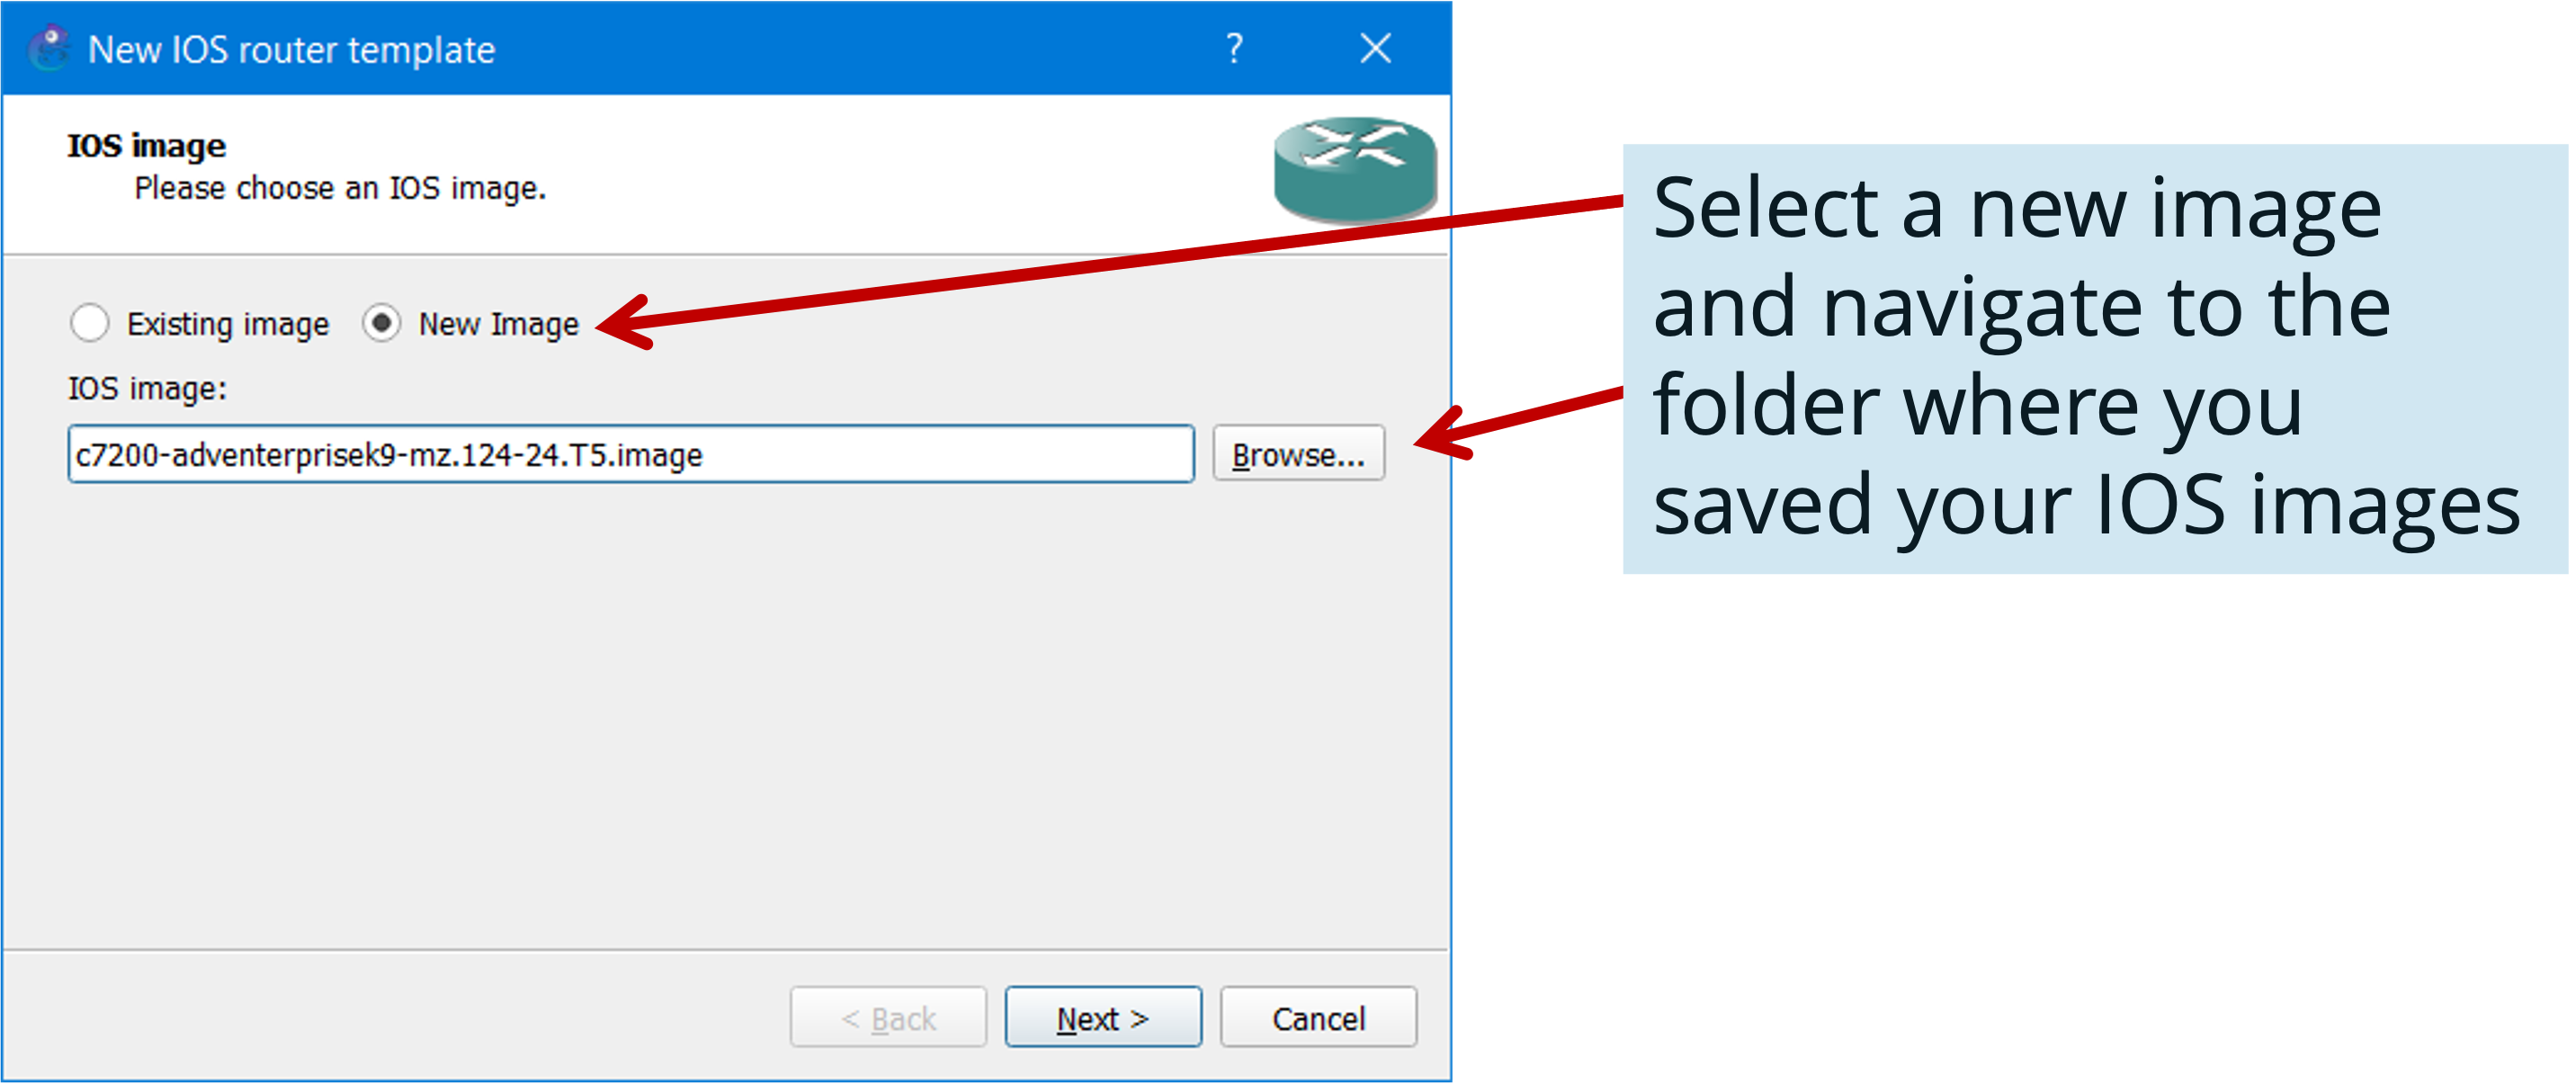
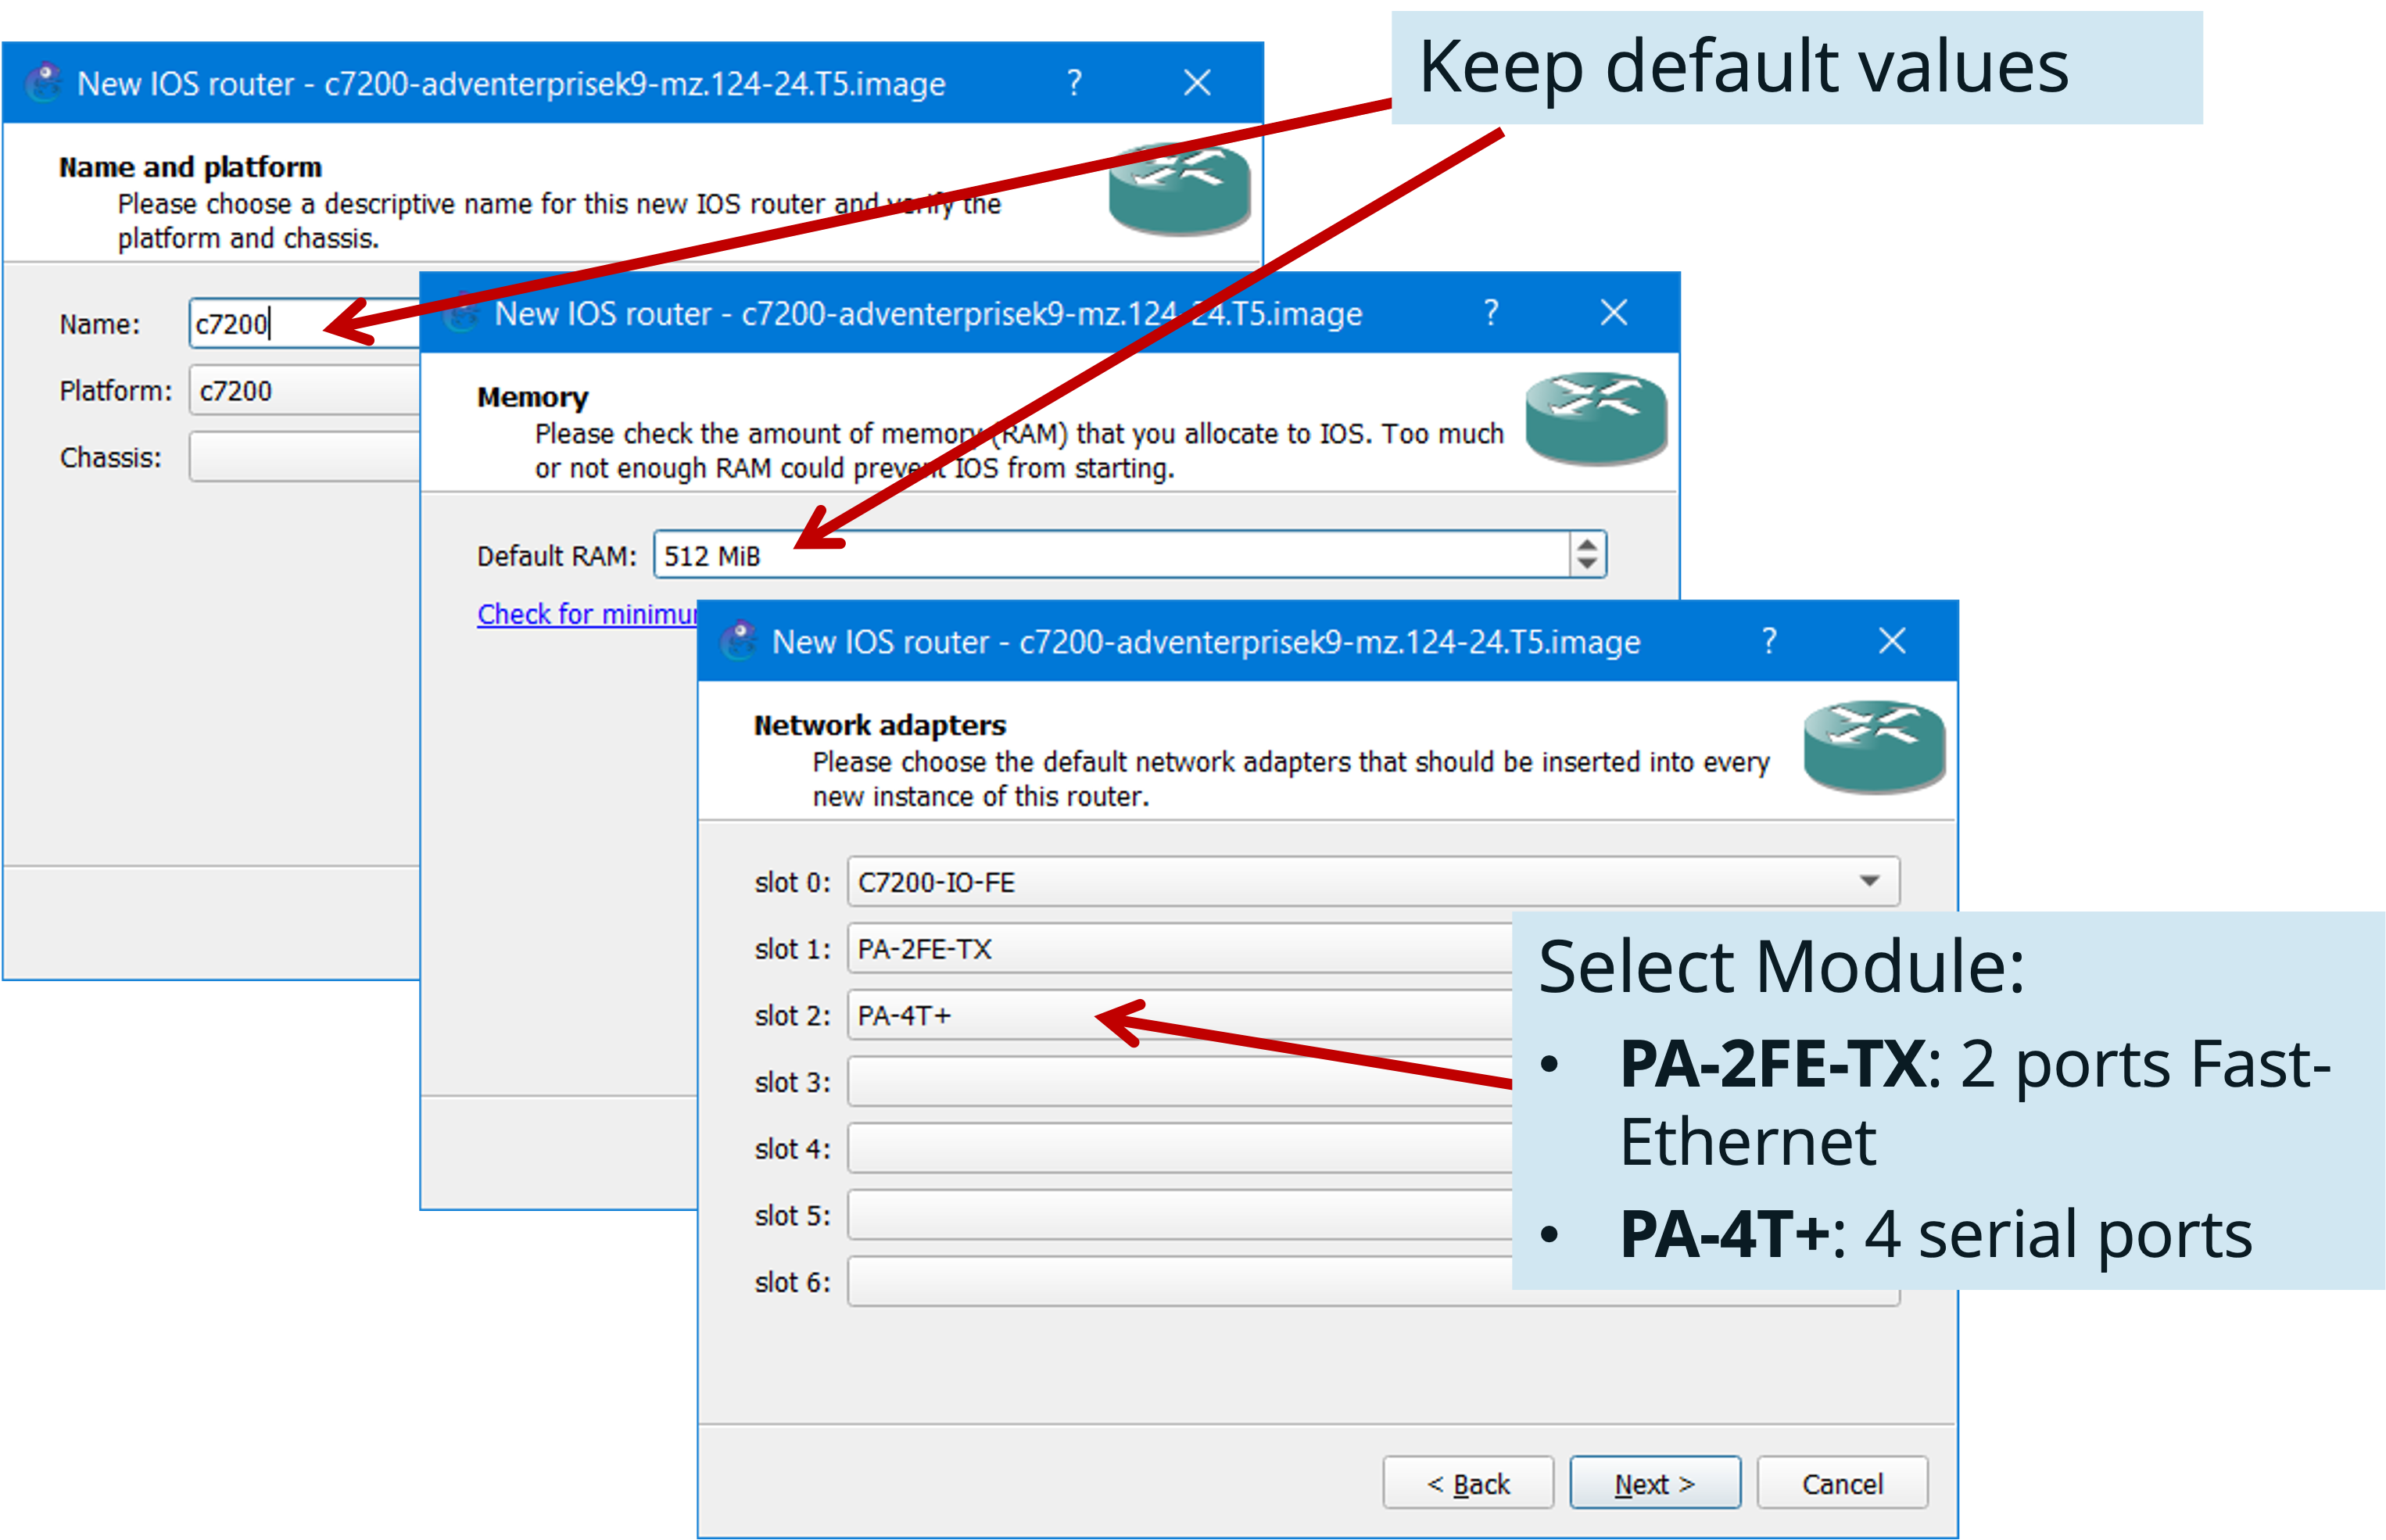
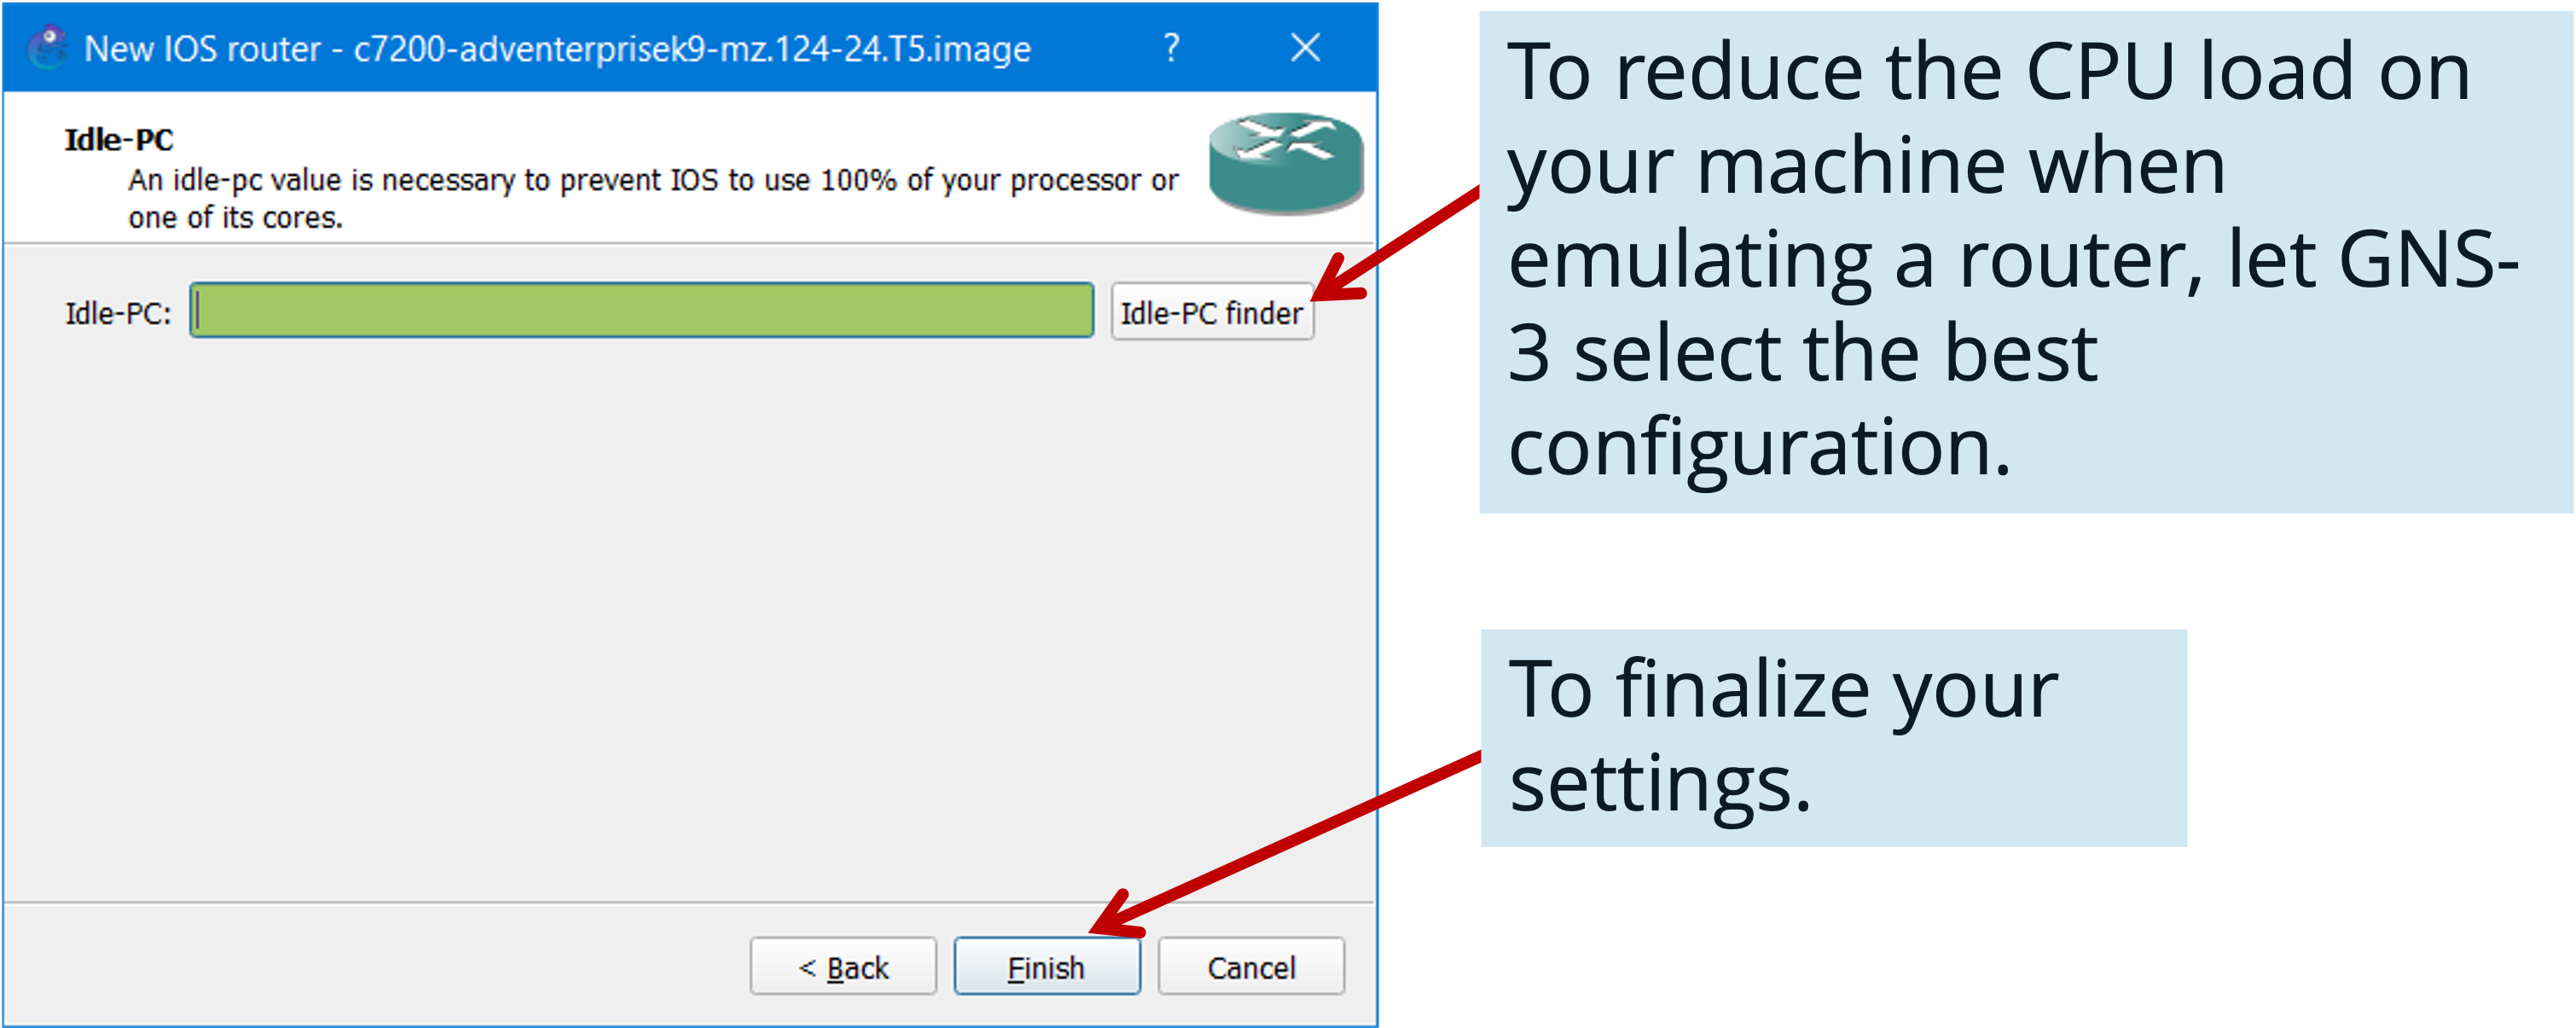
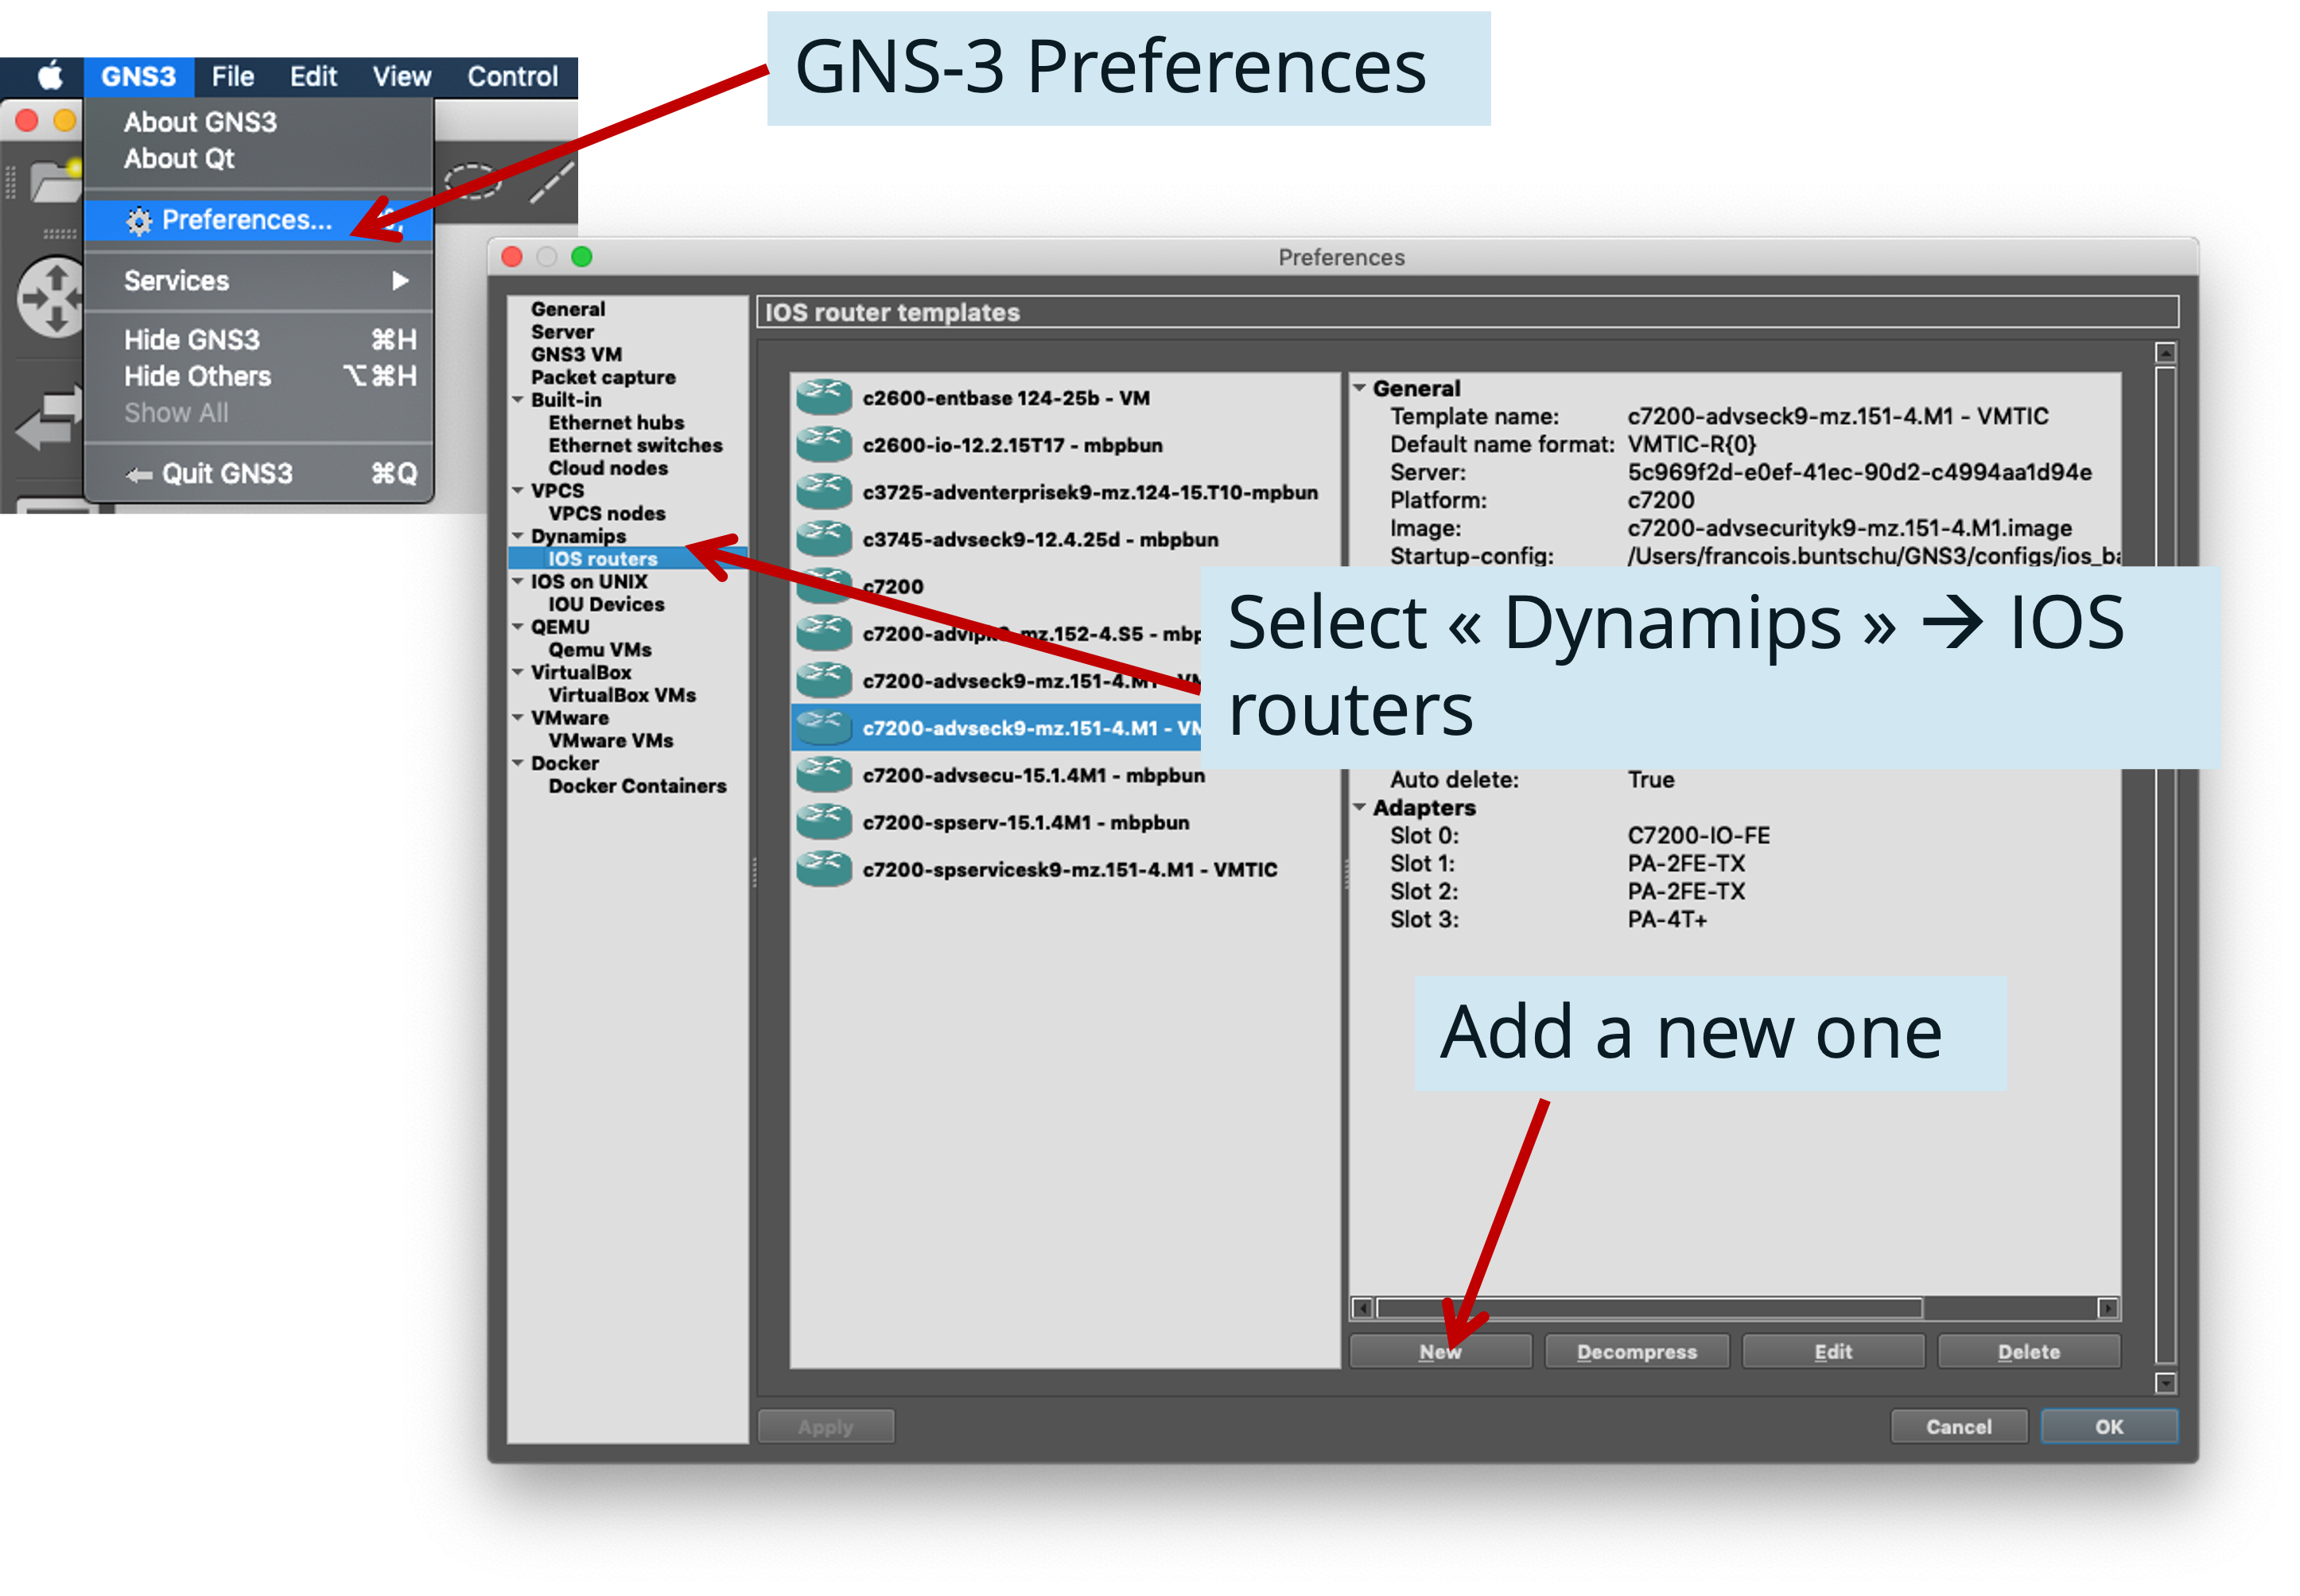
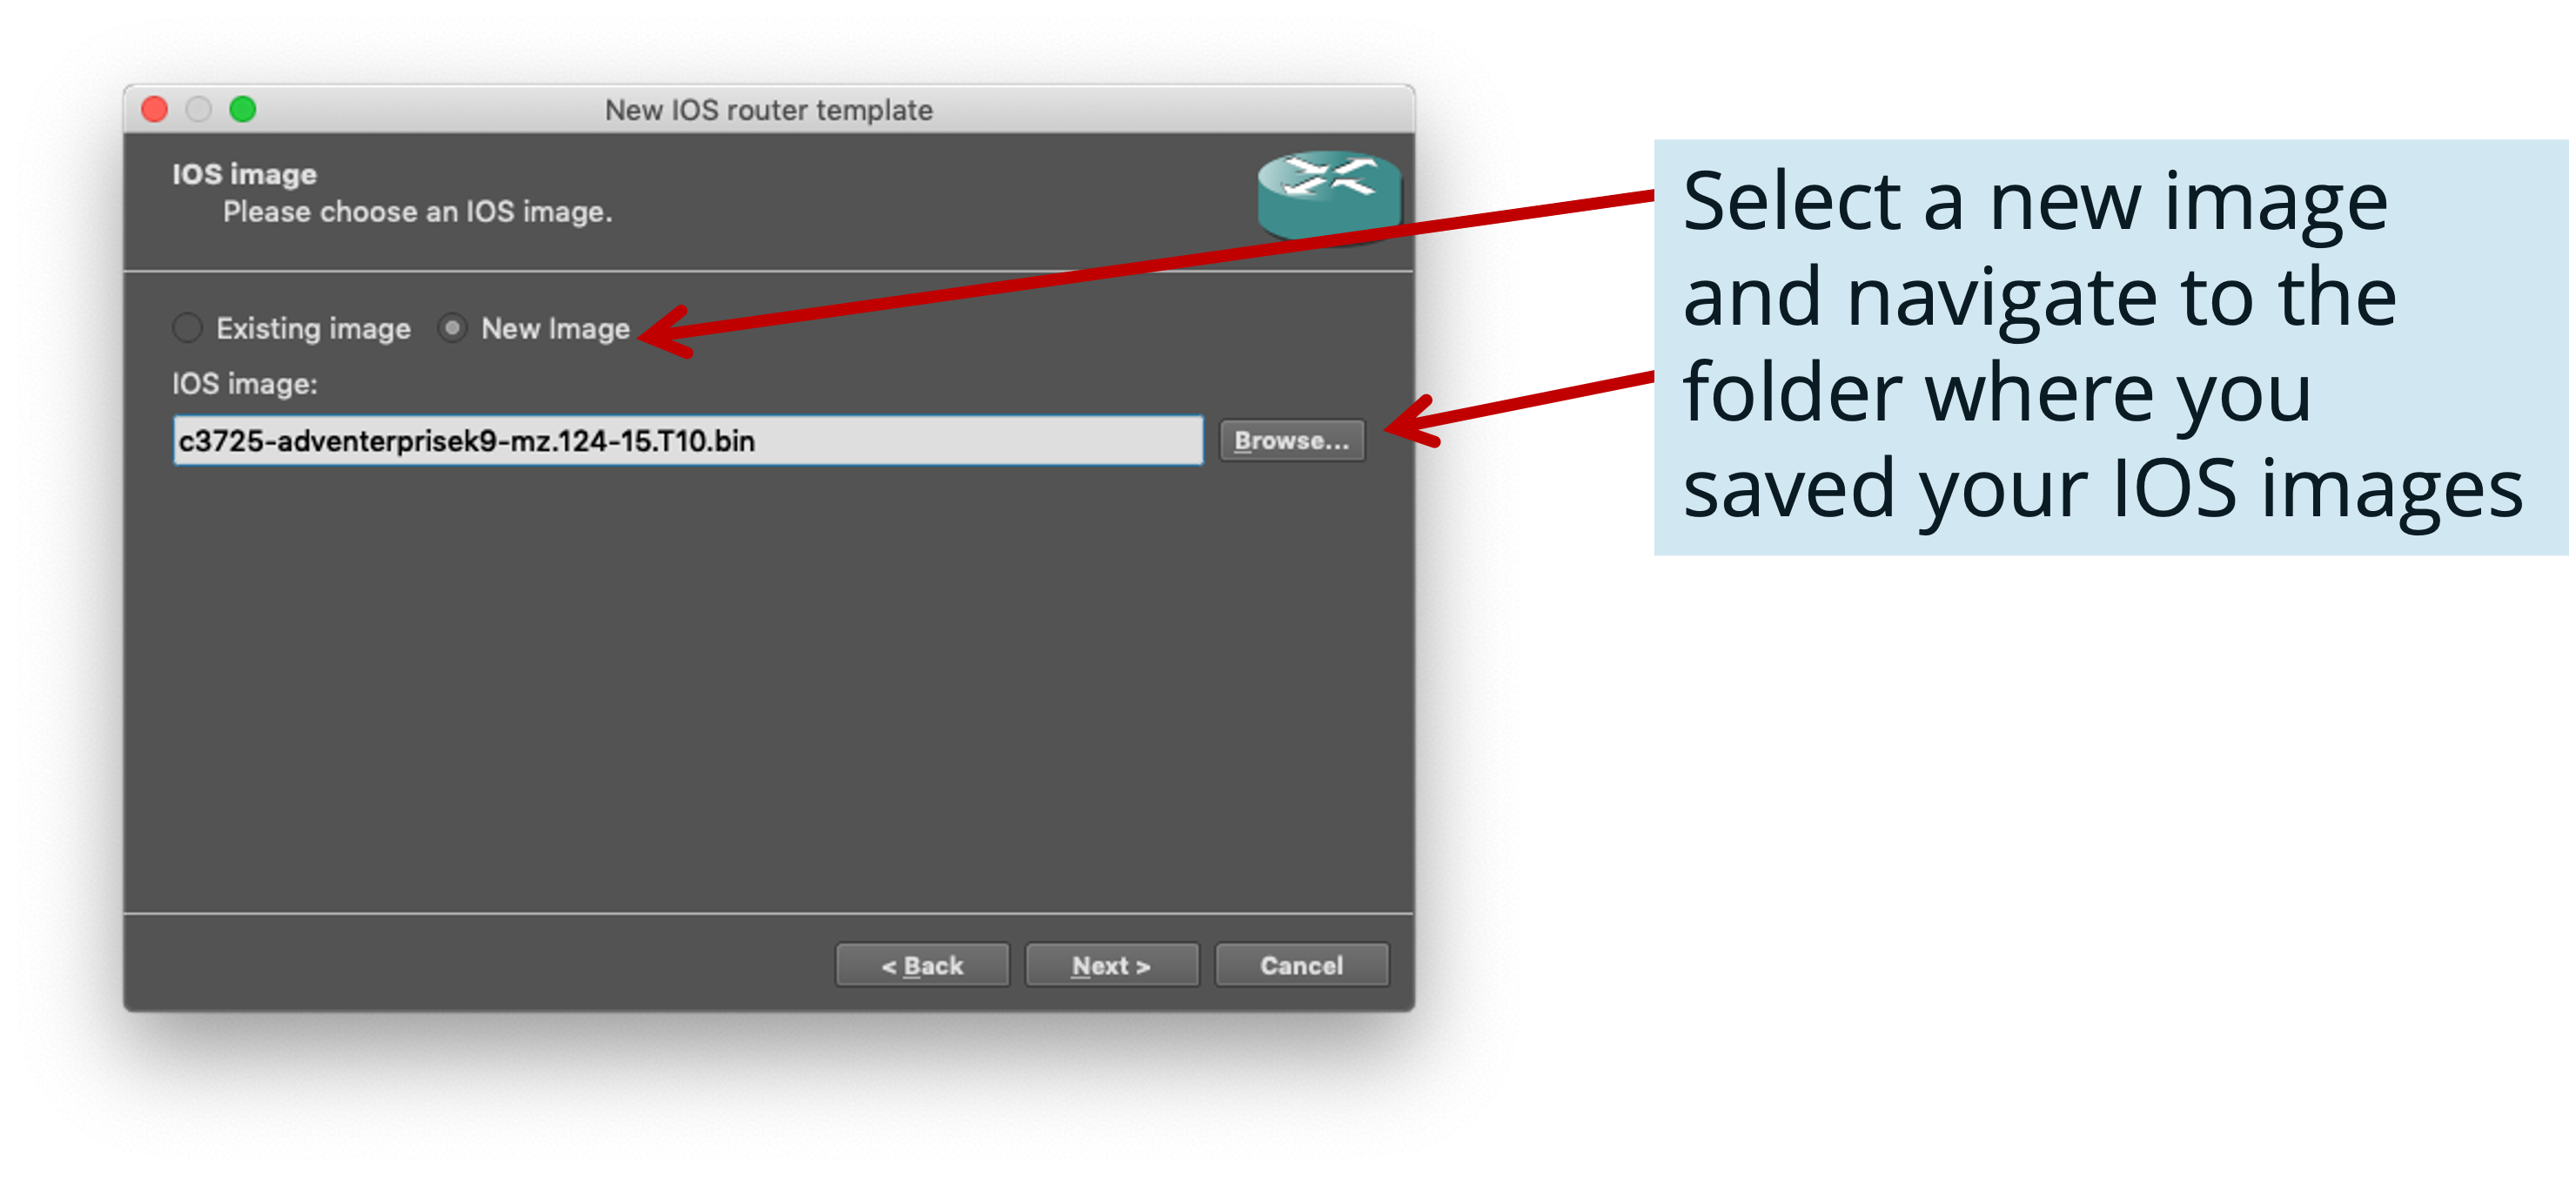
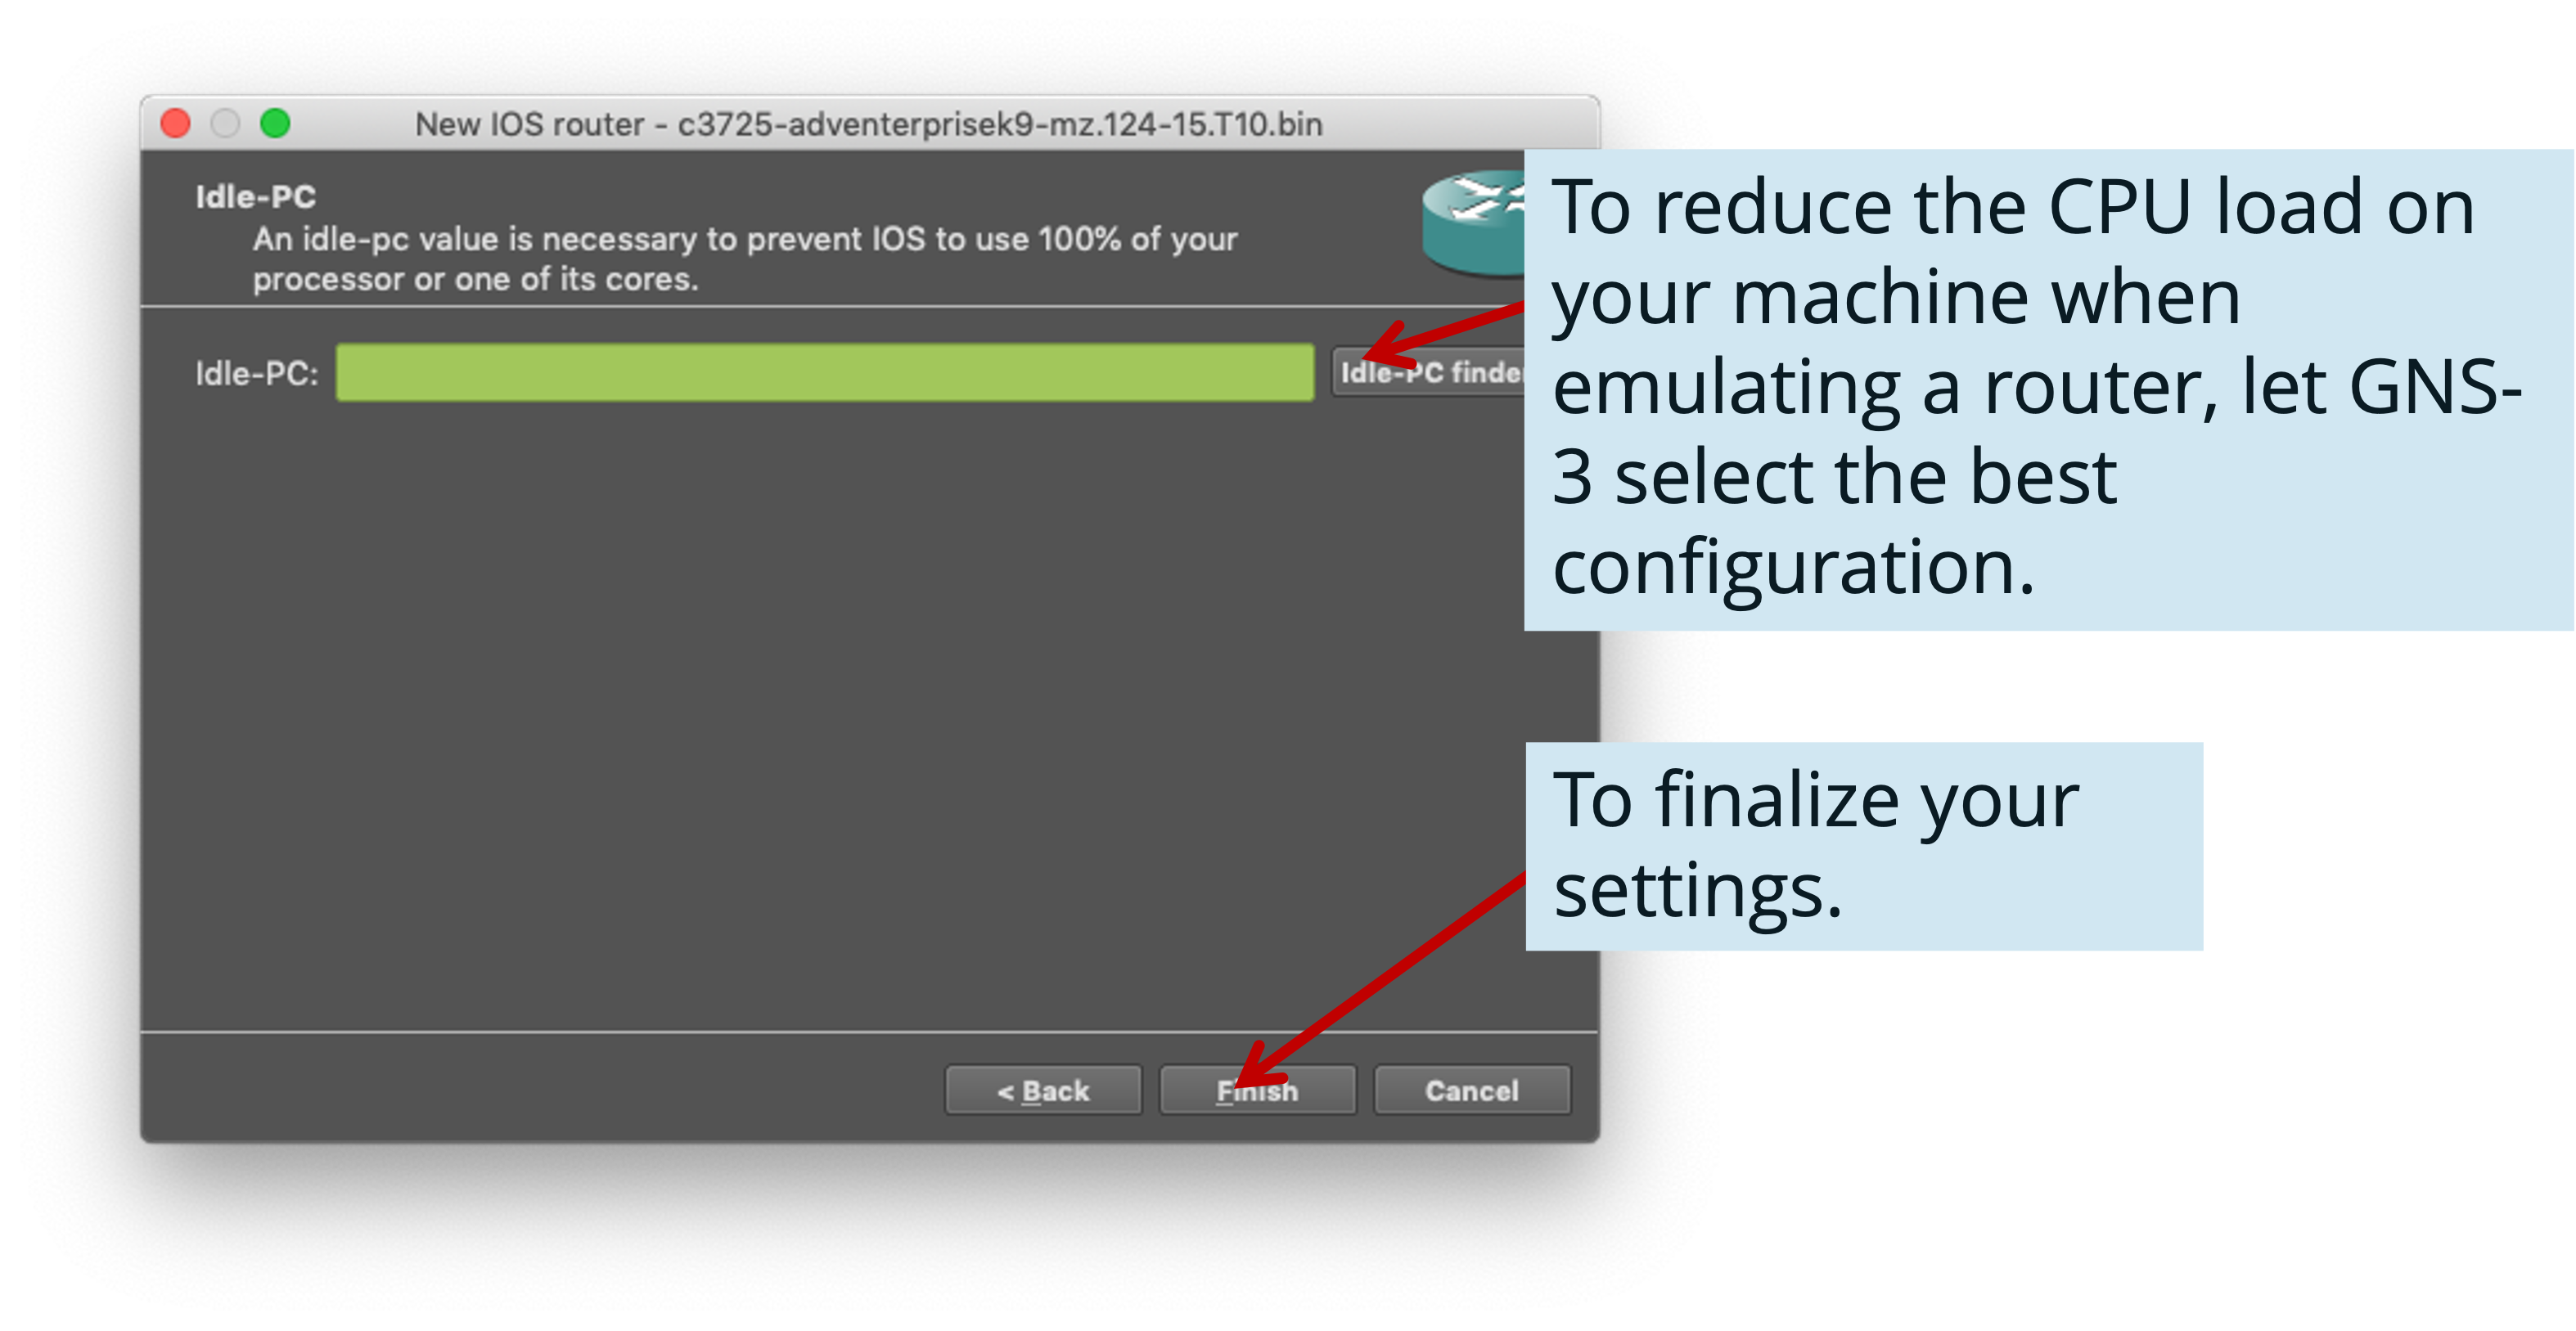
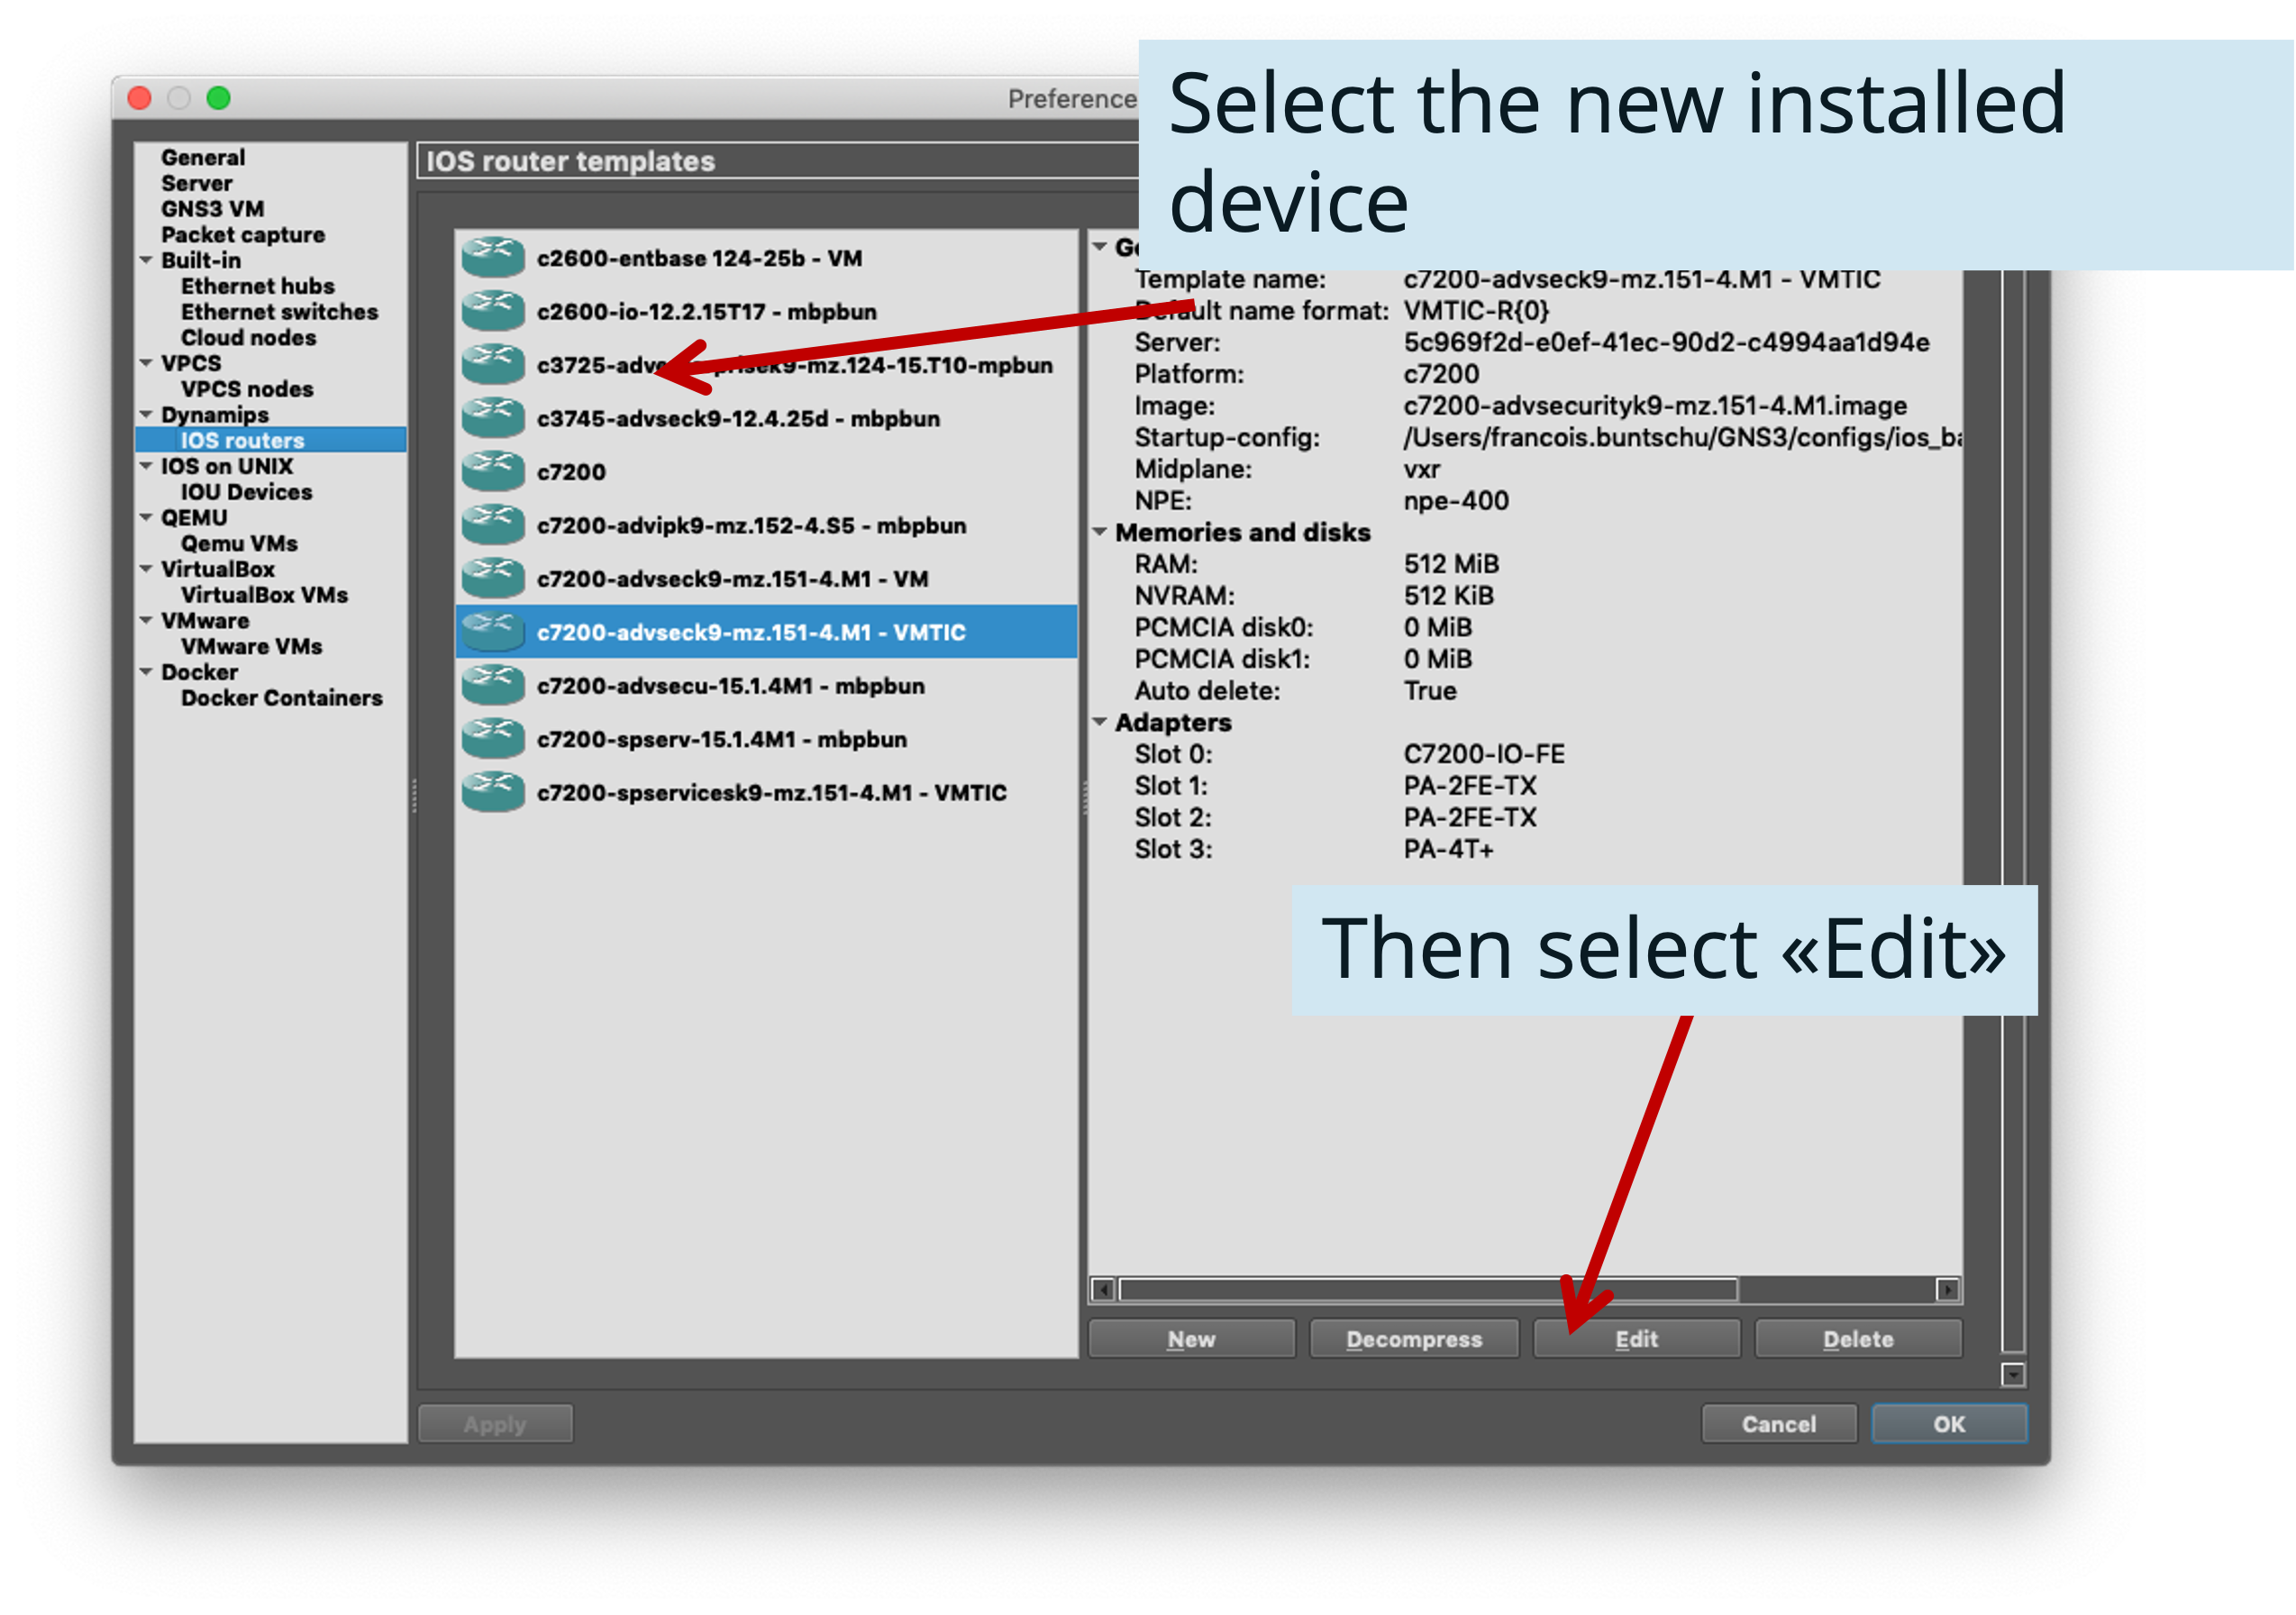
Step 4: Adding an IOS router
Optional steps
These optional steps will explain you how to install a “simple” Layer 2 Switch or a “complete” Layer 2 Switch.
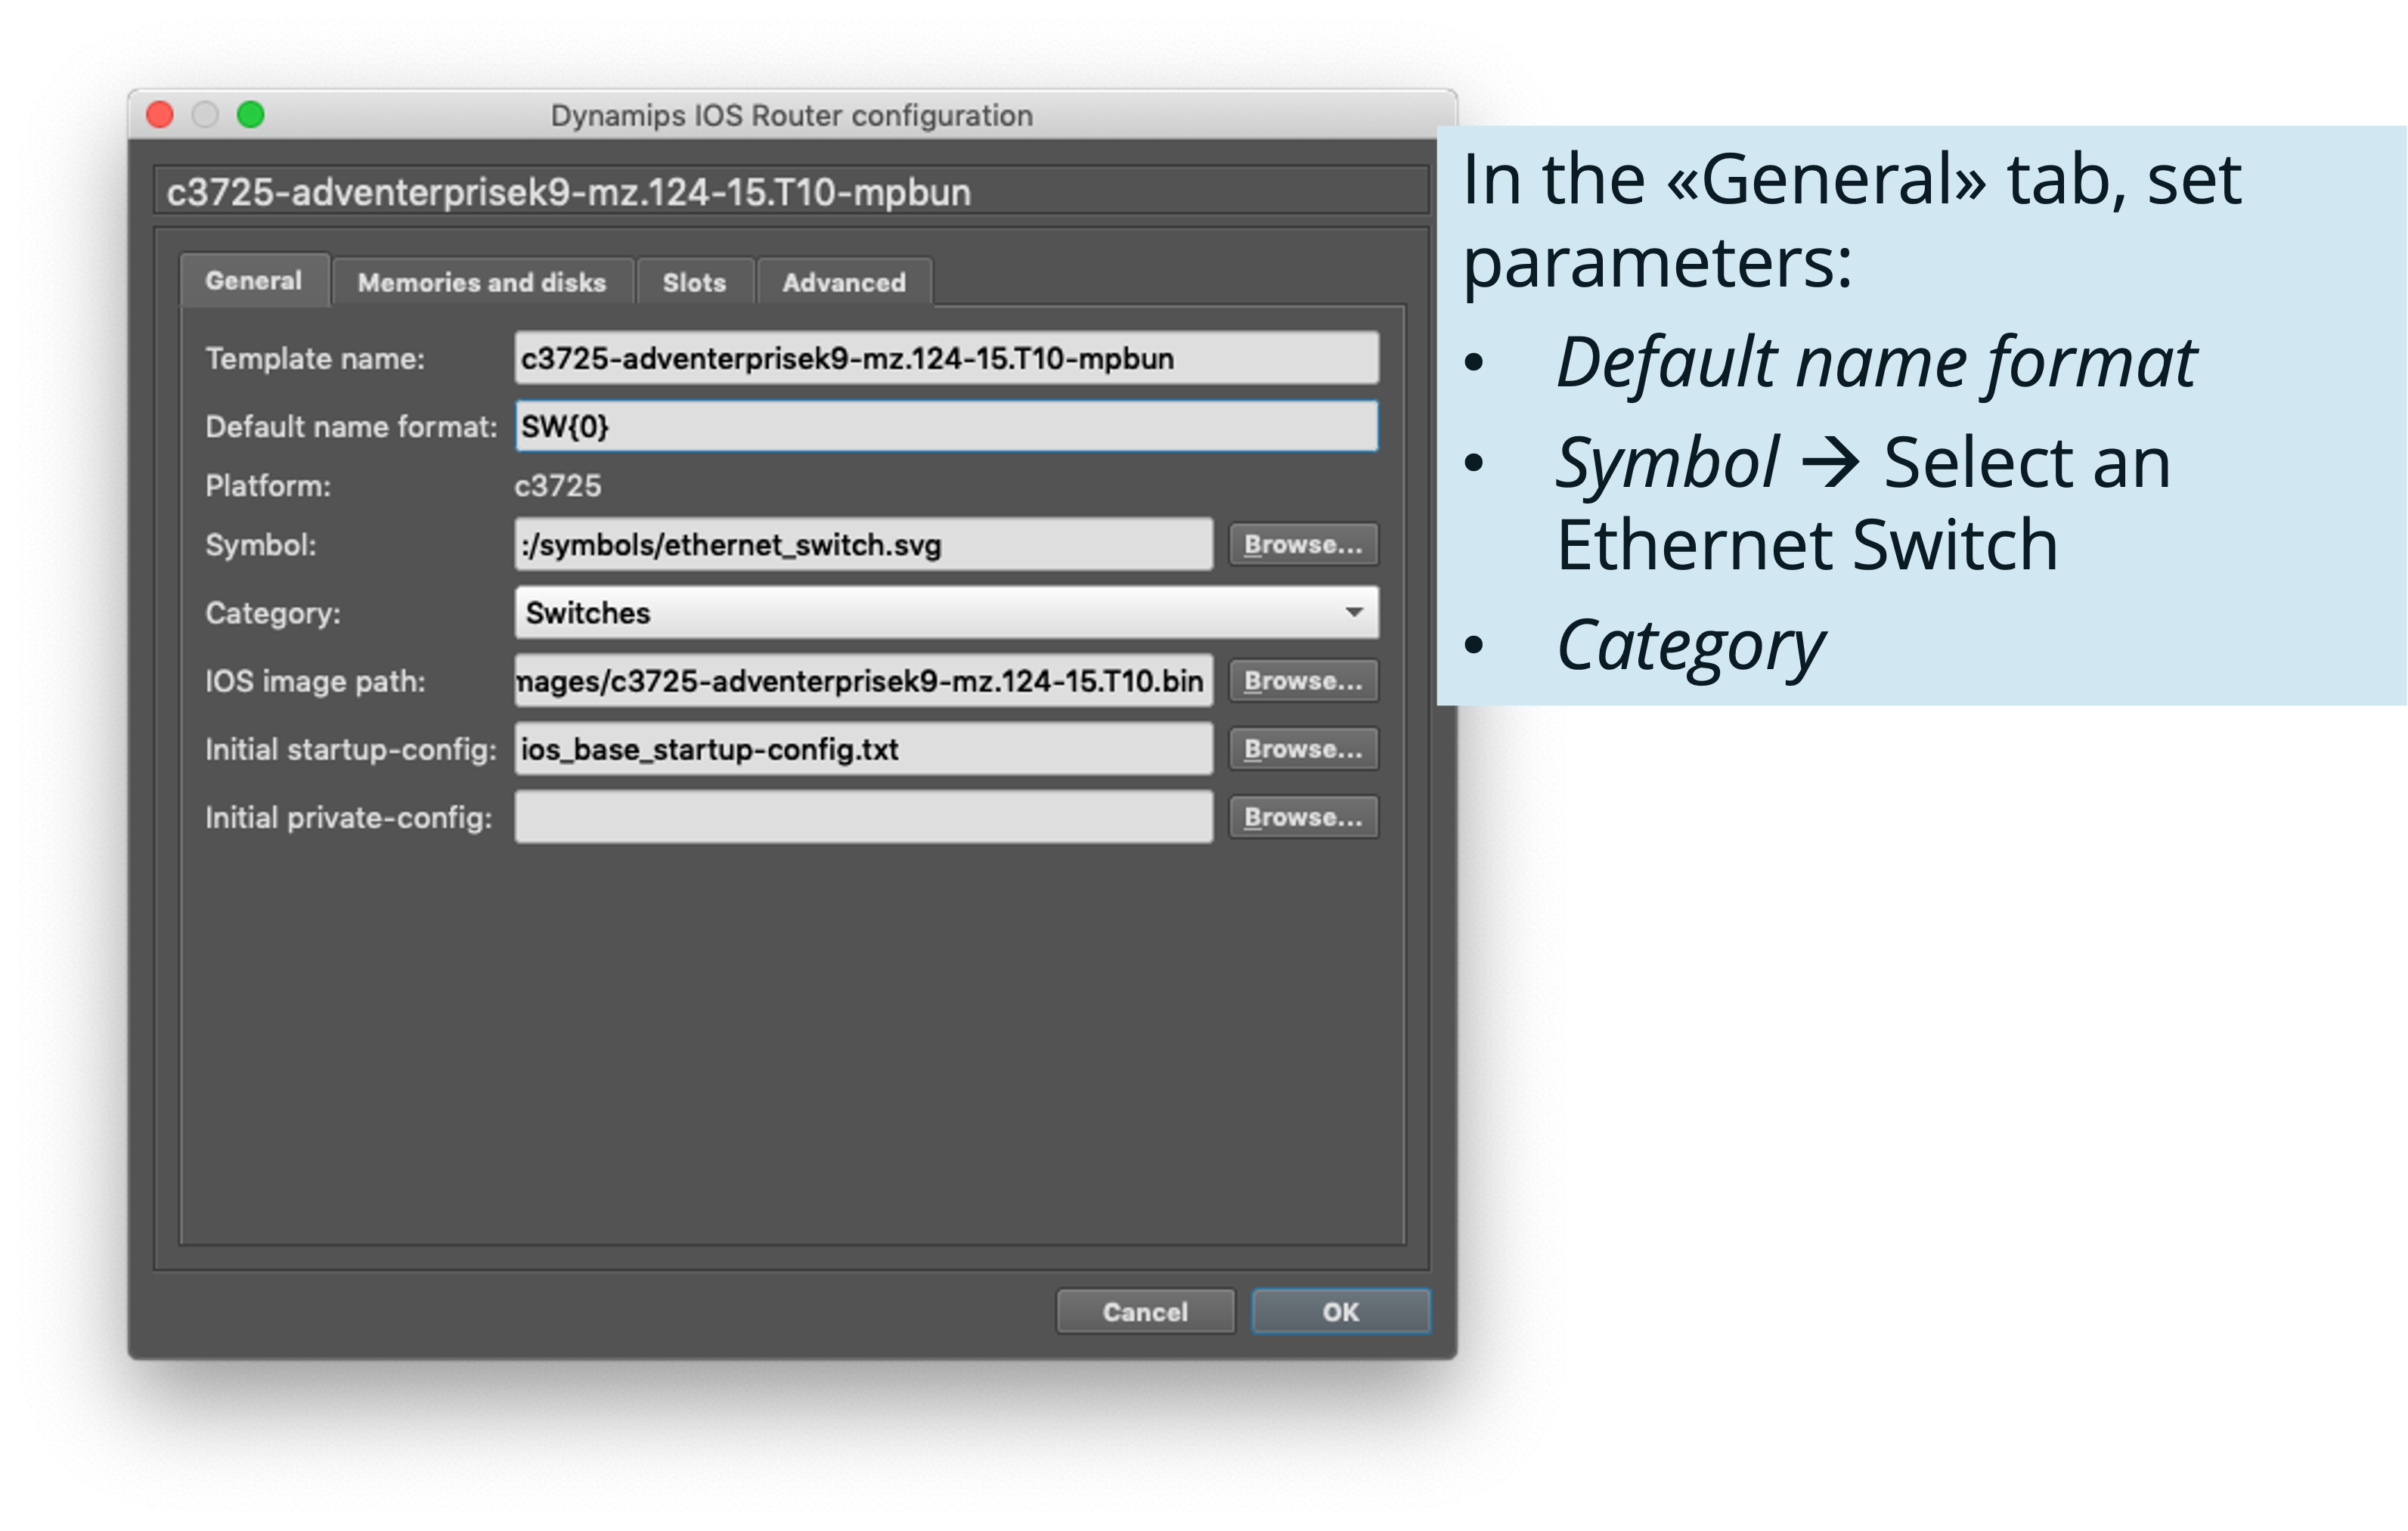
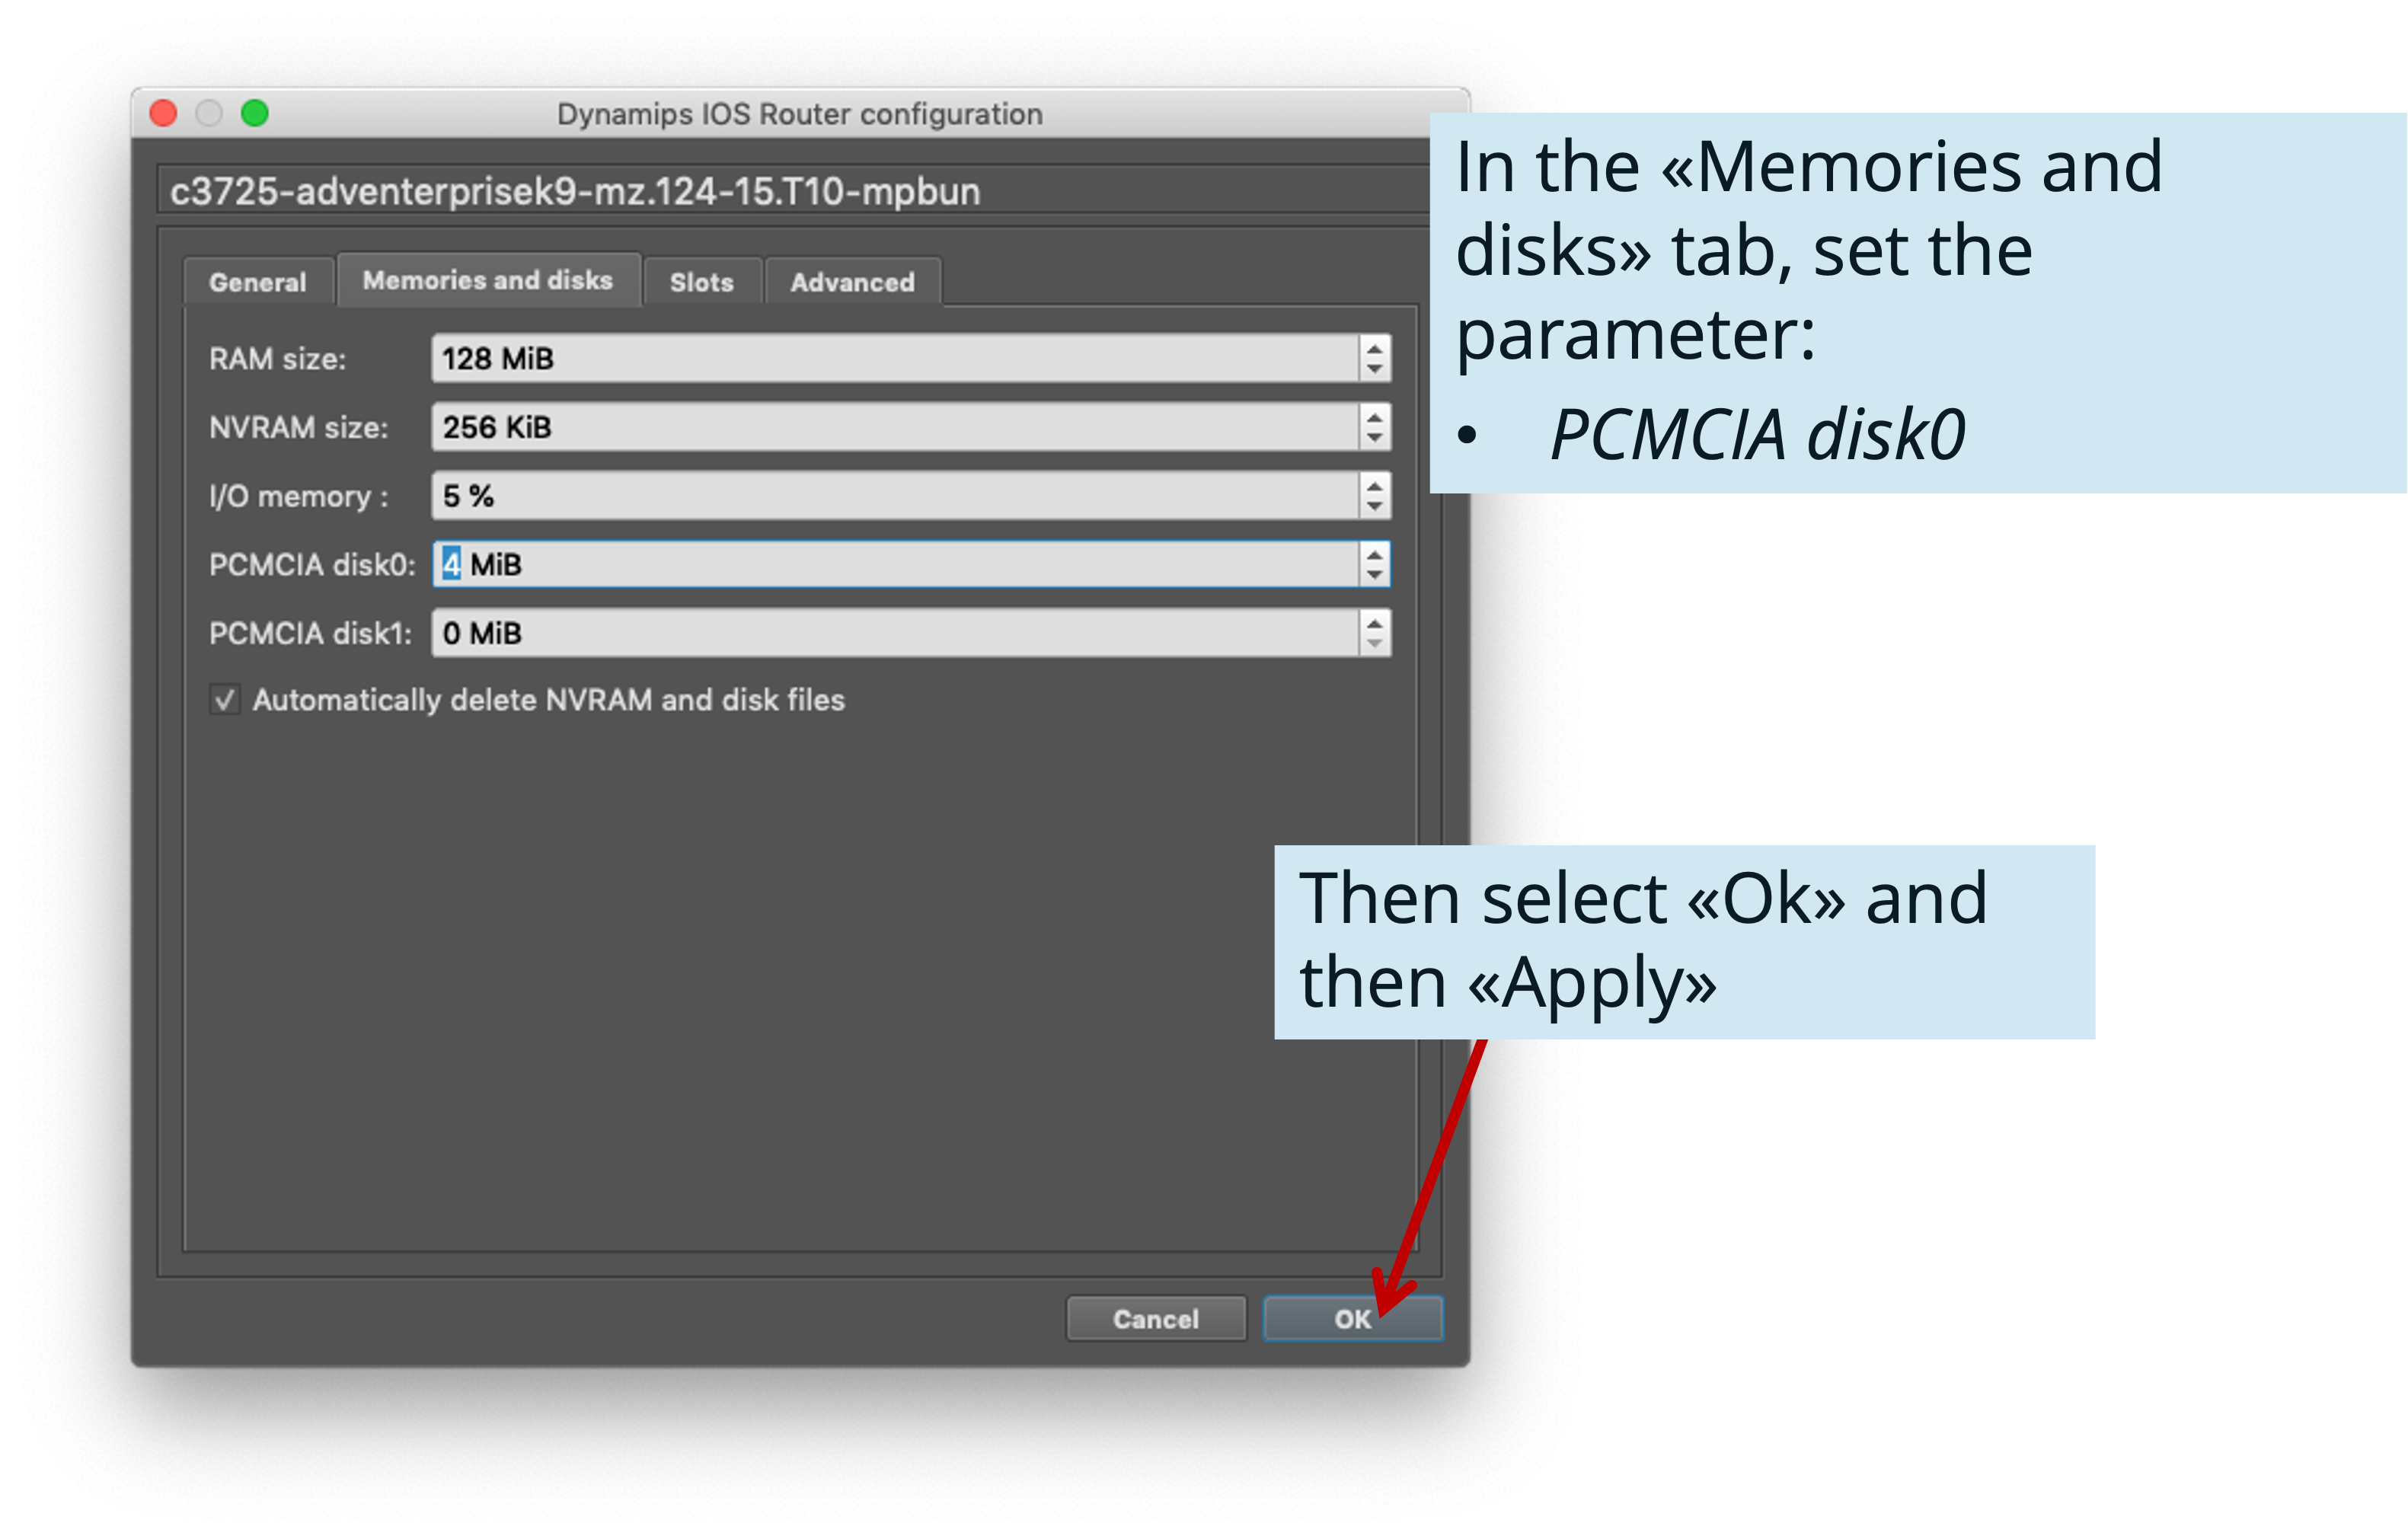
Step 5: Adding a “simple” L2 Switch
If needed, you can add a very simple L2 Switch, based on a Cisco 3725 router with an Ethernet Switch module.

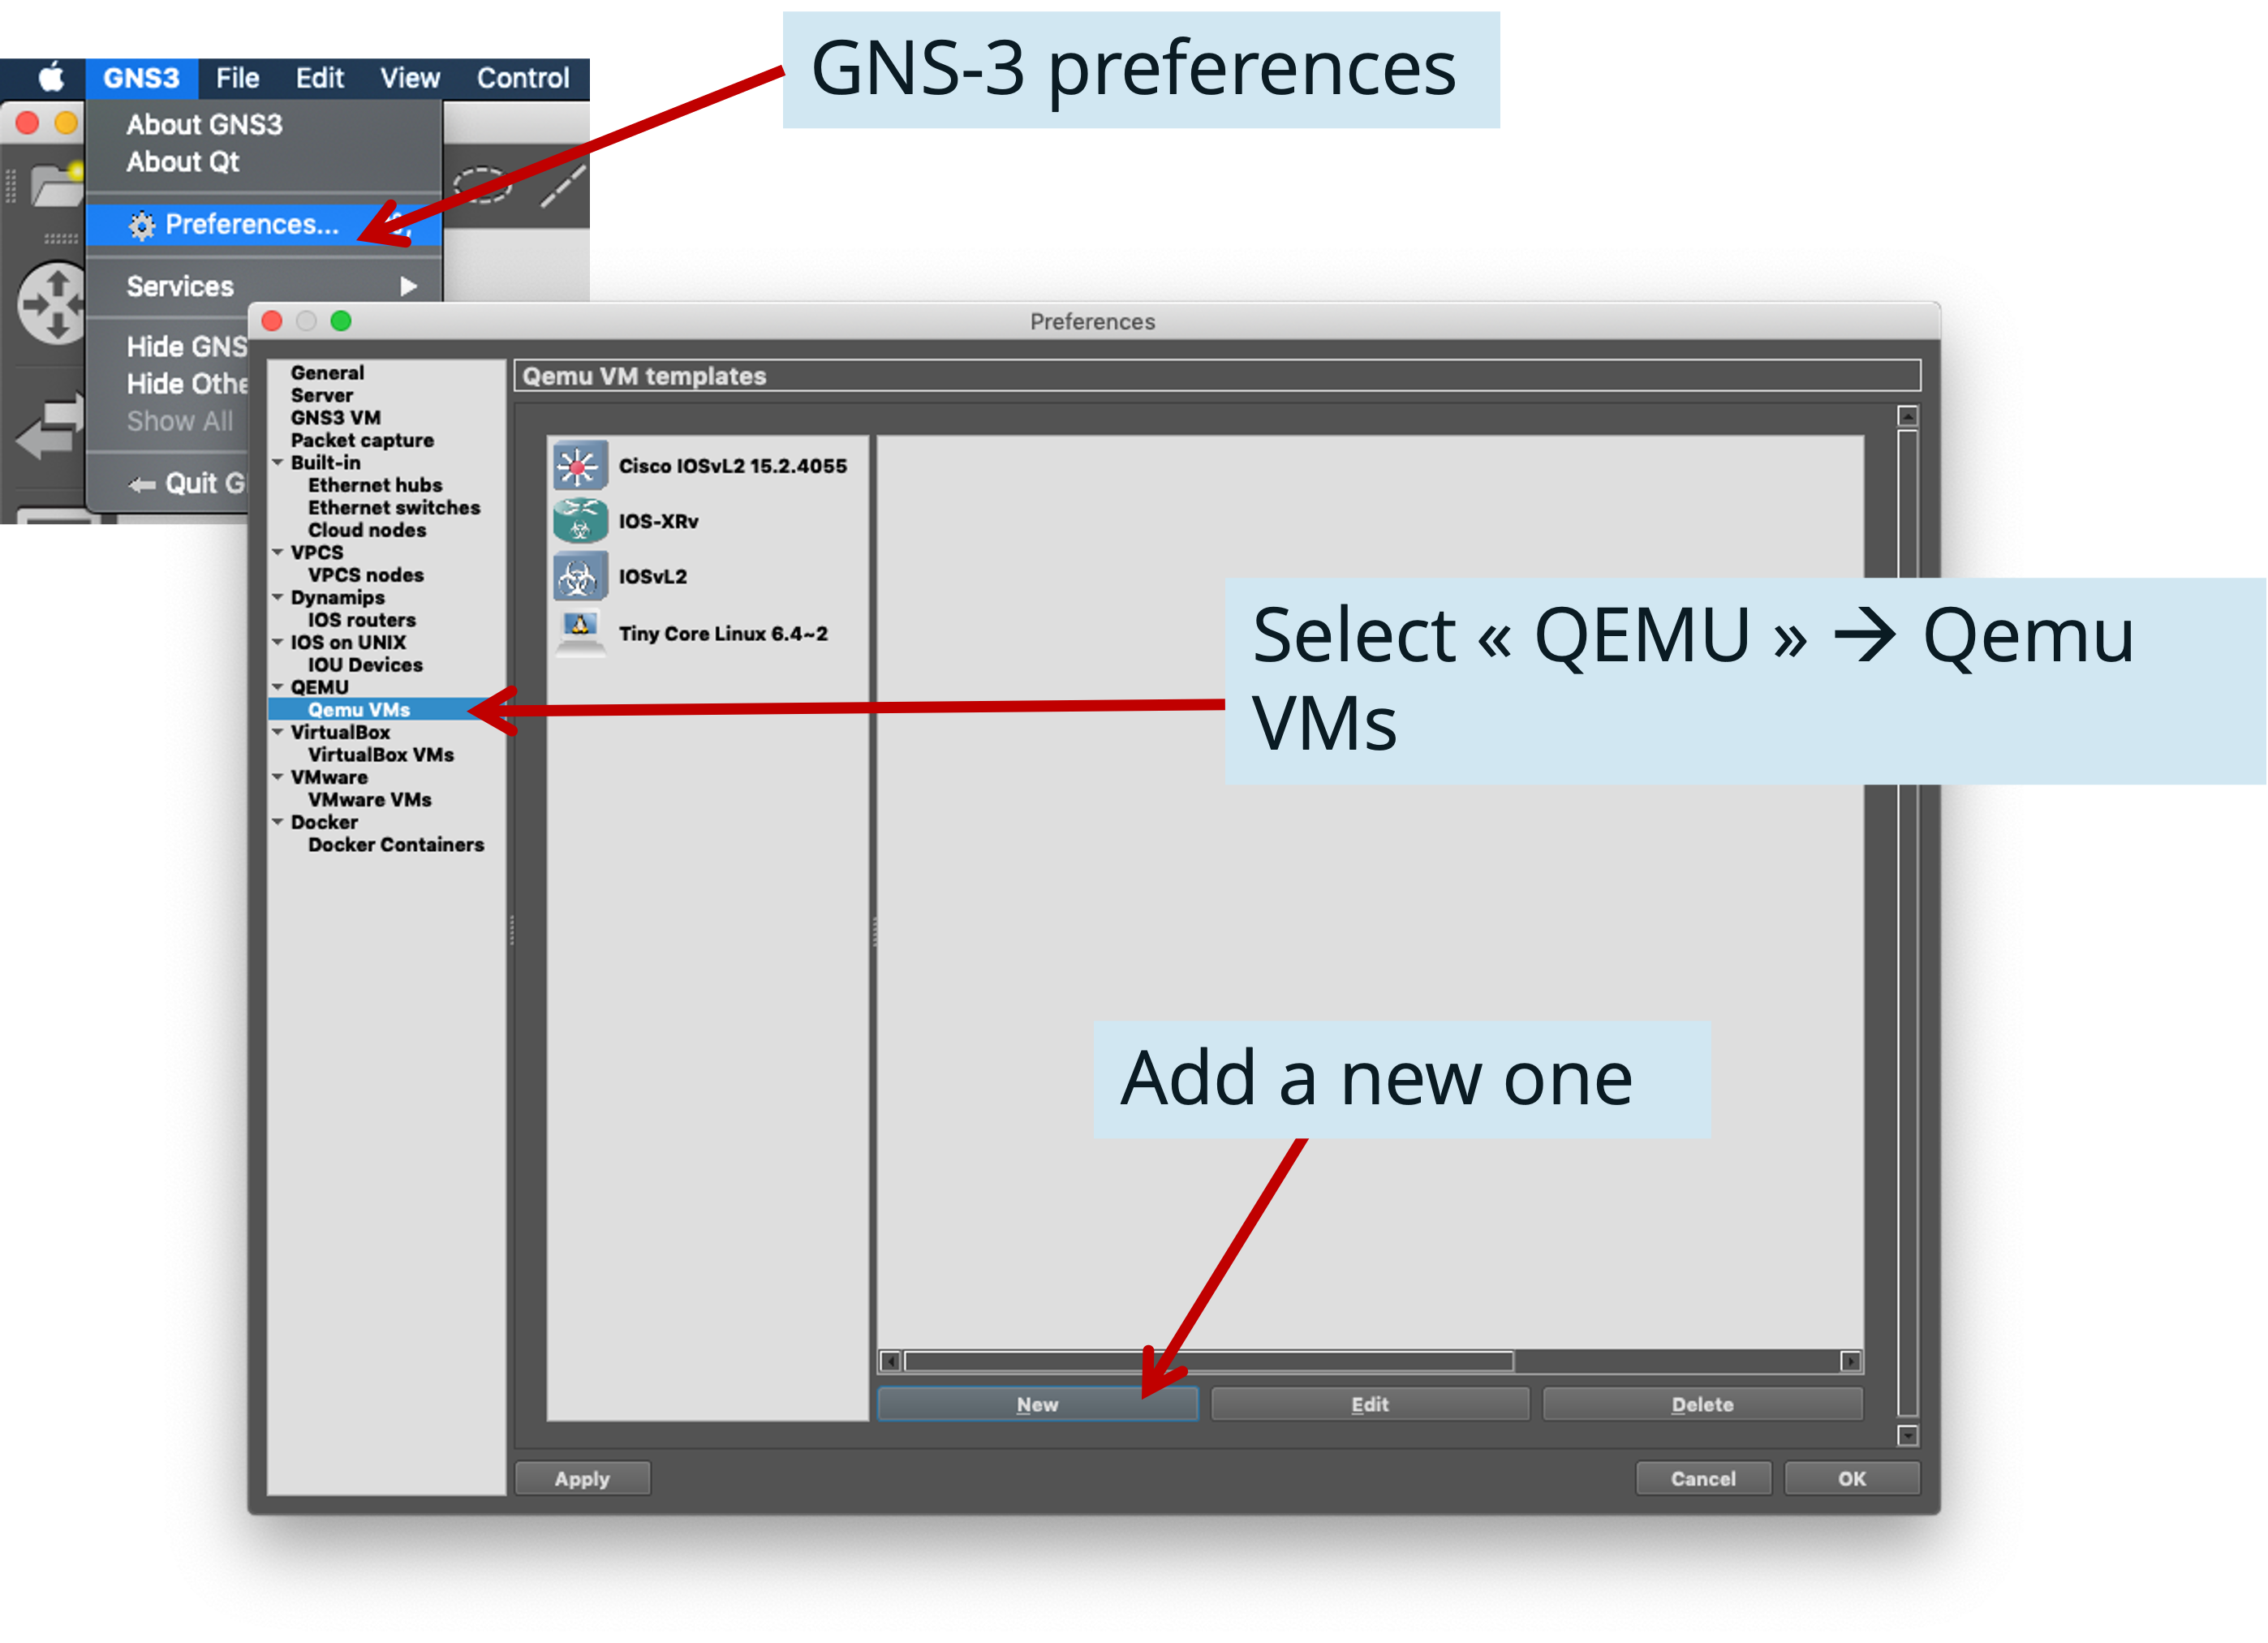
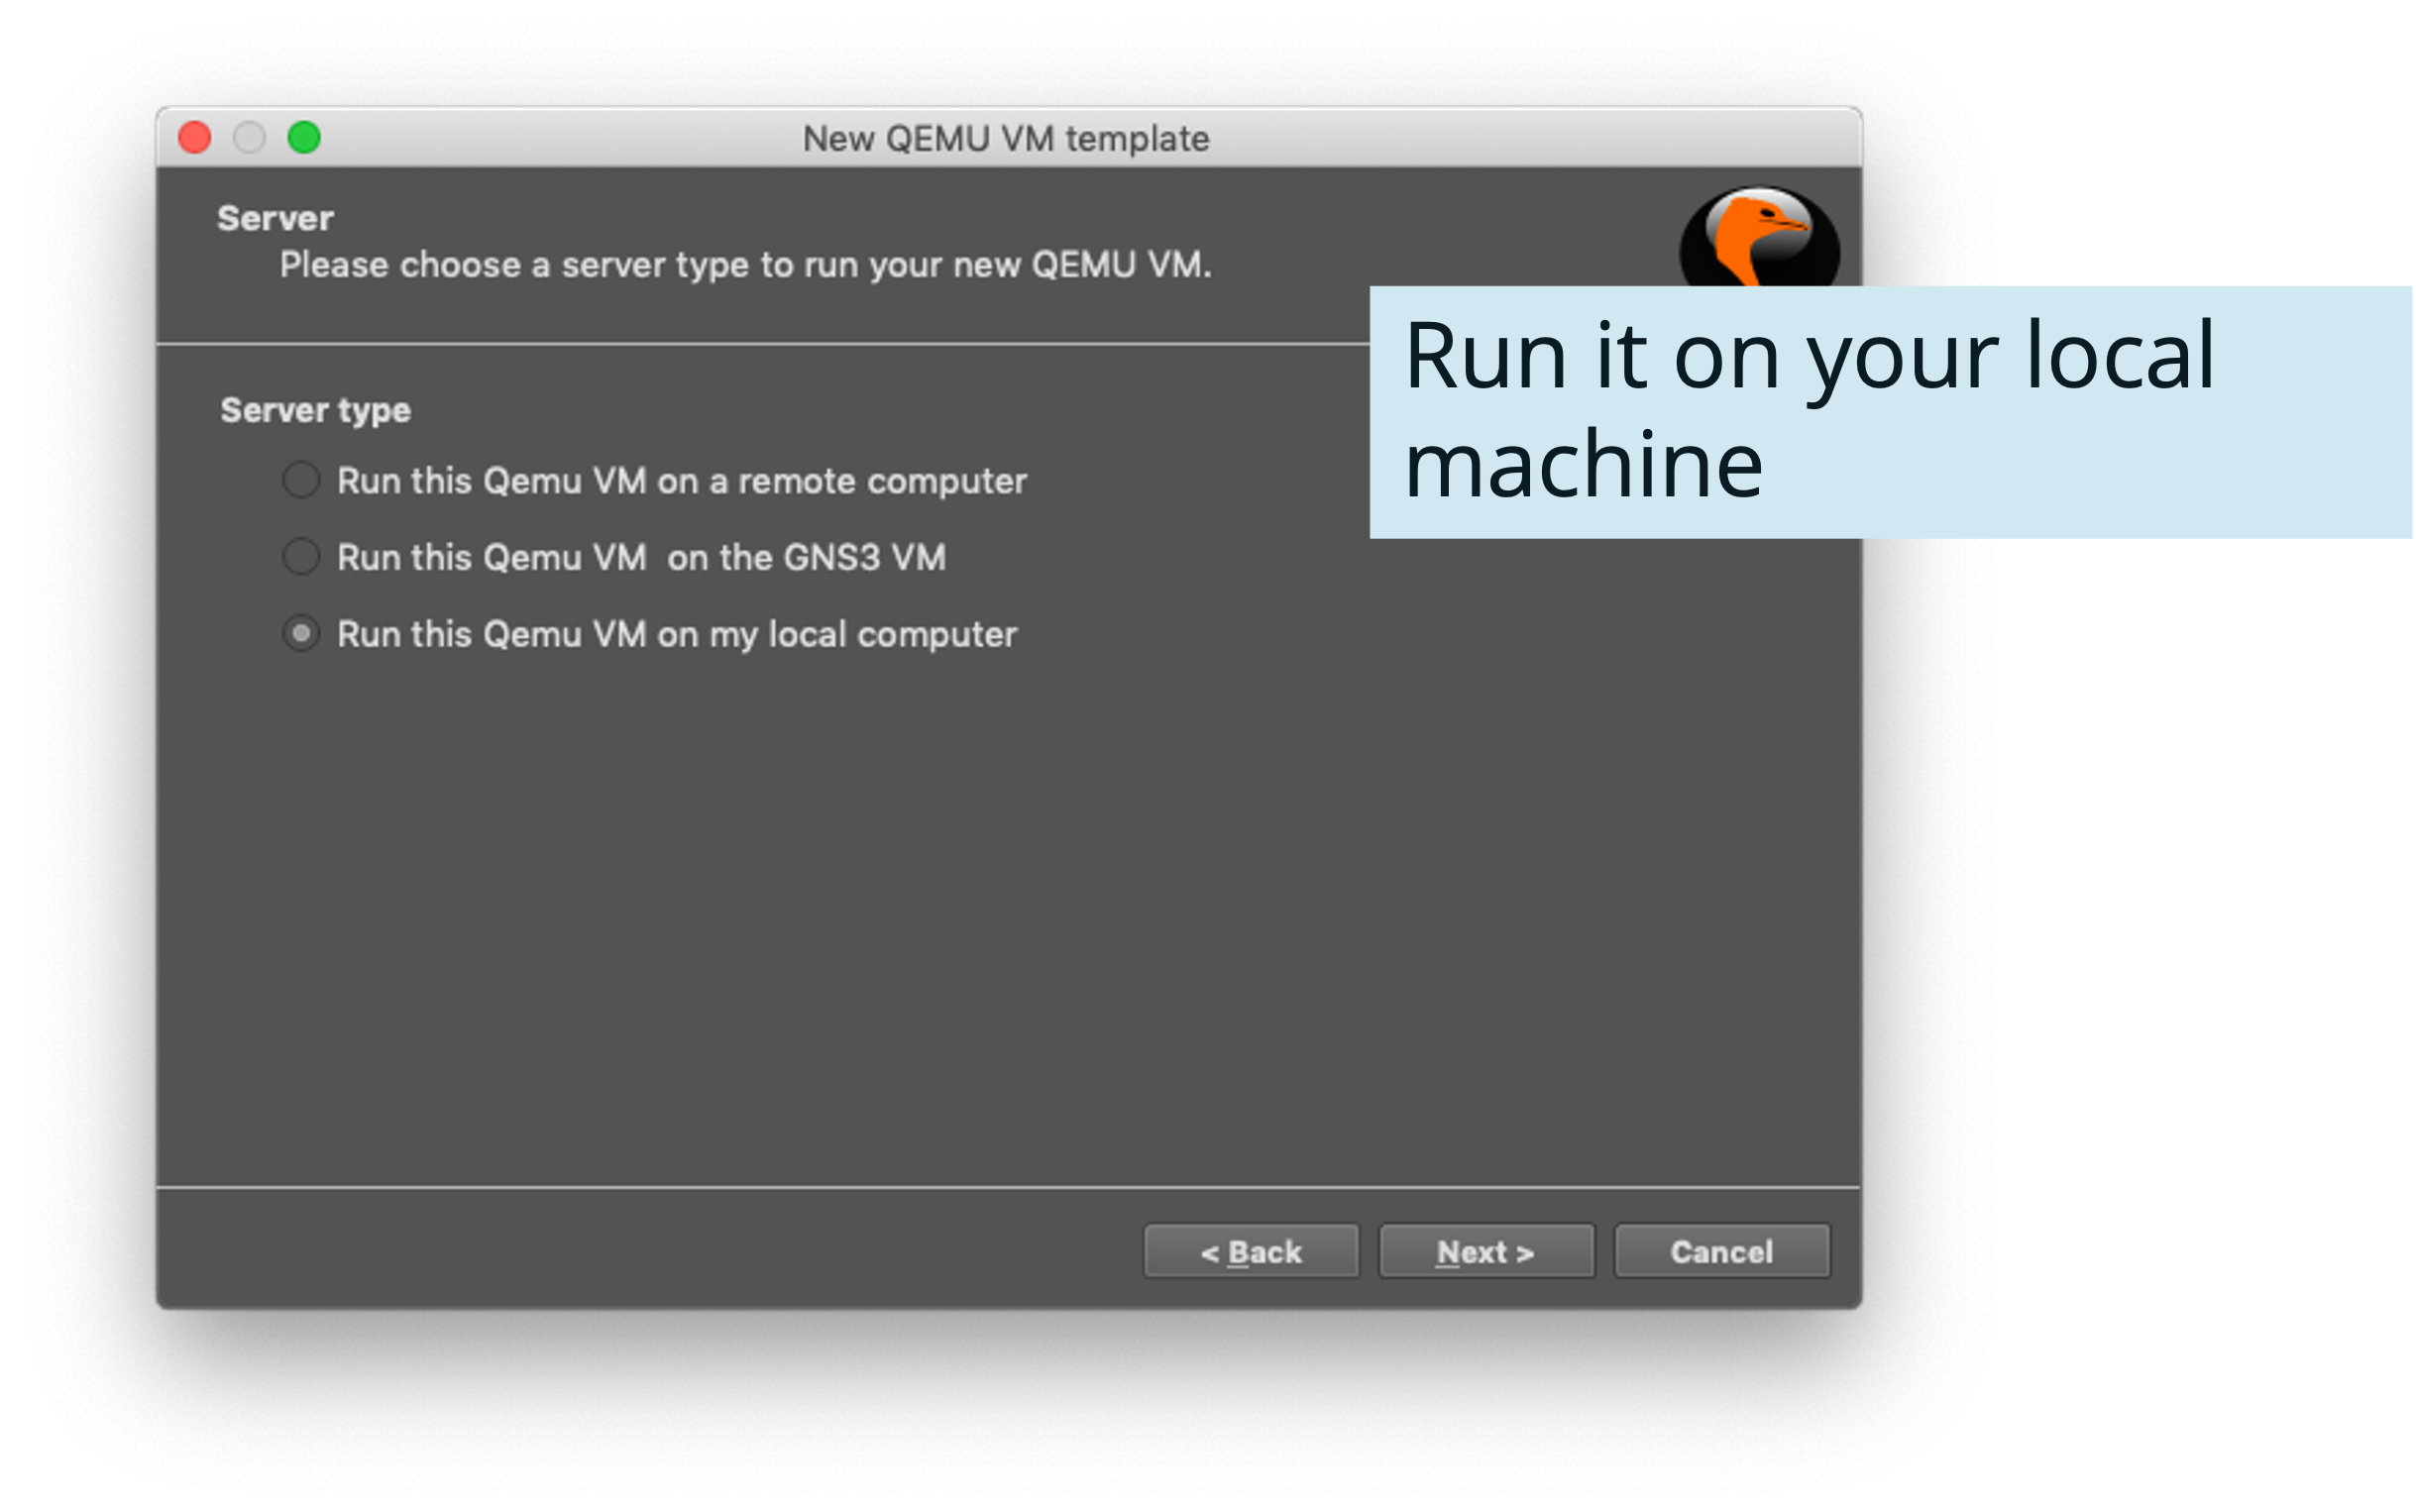
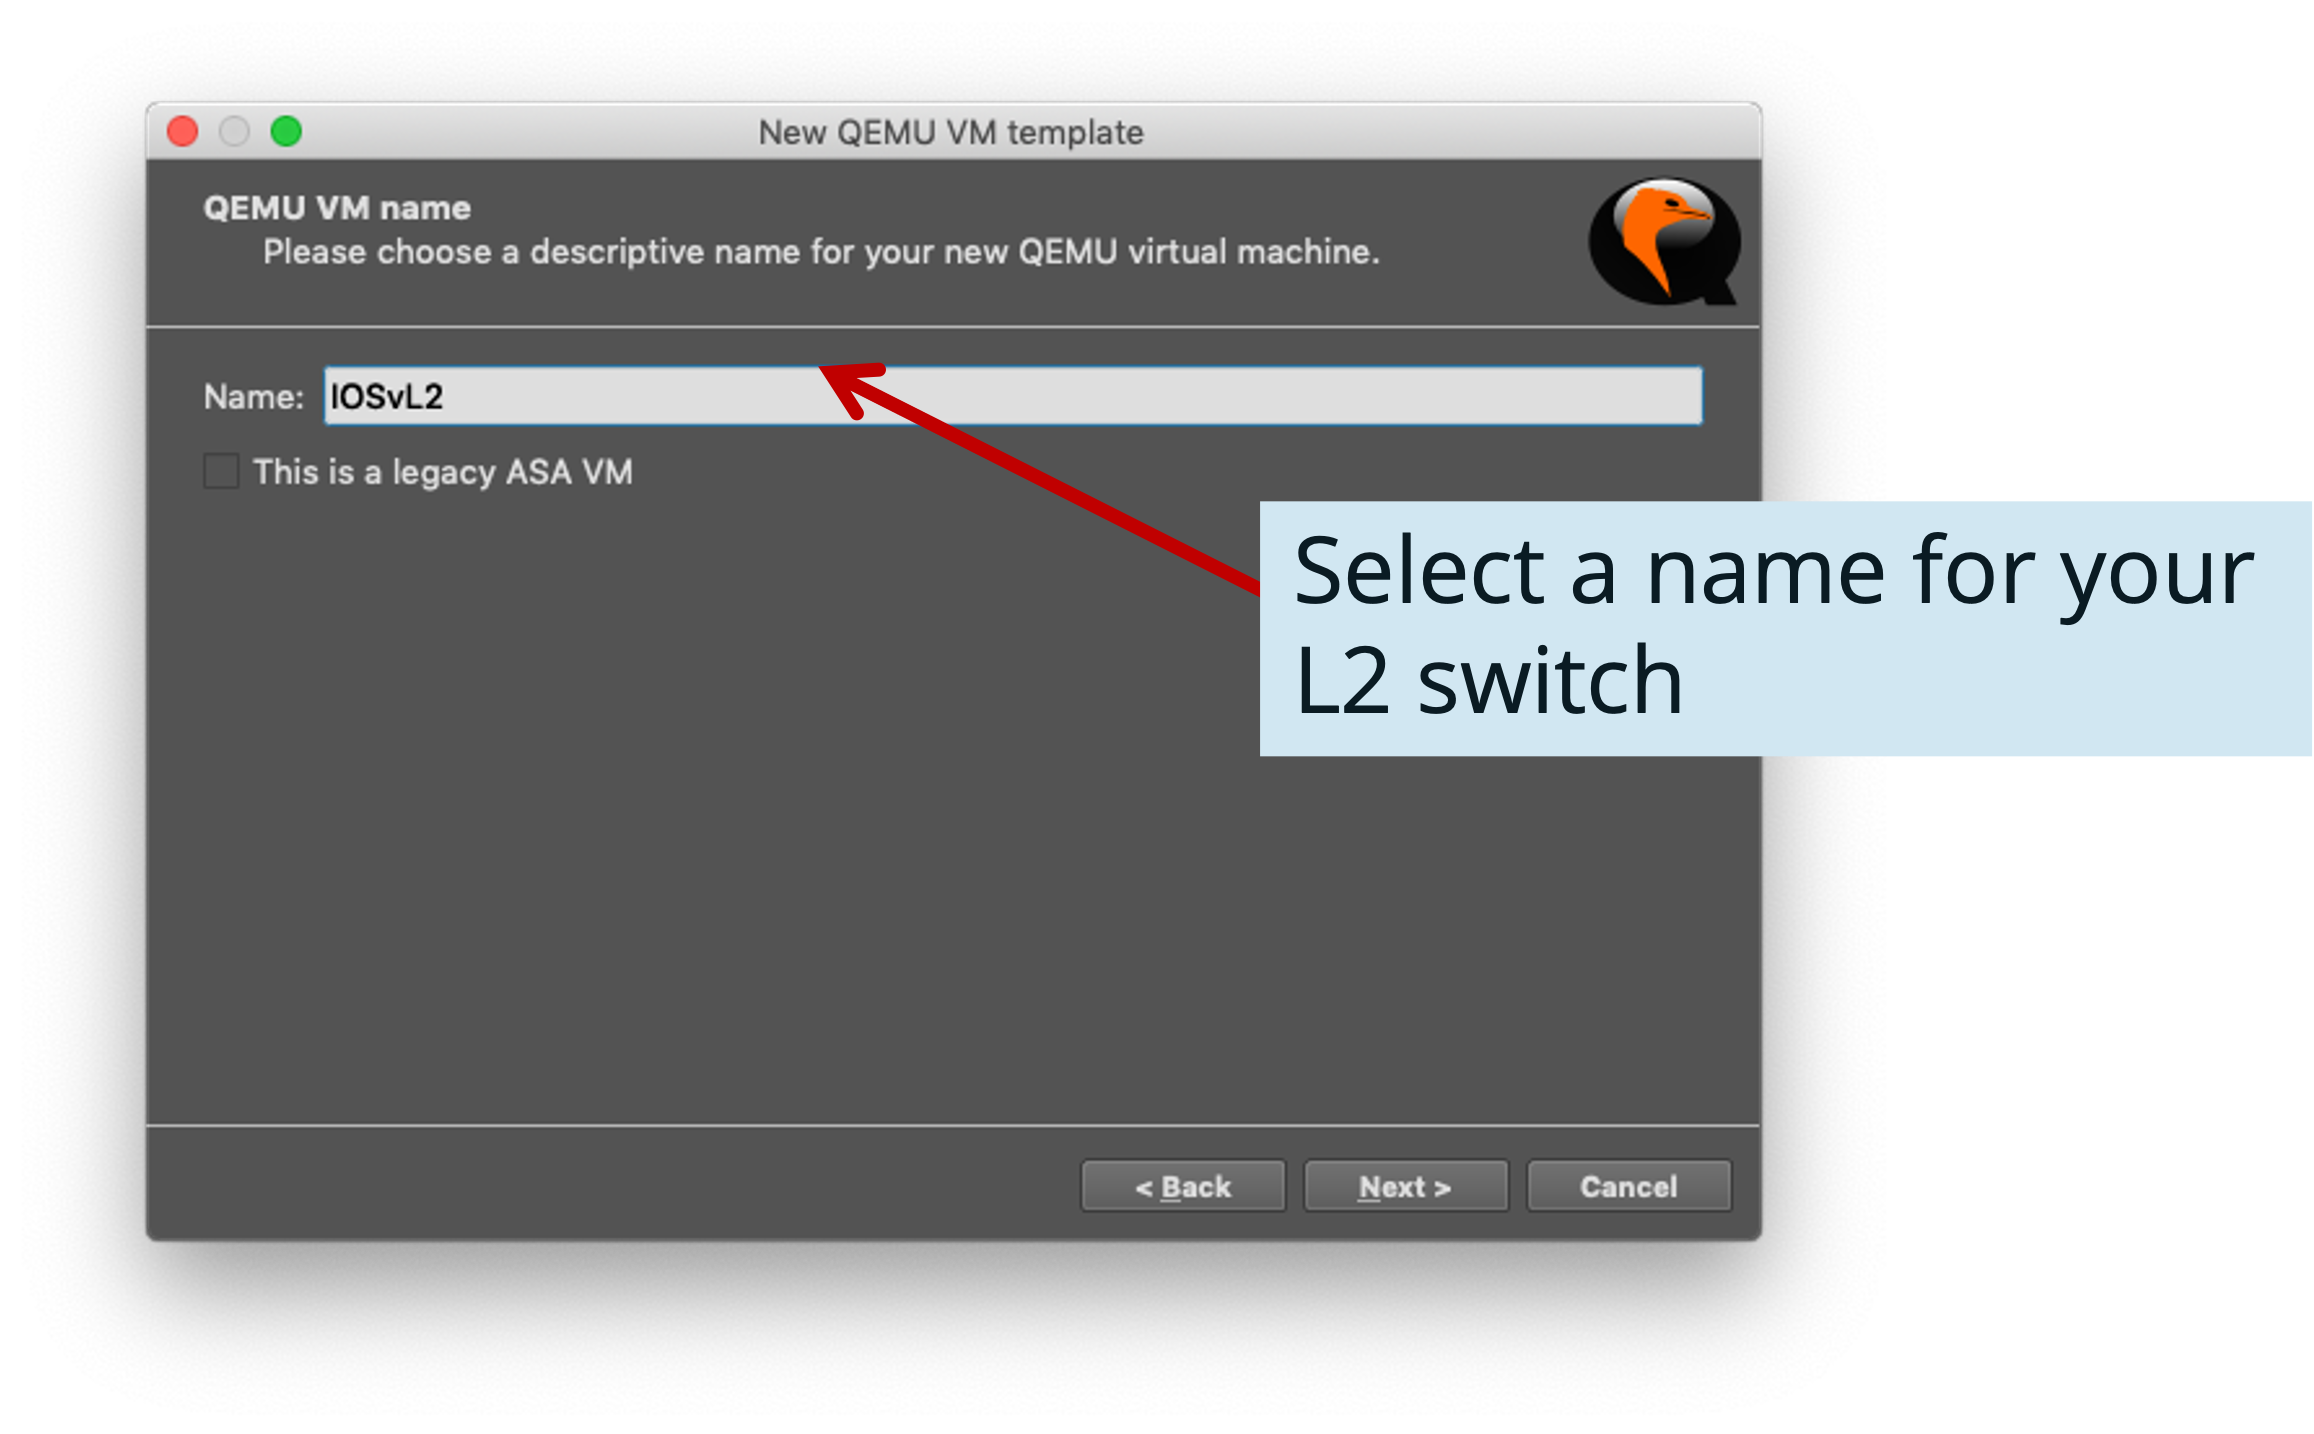
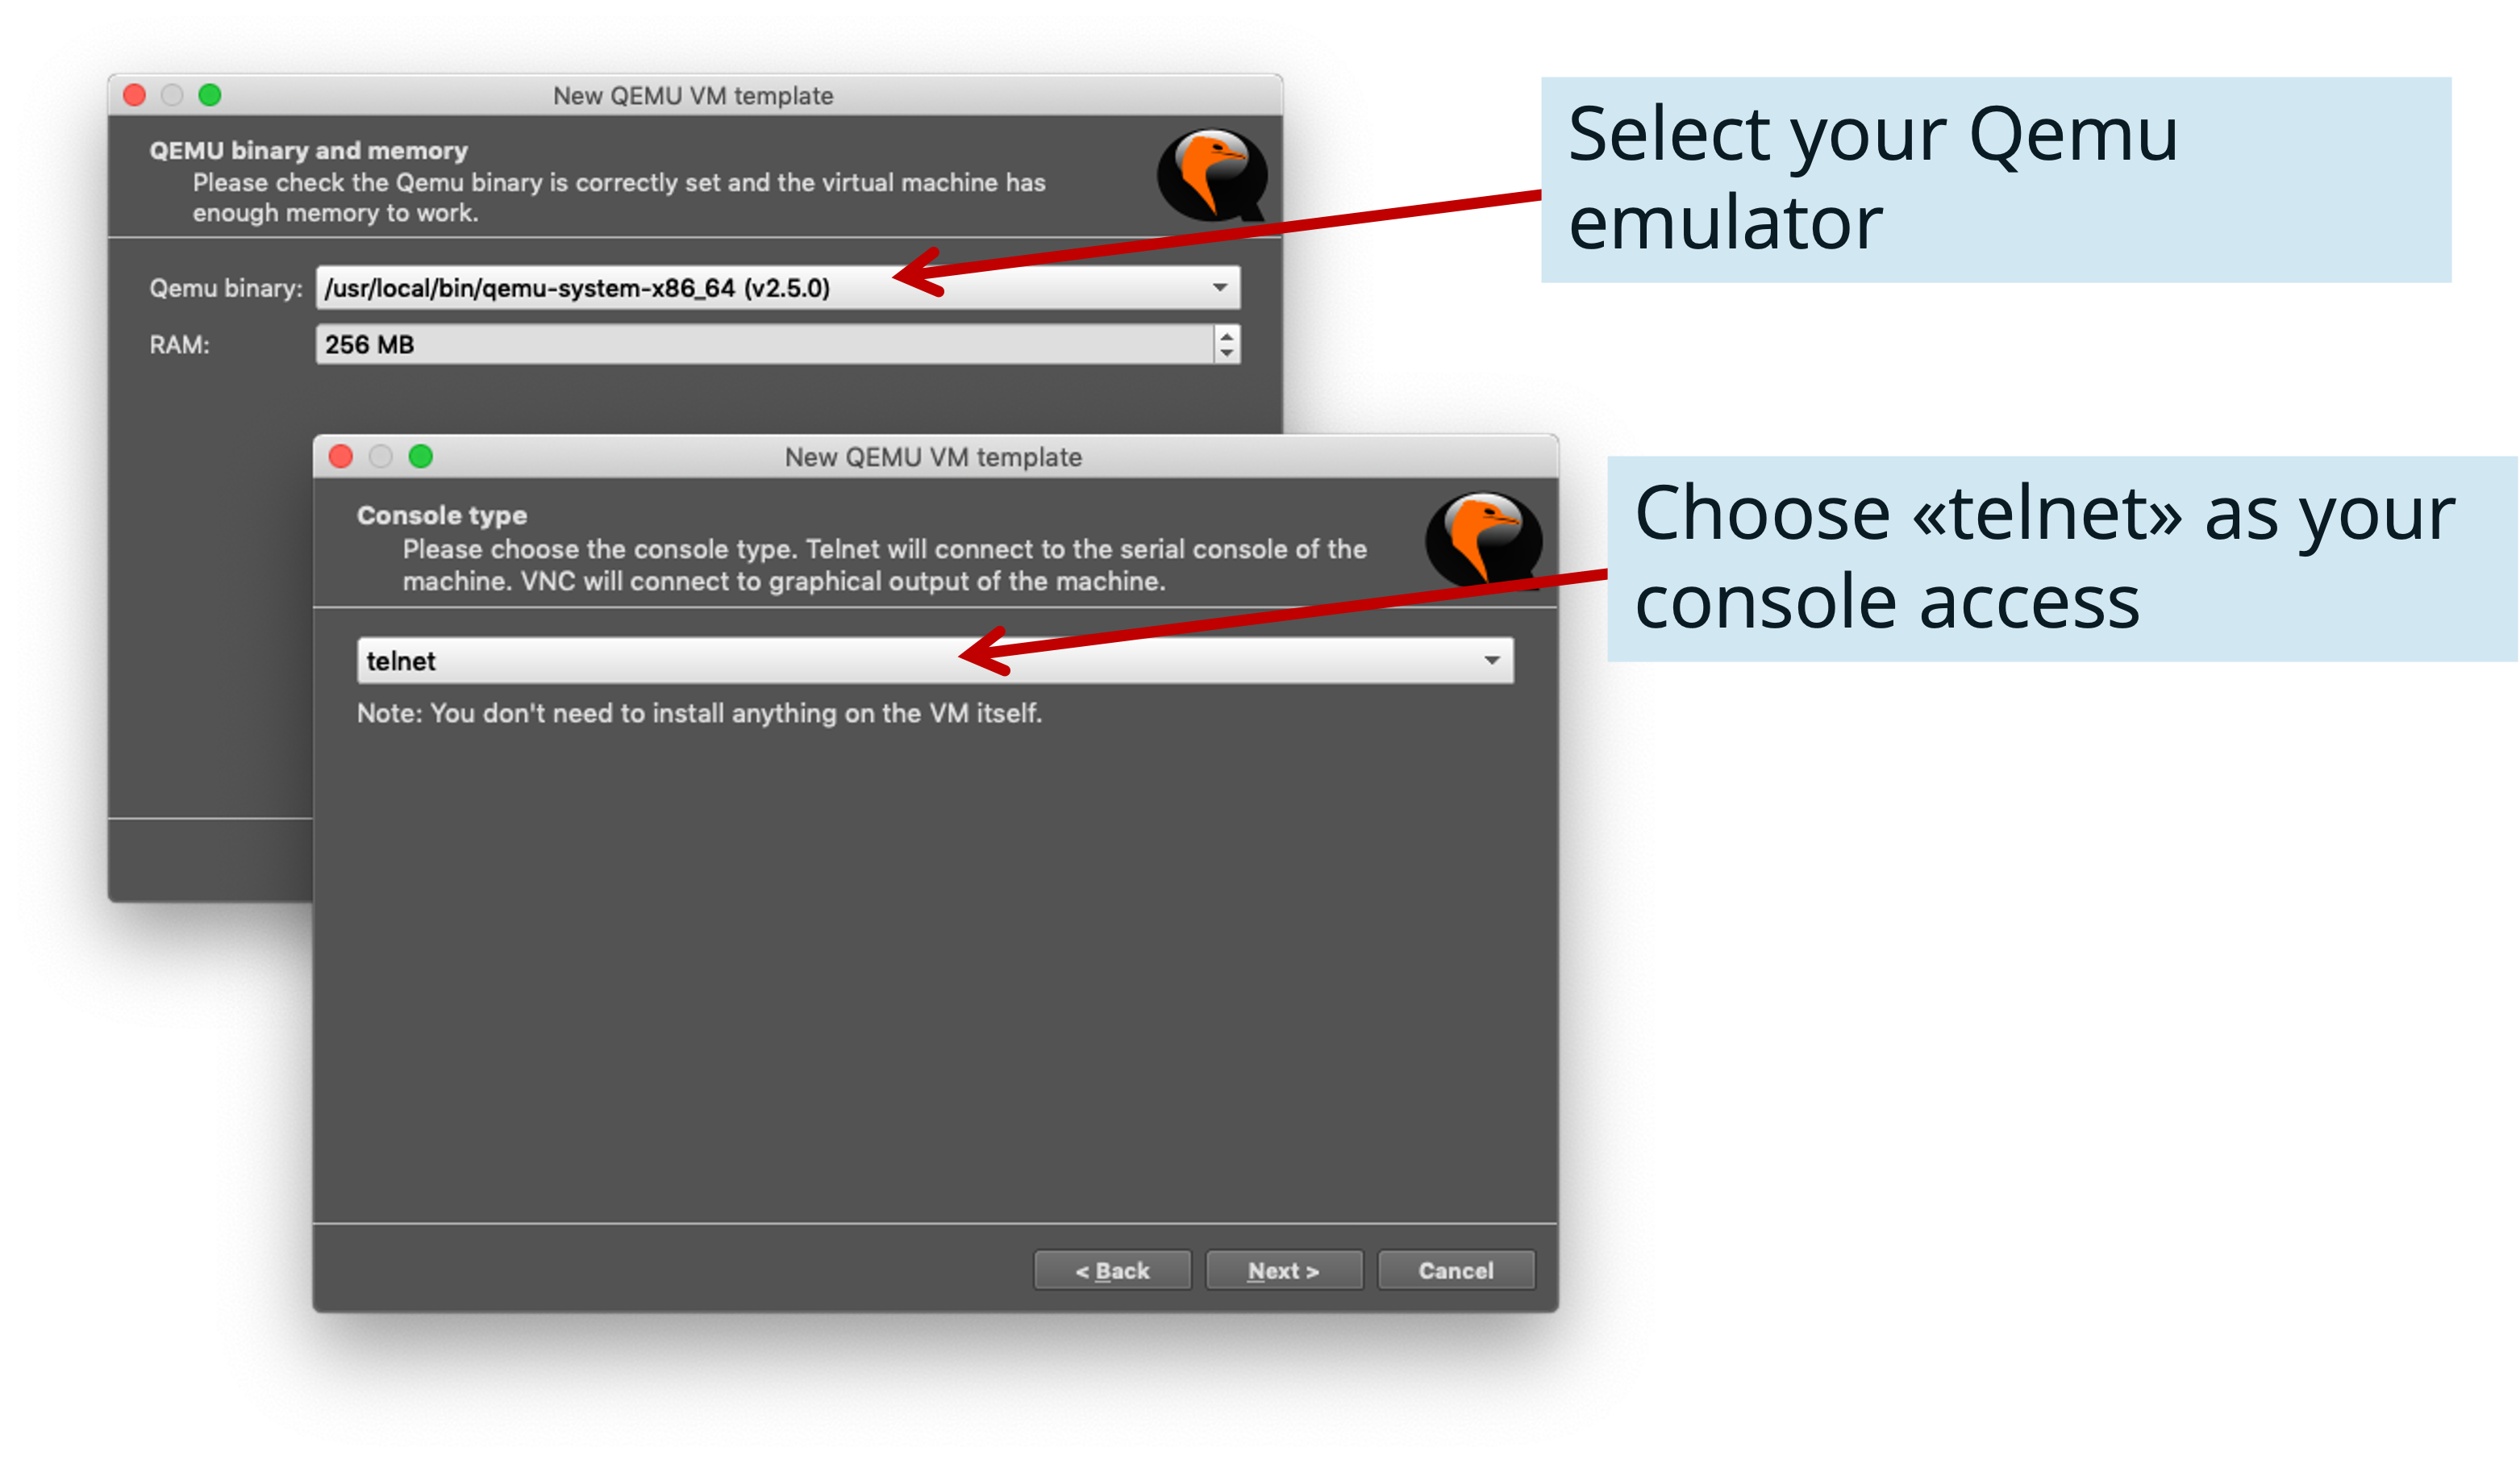
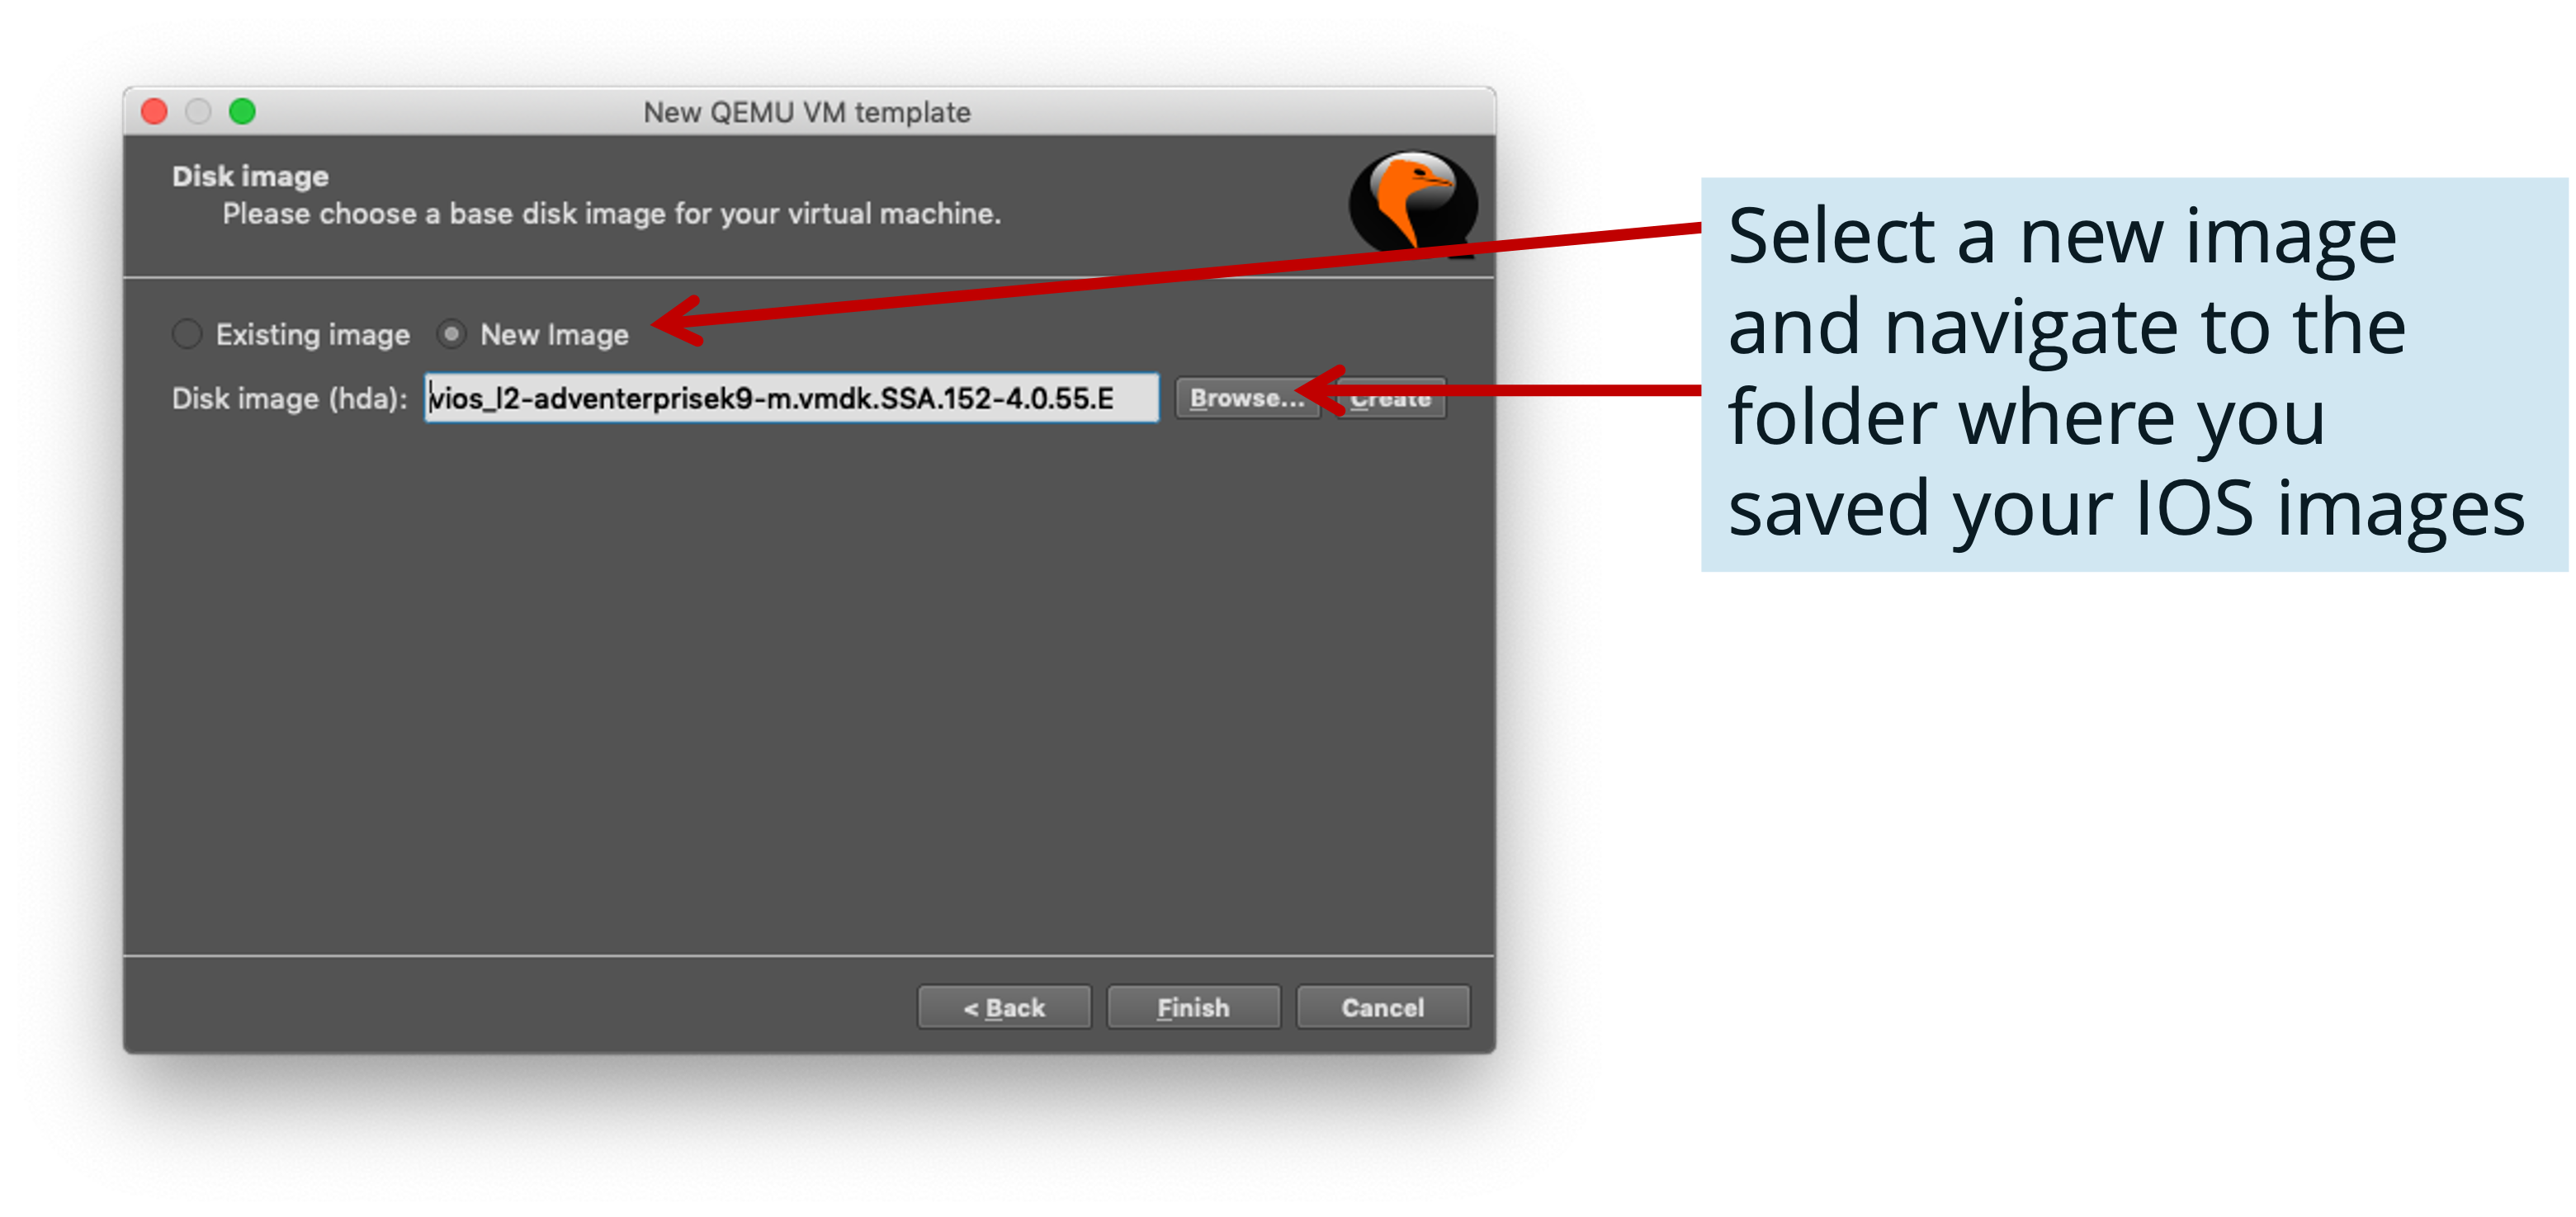
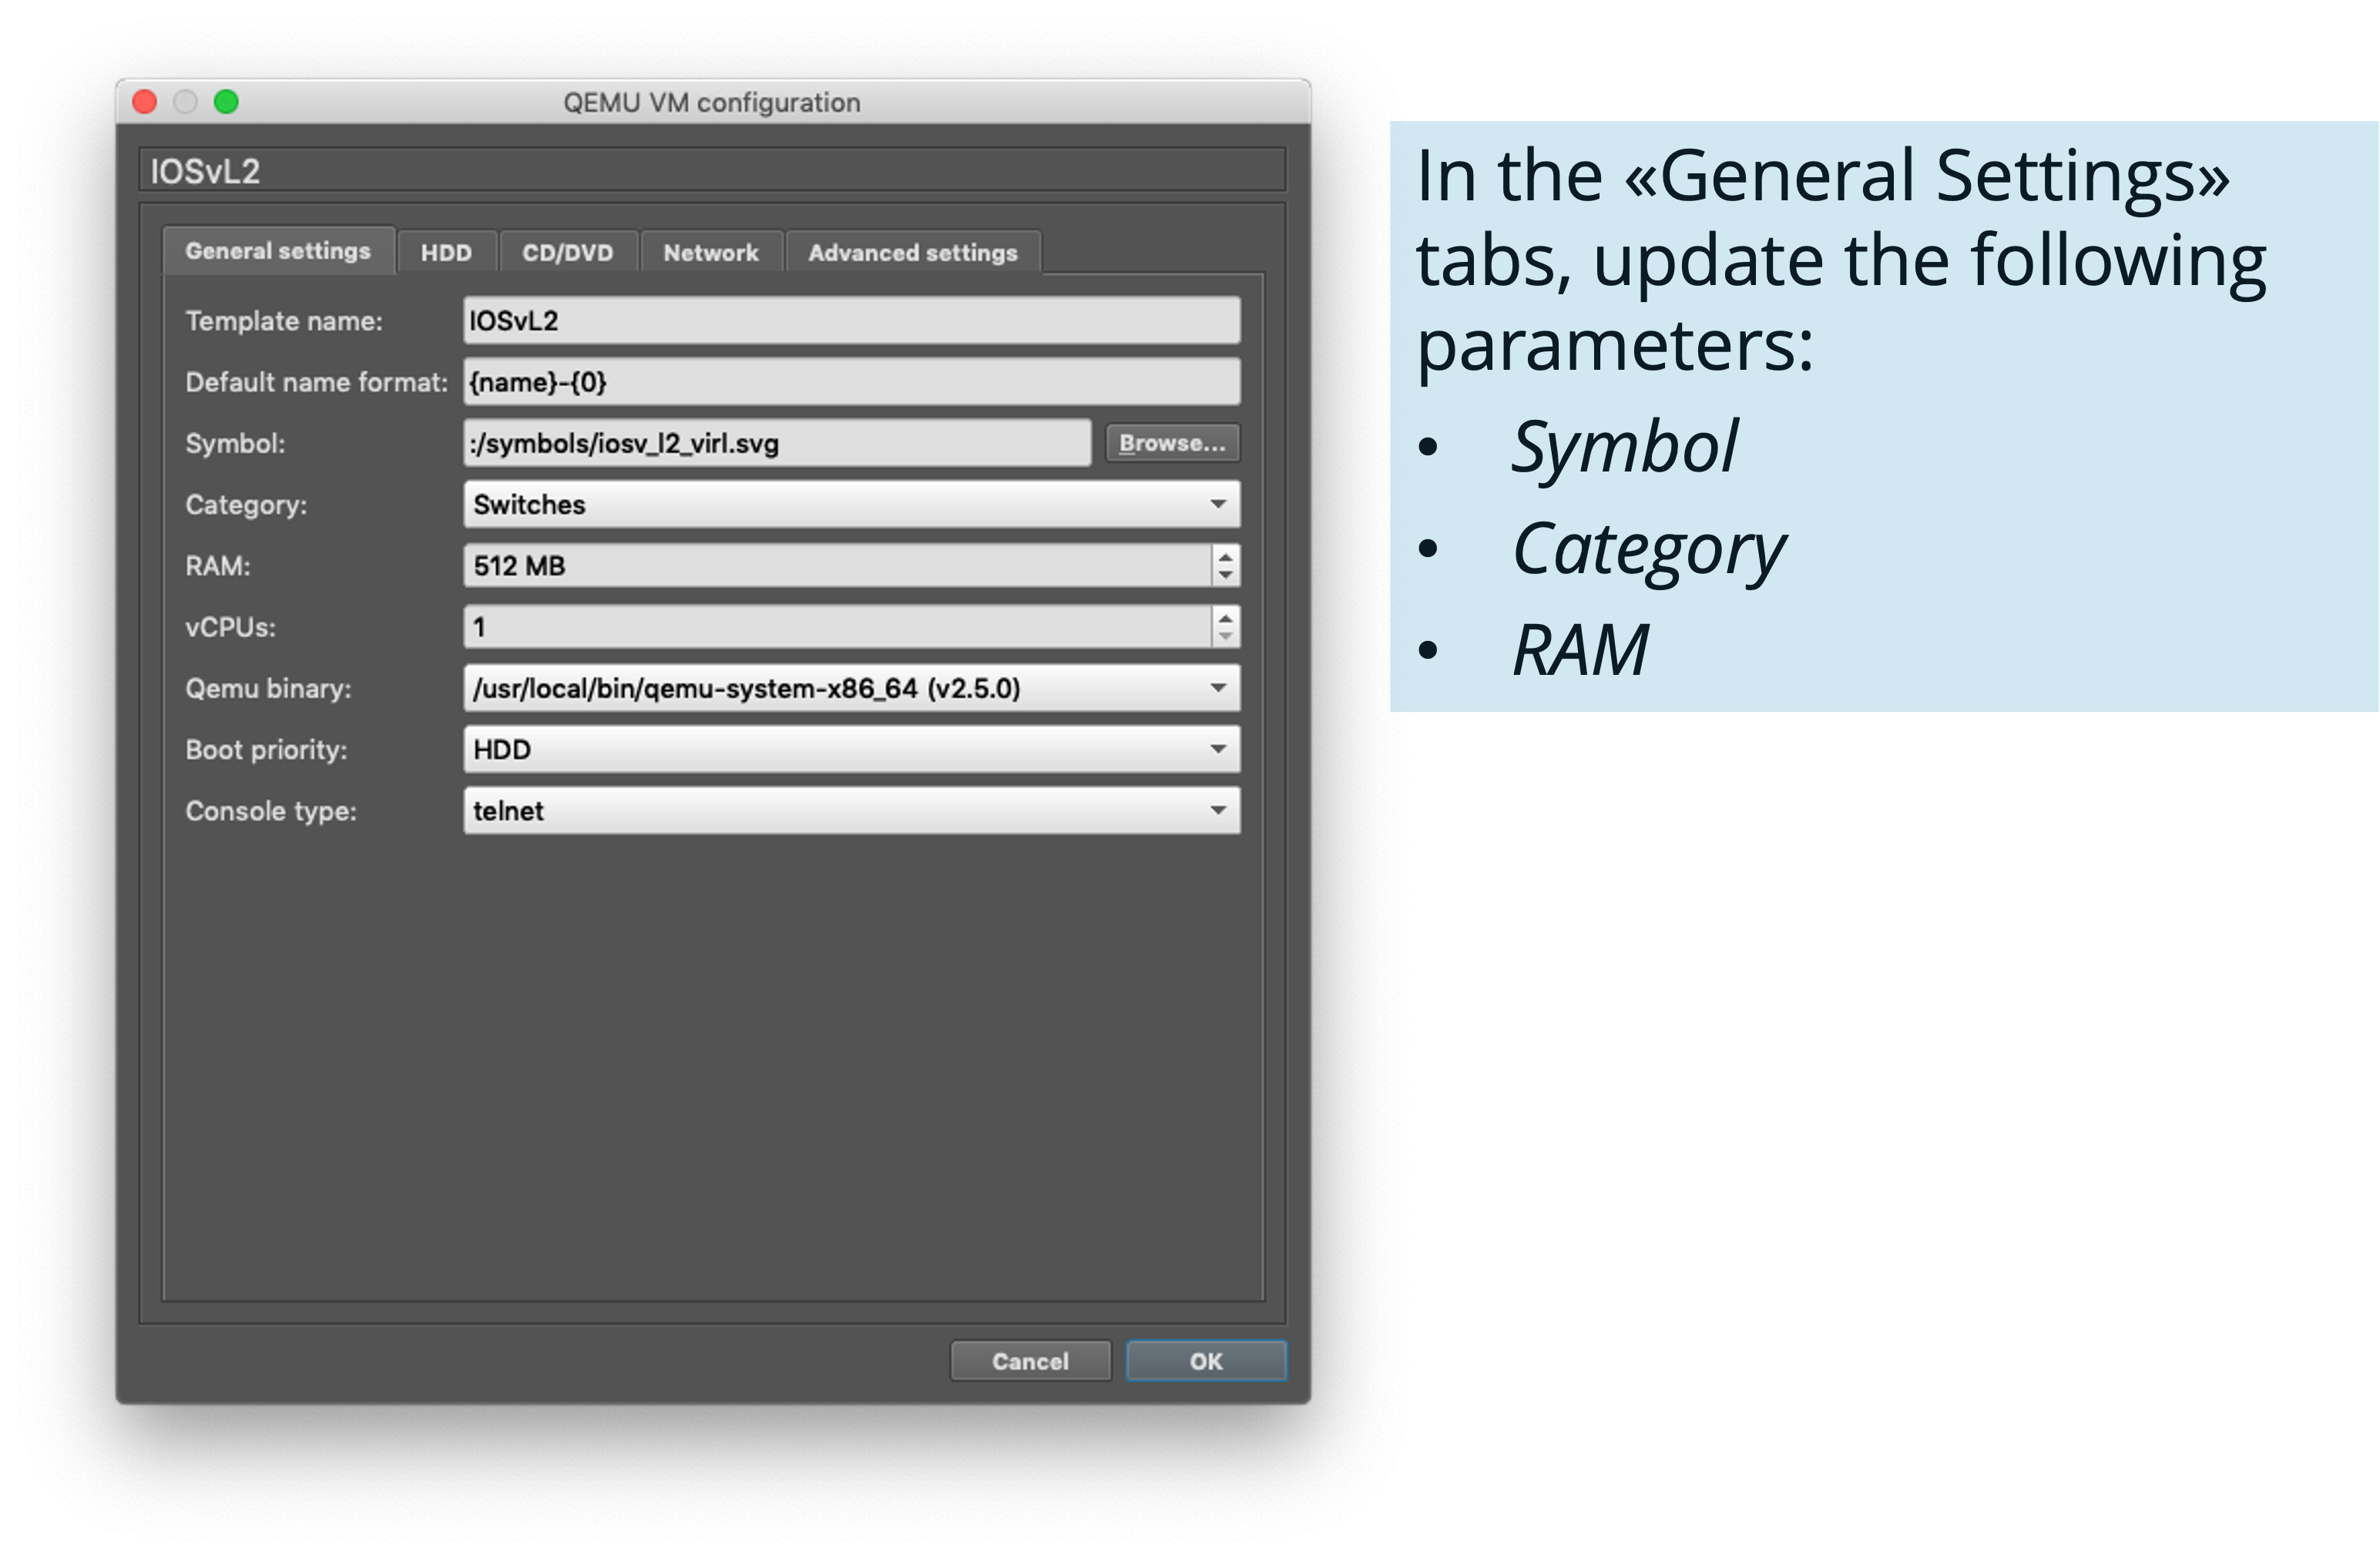
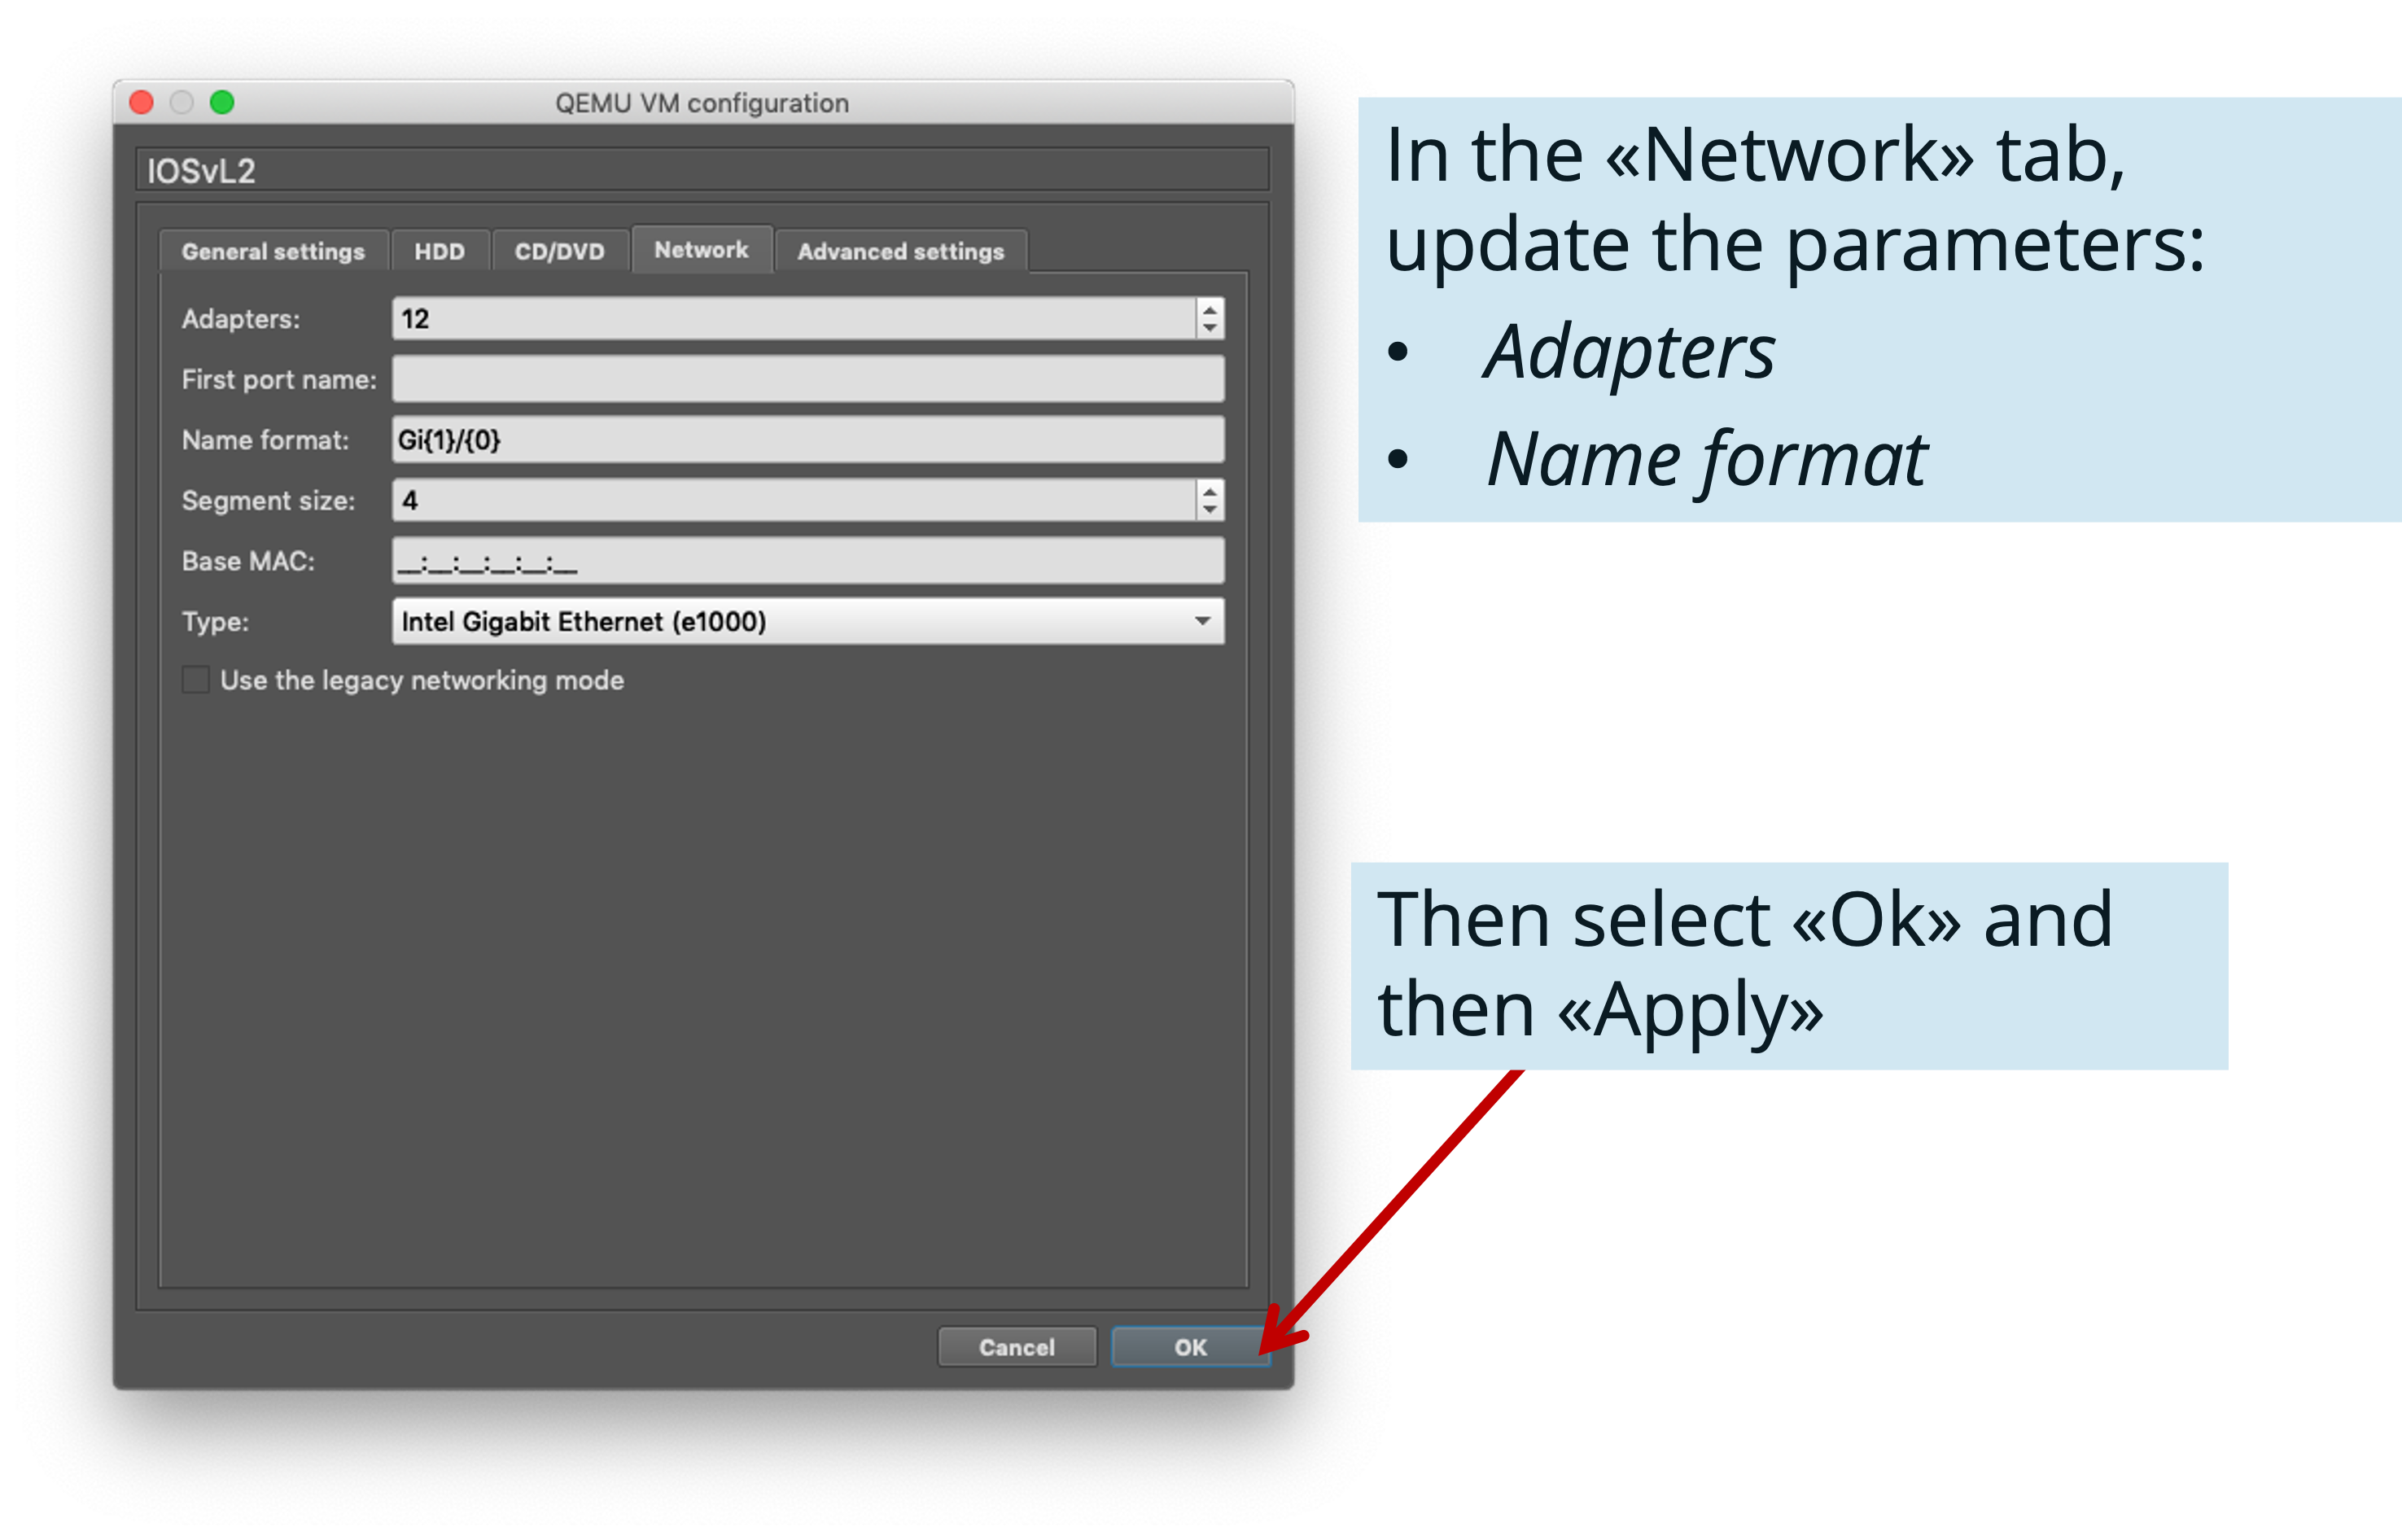
Step 6: Adding a “complete” L2 Switch
If needed, you can add a more complete L2 Switch, based on a Cisco IOU (IOS on Unix). This will run only on the machine where QEMU is installed (mainly Linux).

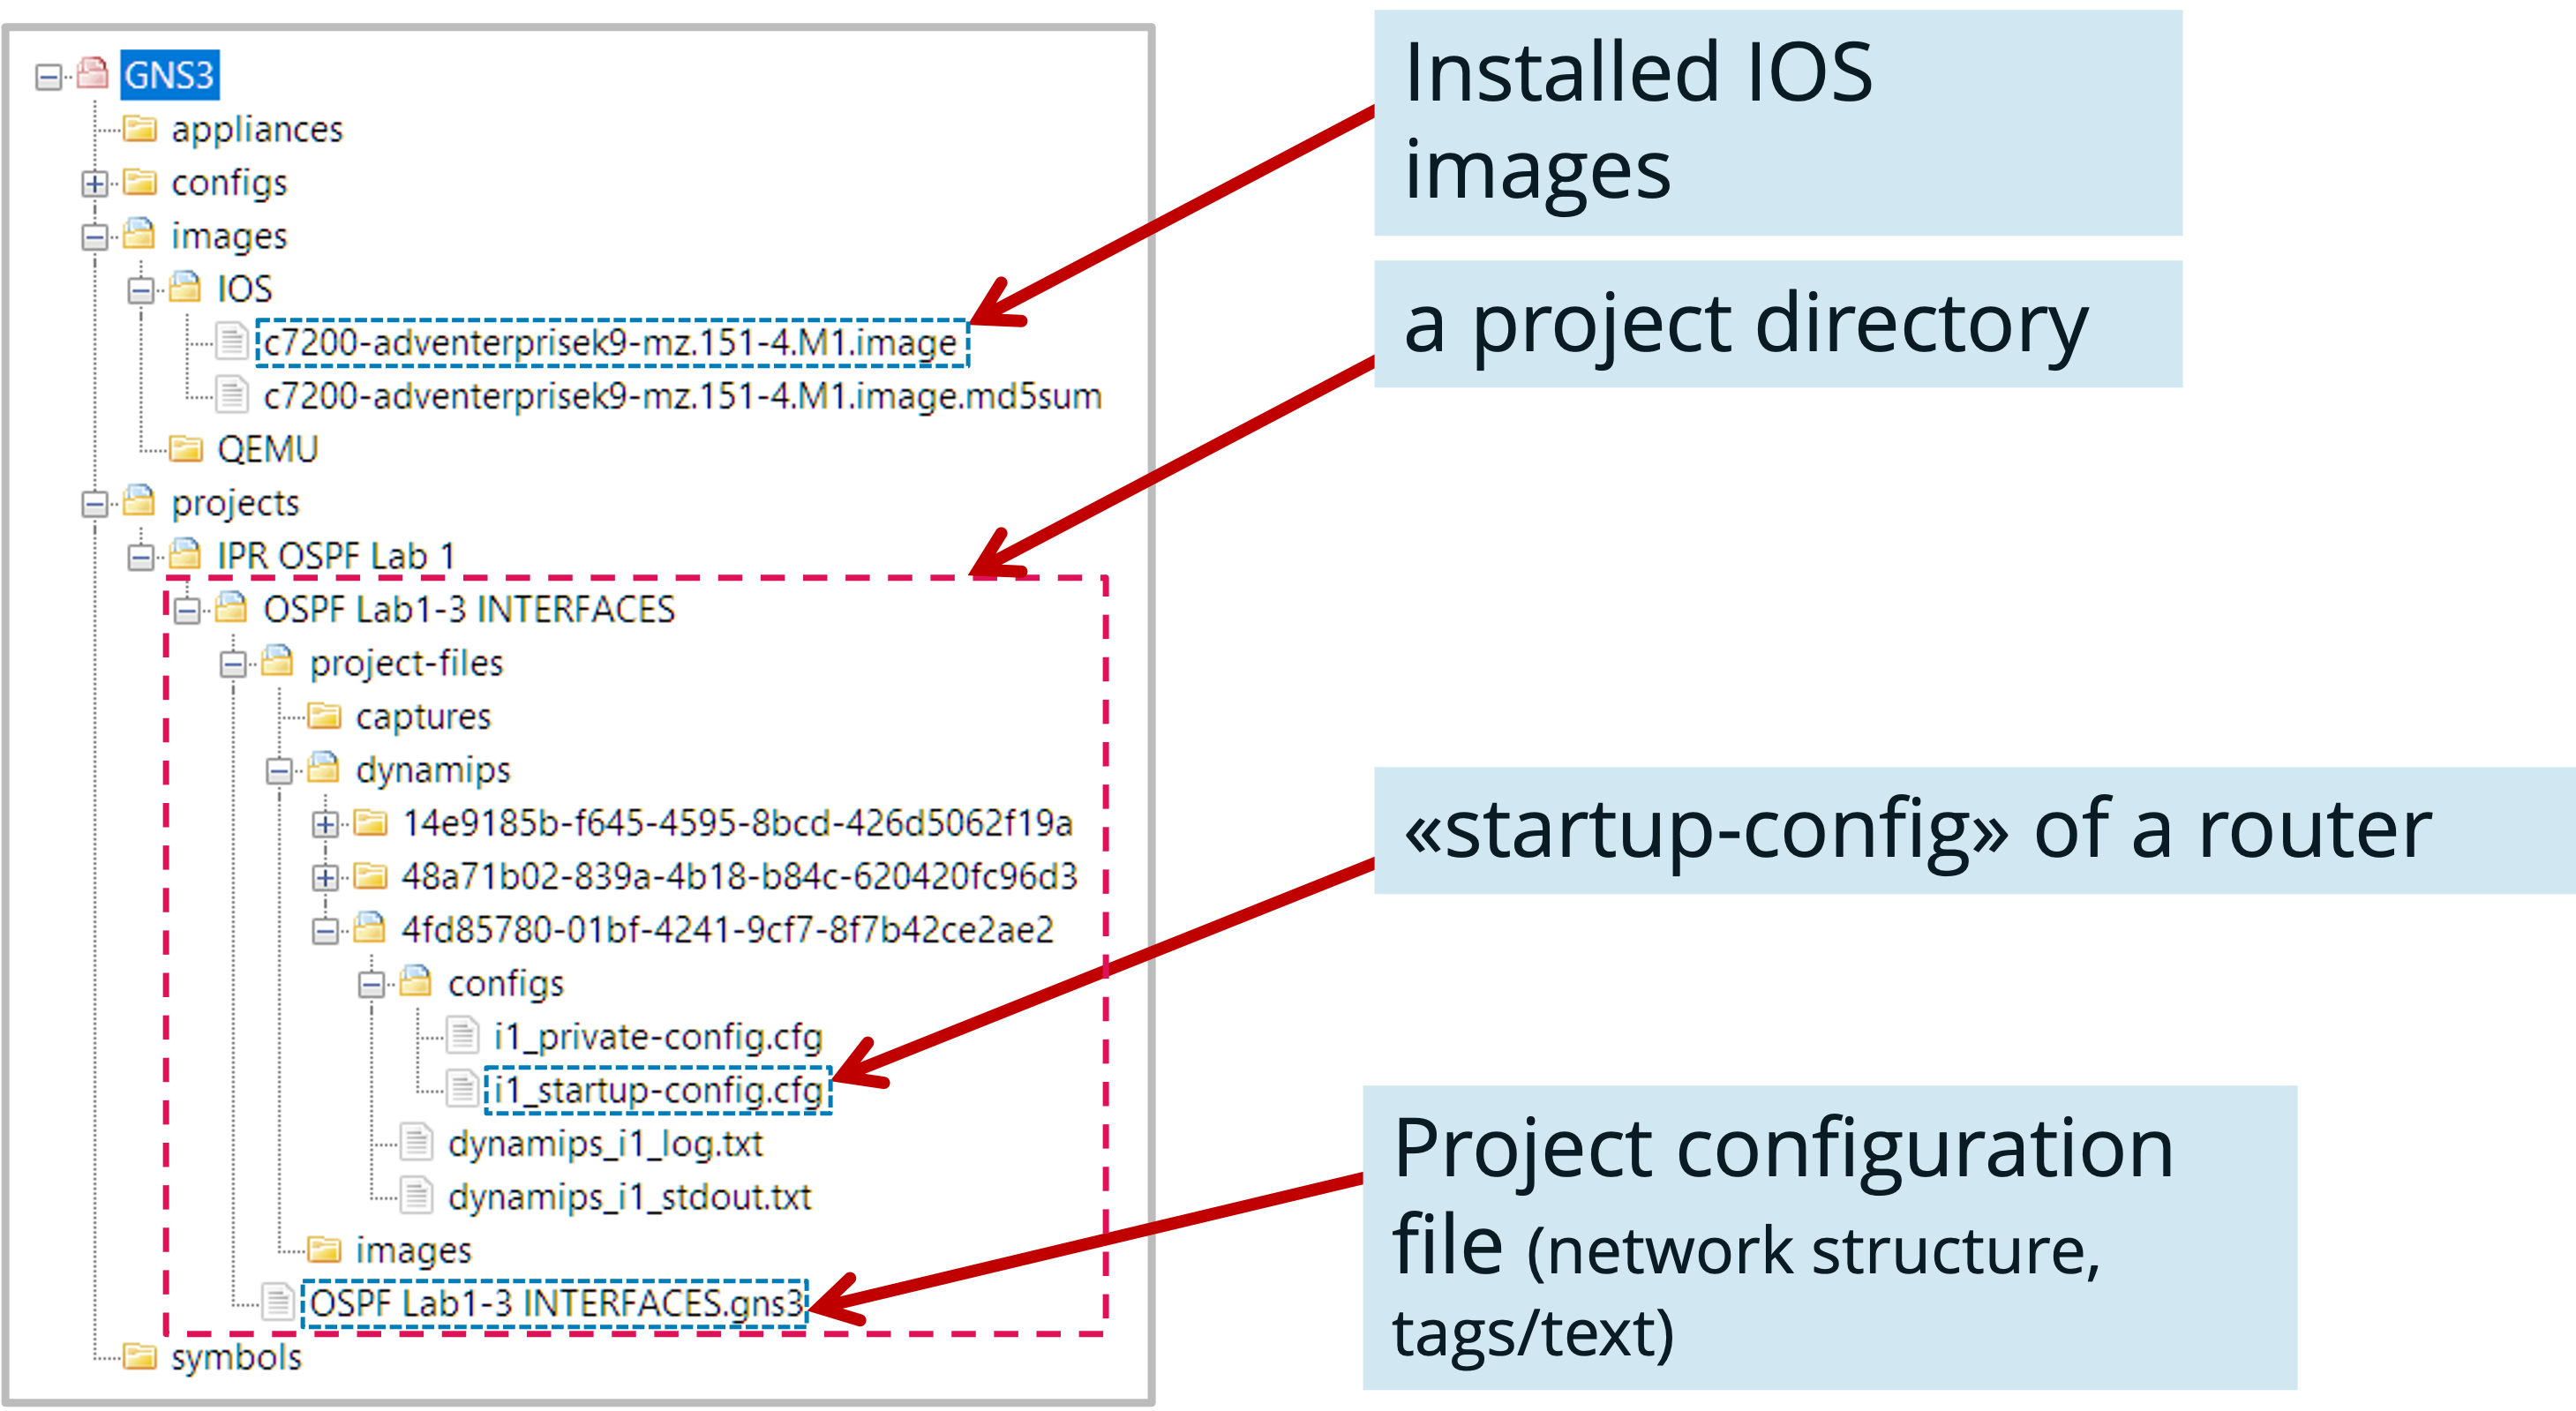
Project Structure
GNS-3 Directories
Project Management
Some Remarks
- Changes to the network structure (routers, connections between interfaces, labels, etc.) are automatically saved in the project configuration file
- The configuration changes on the routers are not! You have to save them before stopping the simulation.
- Save the «running-config» into the «startup-config» using «copy running-config startup-config» or «write»
- Use the command «show archive config diff» to see the differences between the («running-config») and the «startup-config»
Recommended approach
- Start each configuration phase with a new copy of the project (the name of this copy should describe the state at the end of this configuration phase)
- Do the configuration / manipulations
- Save the modified configurations on the routers at the end before stopping the simulation